QNAP Hybrid Backup Sync 3
QNAP Hybrid Backup Sync (HBS) 3 is a comprehensive backup, recovery, and data synchronization solution for QNAP NAS devices. It supports various storage solutions, including local, remote, and cloud storage.
For more information, visit the QNAP website. You can also explore QNAP's HBS 3 for detailed features.
Advantages of QNAP HBS 3 with Storj
- Comprehensive Coverage: Backup and synchronize data across multiple platforms, including NAS, cloud, and remote servers.
- Efficient Disaster Recovery: Using Storj's global network of tens of thousands of Storage nodes provides quick and easy recovery to ensure minimal downtime in case of data loss.
- Real-time Synchronization: Keep your data updated across different locations in real time.
- Flexible Scheduling: Customizable backup schedules to fit business needs.
Integration
To integrate your QNAP NAS with your preferred backup solution using HBS 3, you'll need to configure settings within HBS 3.
Requirements
- A QNAP NAS device with HBS 3 installed.
- An active Storj account: Navigate to https://storj.io/signup?partner=qnap to sign up, or log in https://storj.io/login if you already have an account.
- A bucket for QNAP in your Storj account.
Set Up HBS 3 on Your QNAP NAS
Install HBS 3: Ensure that HBS 3 is installed on your QNAP NAS. You can find it in the QNAP App Center.
Launch HBS 3: Open HBS 3 from your QNAP interface.
Configure HBS 3 to use Storj
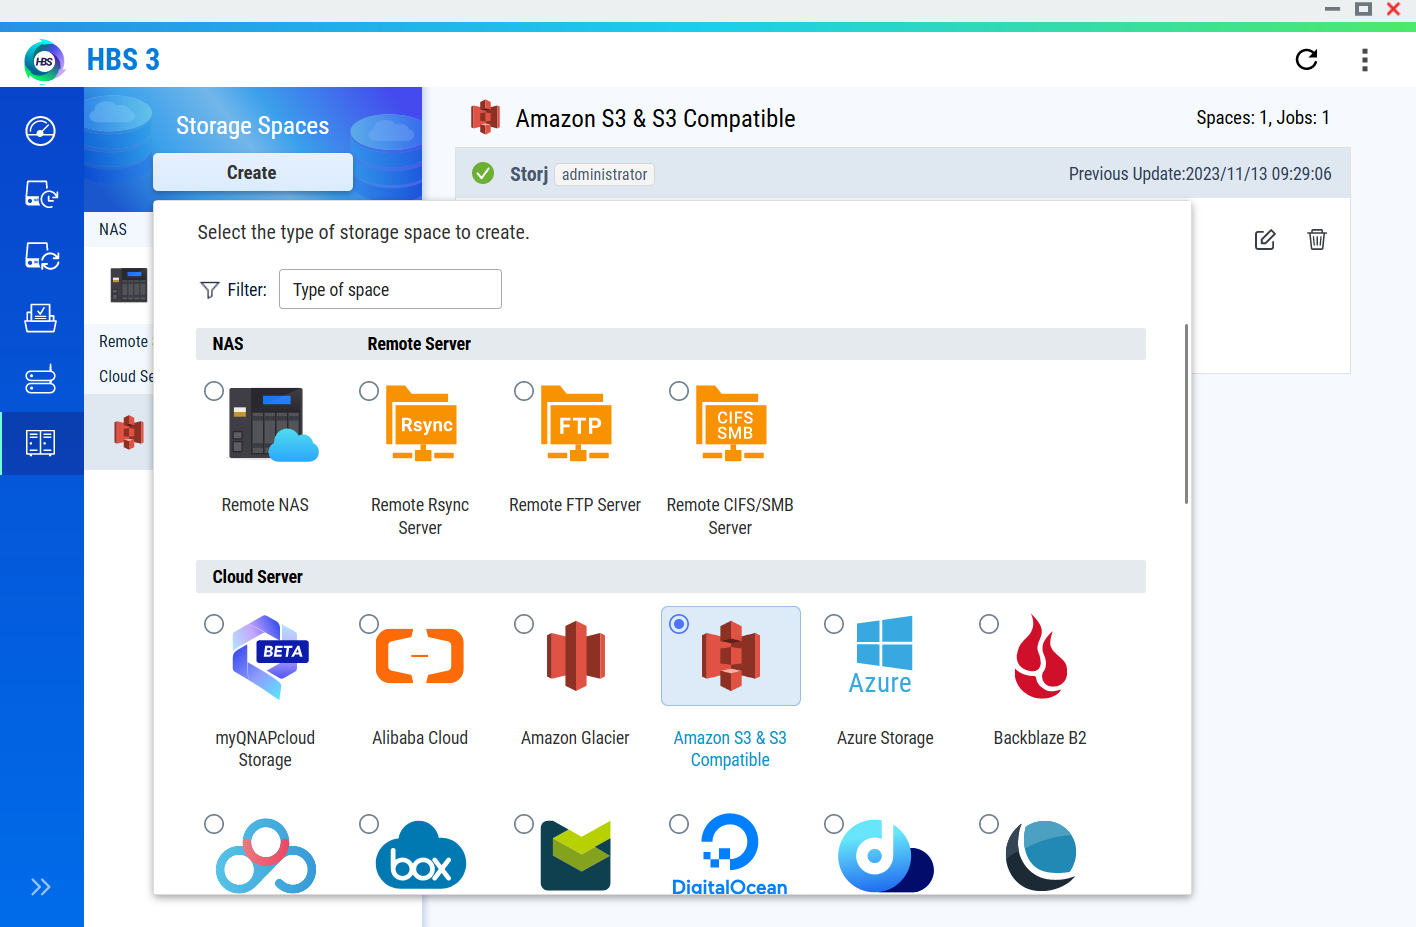
Go to "Storage Spaces"
Create new S3 compatible space.
Enter the following on the "Create a Storage Space" screen
- Service provider: S3 Compatible
- Server address: gateway.storjshare.io
- Signature version: v4
- Region: Global
- Access key and Secret key: created in the previous step
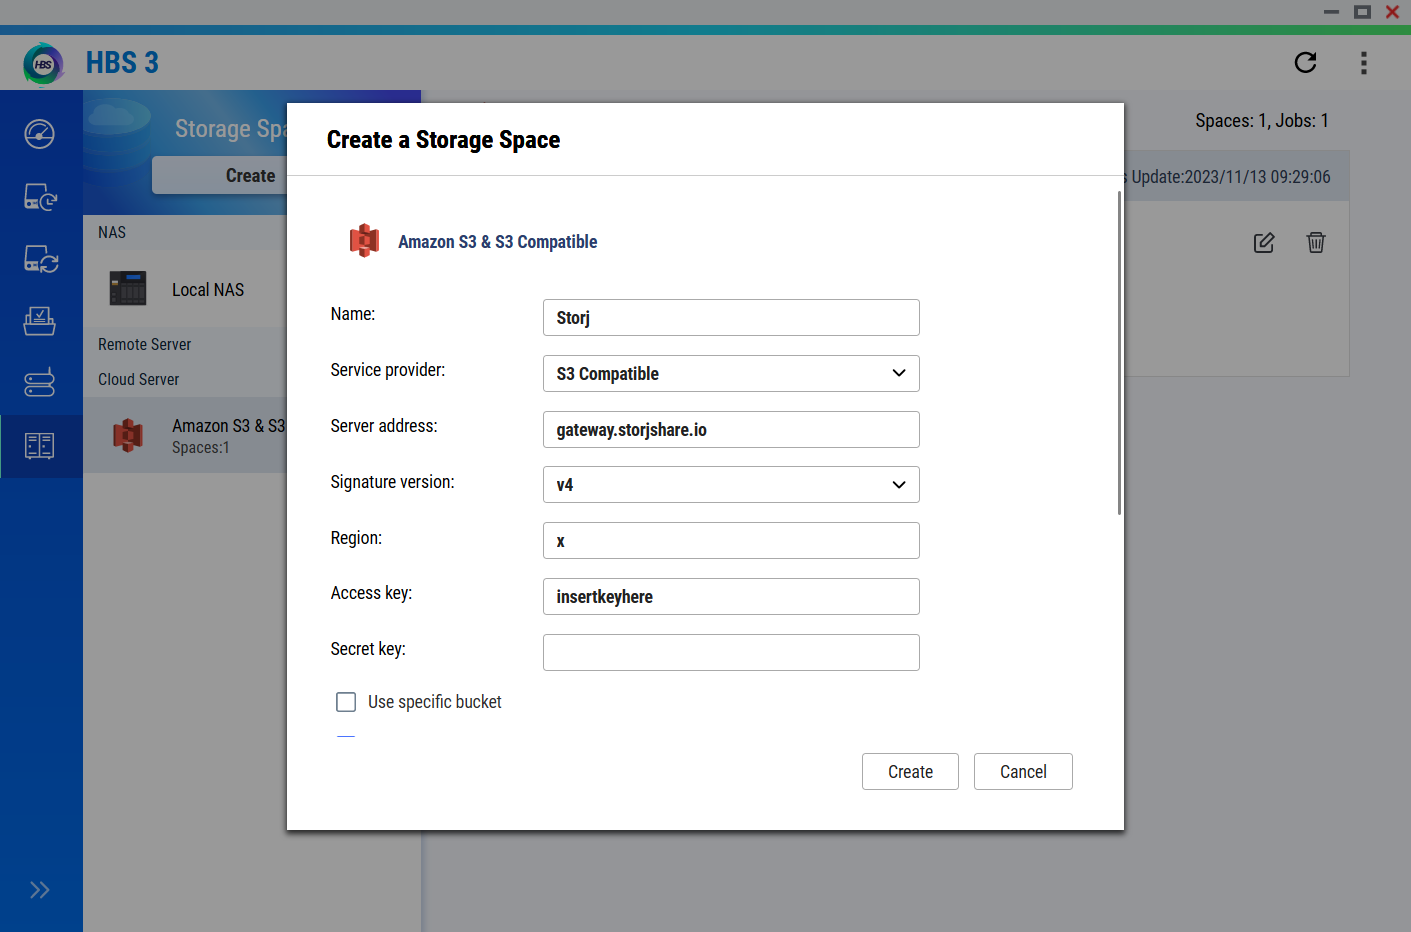
Create a bucket for the "Use specific bucket" option
Select Create
Configure Backup Jobs
Create a New Backup Job: Choose remote as the backup you want to create
Select Source: Choose the folders or volumes on your NAS that you want to back up
Select Destination: Choose Storj
Enter the bucket name created previously
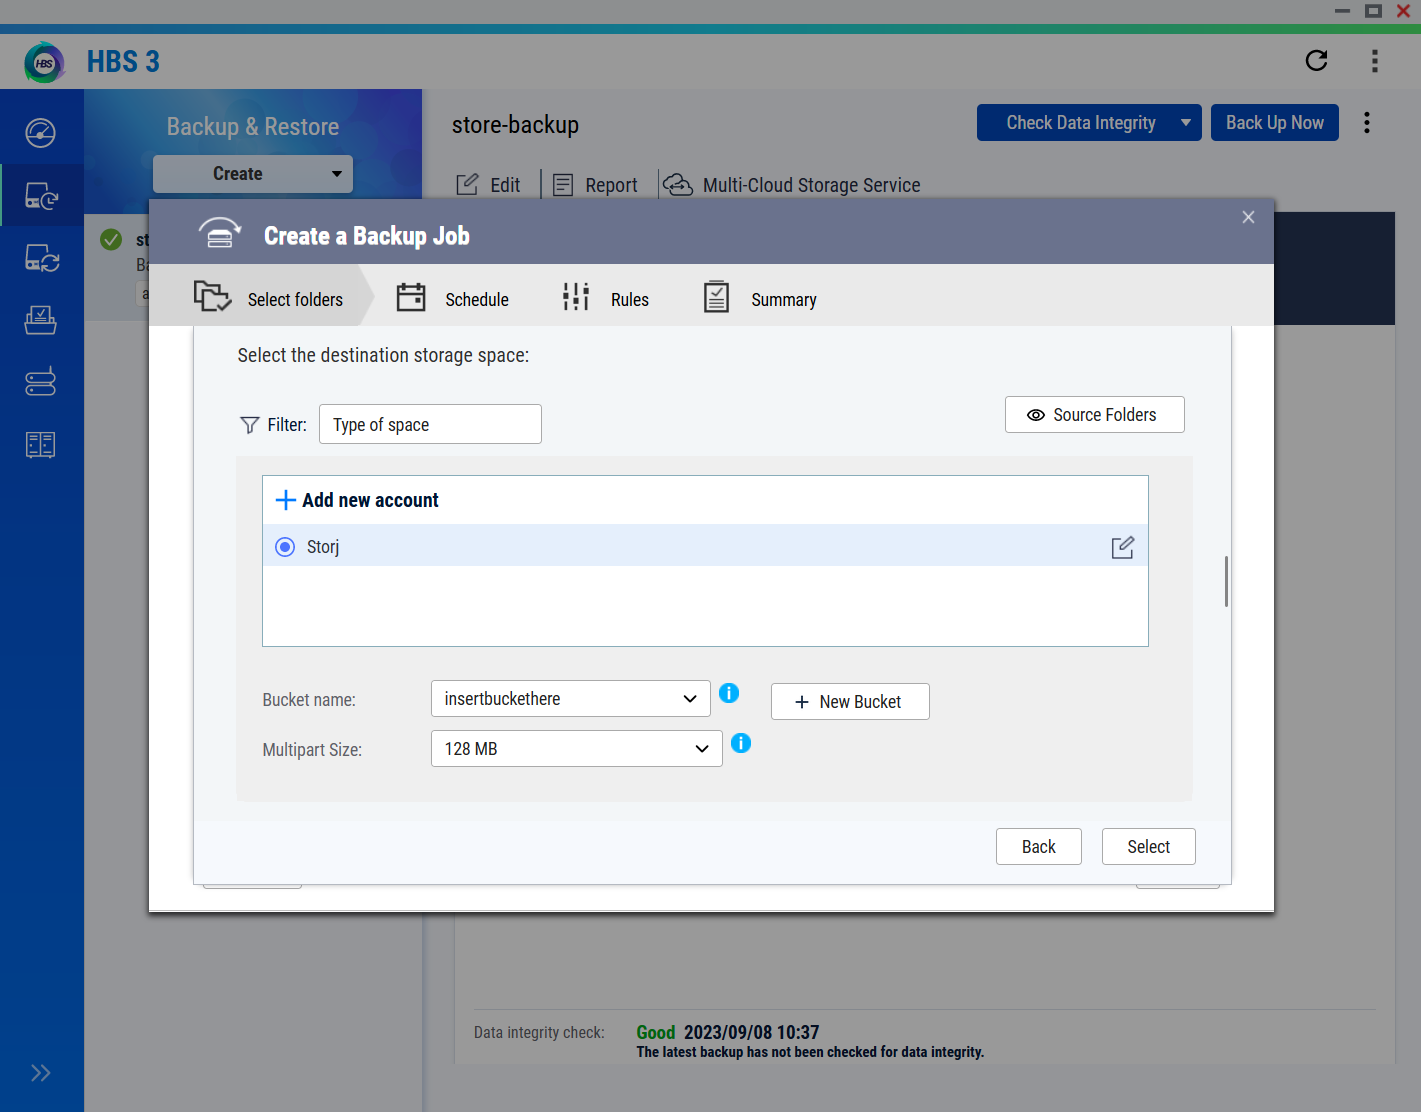
Set Schedule and Options: Configure backup schedule, versioning, encryption, and other options based on your needs.
Save and Run the Backup Job: Save the configuration and run the backup job to ensure it works as expected.