oCIS - ownCloud Infinite Scale
Integration guide for connecting Storj to oCIS
oCIS, or ownCloud Infinite Scale, is a cutting-edge technology platform for building cloud-native file sync and share applications. oCIS is designed with modularity, scalability, and extensibility in mind, providing the foundation for reliable, enterprise-ready digital workspaces.
For more information, visit www.owncloud.com
Advantages of oCIS with Storj
The integration of oCIS and Storj brings an effective solution for handling cloud storage at a competitive cost. oCIS, being a highly extensible platform for file sharing and storage, integrates perfectly with the S3-compatible storage infrastructure of Storj.
With Storj's advanced security features, users can be assured that their data managed on oCIS is safe and secure. oCIS also facilitates metadata archiving, making it effortless to handle and access large datasets. Moreover, the capabilities of manual and automatic archiving can further optimize storage costs.
Integration
The integration between Storj and oCIS is accomplished through the S3 protocol, enabling oCIS to read and write backup data directly to and from the Storj network. Users can configure oCIS to use Storj as the storage destination for their files.
To integrate oCIS with Storj, you will need:
An active Storj account.
A bucket designated for oCIS in your Storj account.
Storj S3 compatible credentials.
An oCIS instance.
Access to the oCIS server for configuration and management.
For more details, visit https://owncloud.dev/
Create a Storj Account
To begin, you will need to create a Storj account https://storj.io/signup?partner=owncloud. If you already have an account, go to https://storj.io/login.
Create a Bucket
Once you have your Storj account you can create a bucket for your data to be stored in.
1. Navigate to “Buckets” on the left side menu.
2. Click “New Bucket” on the top right.
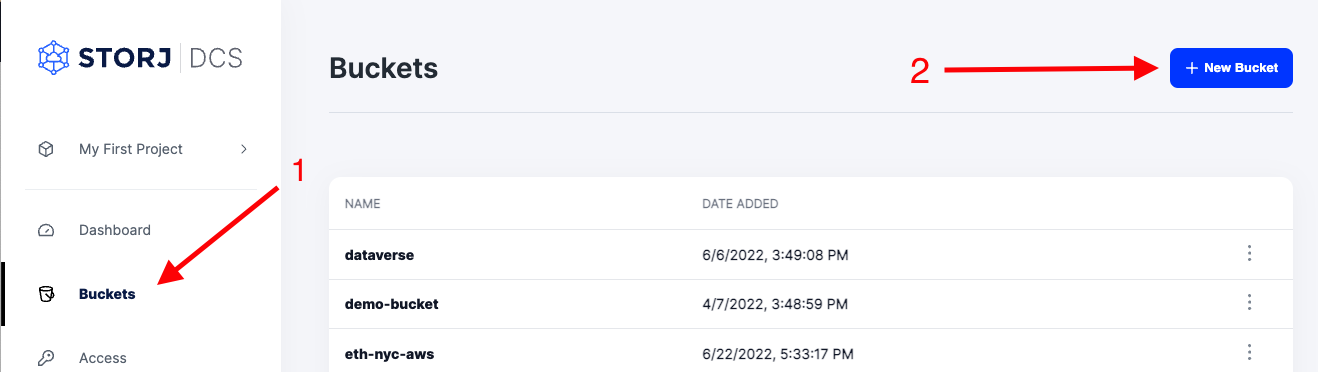
3. Assign the bucket an easily identifiable name, such as "my-bucket".
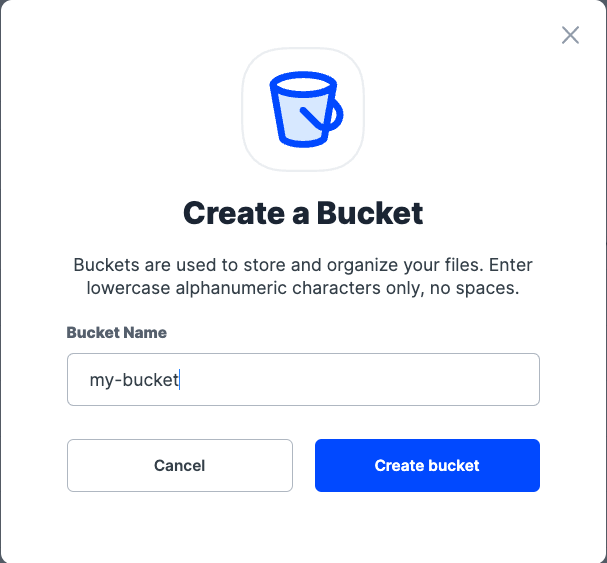
4. Click Create bucket
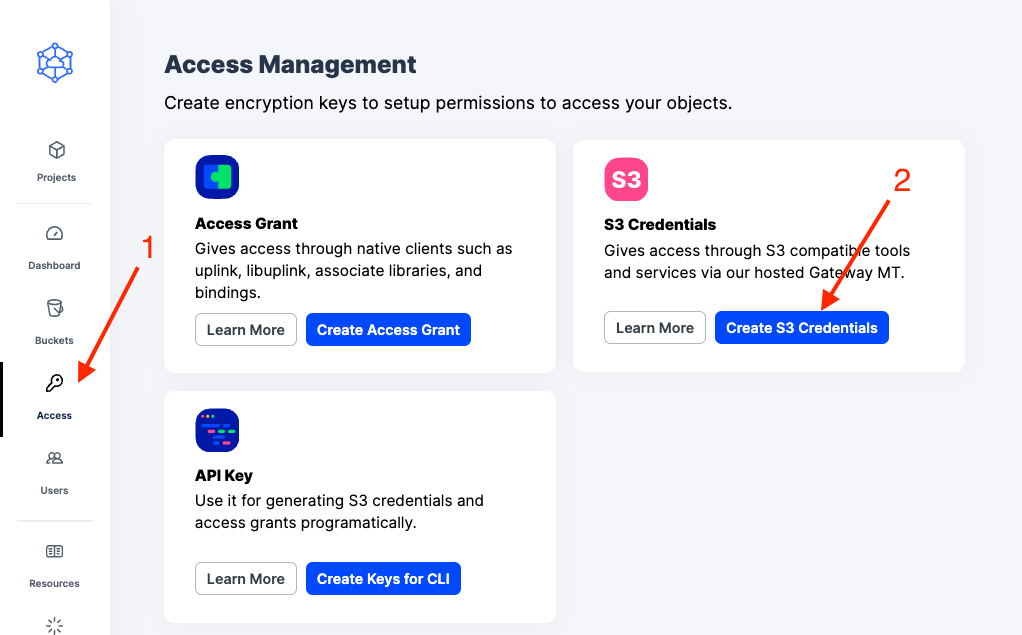
Generate S3 credentials
Storj has an Amazon S3 compatible API and you'll need generate S3 credentials to use it. S3 credentials consist of an access key, secret key, and endpoint.
Create S3 credentials in the Storj web console:
1. Navigate to Access on the left side menu.
2. Click Create S3 Credentials under the S3 Credentials block.
3. When the Create Access screen comes up, set specifications according to the following guidelines:
Type: S3 Credentials
Name: The name of the credentials (e.g. my-access)
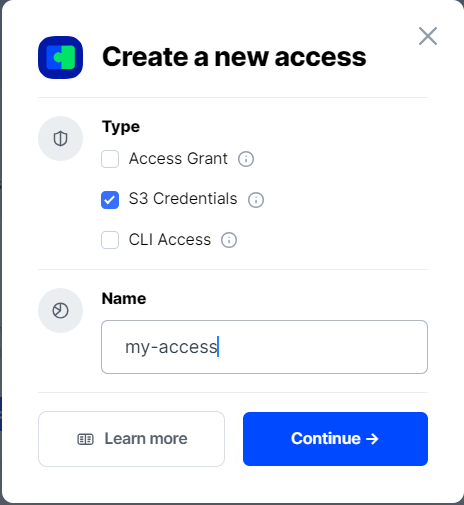
4. Click Continue to provide permissions
Permissions: All
Buckets: Feel free to specify the bucket you created above (e.g. my-bucket), or leave as “All”
End date: provide an expiration date for these credentials (optional)
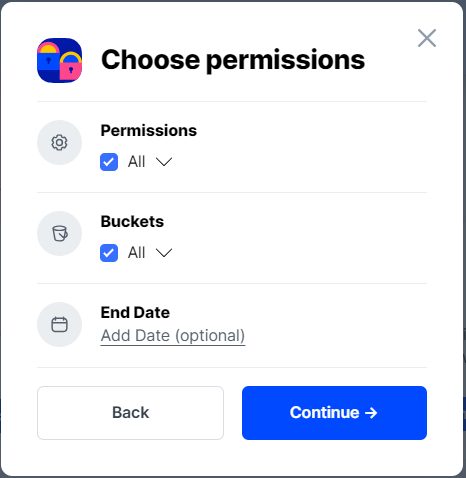
5. Click Continue to provide Access encryption Information
Use the current passphrase: this is default option
Advanced: you may provide a different encryption phrase either your own or generate a new one.
Enter a new passphrase: use this option, if you would like to provide your own new encryption phrase
Generate 12-word passphrase: use this option, if you would like to generate a new encryption phrase
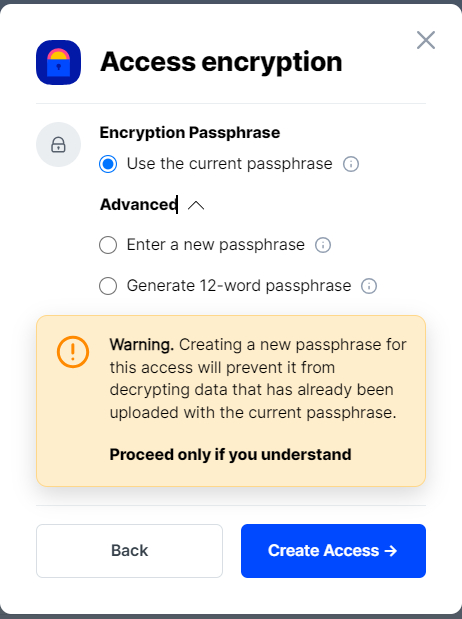
In order to see the data uploaded to your bucket in the web console, you must unlock the bucket with the same encryption passphrase as the credentials.
6. Click Create Access to finish creation of your S3 credentials
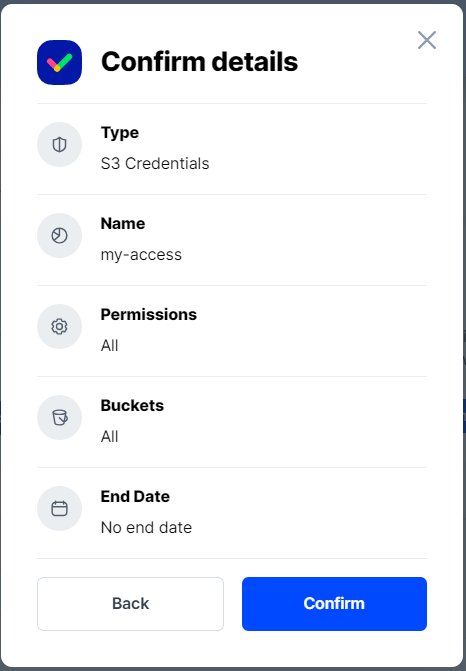
7. Click Confirm the Confirm details pop-up message
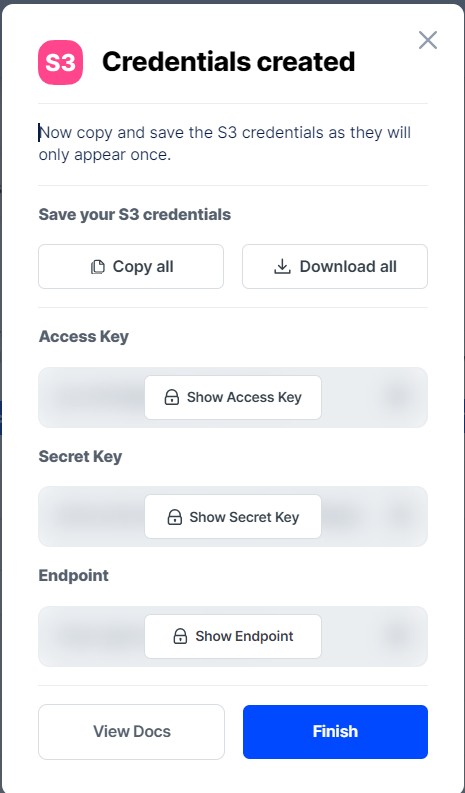
8. Your S3 credentials are created. Write them down and store them, or click the Download all button. You will need these credentials for the following steps.
Connecting to Storj via oCIS S3NG
S3NG, or S3-Next Generation, is a storage driver for oCIS, the latest iteration of the ownCloud platform. This technology allows oCIS to interact seamlessly with S3-compatible storage services like Storj.
To set up the environment variables required for oCIS to interact with S3-compatible storage through the S3NG driver, you would need to configure the following settings:
STORAGE_USERS_DRIVER=s3ng: This instructs oCIS to use the S3NG storage driver, enabling compatibility with S3-based storage systems like Storj.
STORAGE_SYSTEM_DRIVER=ocis: This retains system data on oCIS storage, as it's currently handling only small files.
Then, you have to configure the S3NG specific settings:
STORAGE_USERS_S3NG_ENDPOINT: This sets the endpoint that oCIS will connect to, in this case, the Storj gateway.
STORAGE_USERS_S3NG_REGION: This specifies the Storj region, which in this instance is set as 'global'.
STORAGE_USERS_S3NG_ACCESS_KEY: This sets the access key for the Storj service created above.
STORAGE_USERS_S3NG_SECRET_KEY: This sets the secret key for the Storj service created above. This should be kept secure as it, along with the access key, allows access to your Storj account.
STORAGE_USERS_S3NG_BUCKET: This sets the bucket in the Storj service where oCIS will store its data.
For more information visit https://owncloud.dev/ocis/deployment/ocis_s3/