Acronis
Integration guide for connecting Storj to Acronis
Acronis is a leading cyber protection solution provider that delivers innovative backup, disaster recovery, and secure file sync and share services. With a wide range of products and services for businesses and individuals, Acronis ensures data safety, accessibility, privacy, authenticity, and security.
Advantages of Acronis with Storj
The combination of Acronis and Storj provides comprehensive cloud management capabilities at a competitive cost. Acronis offers reliable backup and disaster recovery solutions for data archiving and organization, seamlessly integrating with Storj's S3 infrastructure for cost-effective storage and retrieval of large datasets.
With Storj's advanced security integrations, users can be confident that their data managed on Acronis is safe and secure. Acronis also provides metadata archives that make managing and accessing large datasets easy, while manual and automatic archiving capabilities help optimize storage costs.
Integration
The integration between Storj and Acronis is achieved through the S3 protocol, which allows Acronis to write and read backup data directly to and from the Storj network. Users can configure Acronis Backup Gateway to use Storj as the storage destination for their backups.
To integrate Acronis with Storj, you will need:
- An active Storj account
- A bucket for Acronis in your Storj account
- Storj S3 compatible credentials
- Acronis Cyber Infrastructure instance (see here)
- Partner Account Access to the Acronis web interface for configuration and management
For more details, see https://www.acronis.com/en-us/products/
Set up Storj
Create an Account
To begin, you will need to create a Storj account.
Navigate to https://storj.io/signup?partner=acronis to sign up, or log in https://storj.io/login if you already have an account.
Create a Bucket
Once you have your Storj account you can create a bucket for your data to be stored in.
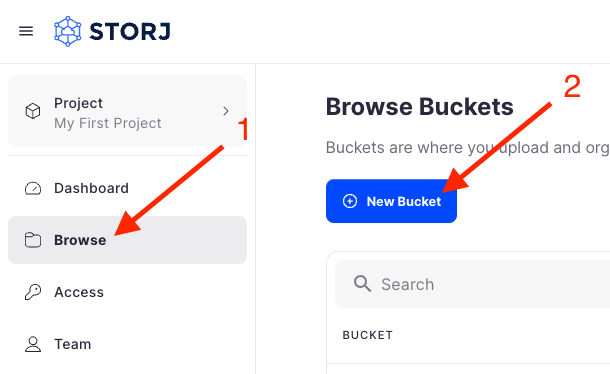
Navigate to Buckets on the left side menu.
Click New Bucket on the top right.
Assign the bucket an easily identifiable name, such as "my-bucket".

Click Create bucket
Generate S3 credentials
Storj has an Amazon S3 compatible API and you'll need generate S3 credentials to use it. S3 credentials consist of an access key, secret key, and endpoint.
Create S3 credentials in the Storj console:
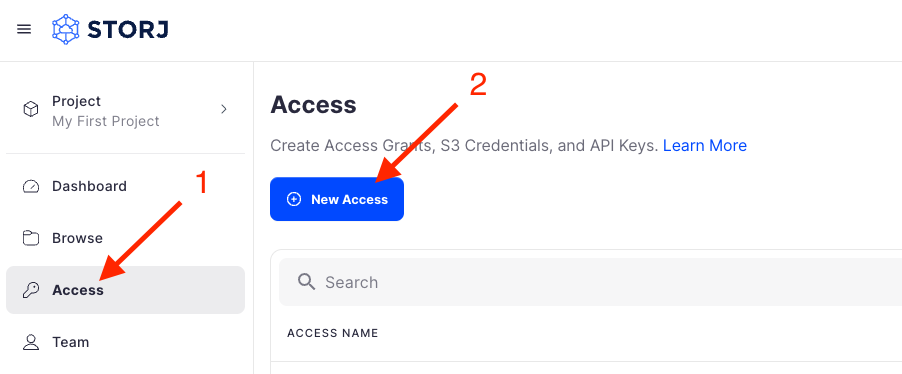
Navigate to Access on the left side menu.
Click Create S3 Credentials under the S3 Credentials block.
When the Create Access screen comes up, set specifications according to the following guidelines:
- Type: S3 Credentials
- Name: The name of the credentials (e.g. my-access)

Click Continue to provide permissions
- Permissions: All
- Buckets: Feel free to specify the bucket you created above (e.g. my-bucket), or leave as “All”
- End date: provide an expiration date for these credentials (optional)
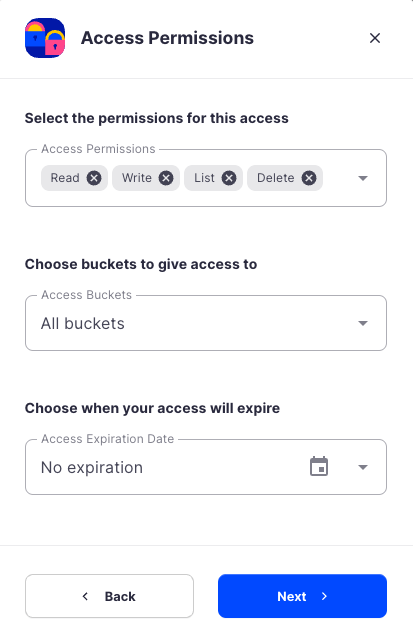
Click Continue to provide Access encryption Information
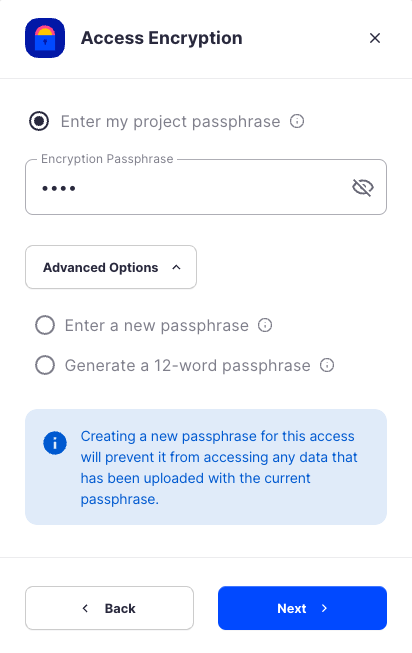
In order to see the data uploaded to your bucket in the Storj console, you must unlock the bucket with the same encryption passphrase as the credentials.
- Use the current passphrase: this is default option
- Advanced: you may provide a different encryption phrase either your own or generate a new one.
- Enter a new passphrase: use this option, if you would like to provide your own new encryption phrase
- Generate 12-word passphrase: use this option, if you would like to generate a new encryption phrase
Click Create Access to finish creation of your S3 credentials
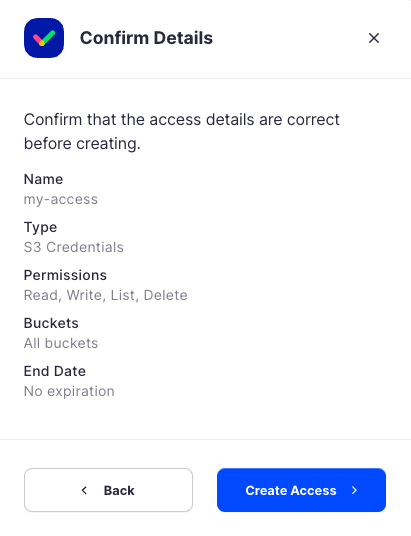
Click Confirm the Confirm details pop-up message
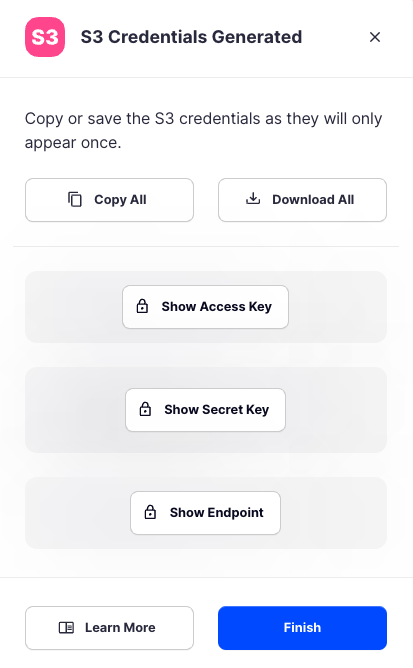
Your S3 credentials are created. Write them down and store them, or click the Download all button. You will need these credentials for the following steps.
Connecting to Storj via Backup Gateway
Before proceeding, ensure the destination storage has enough space for backups.
To set up Backup Gateway, do the following:
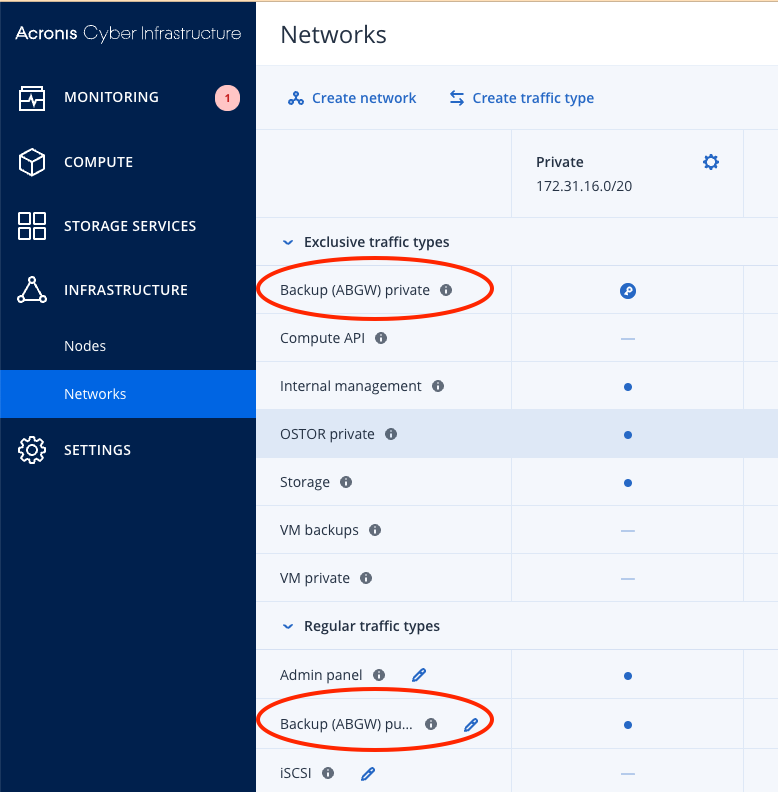
On the INFRASTRUCTURE > Networks screen, make sure that the ABGW private and ABGW public traffic types are added to your networks.
In the left menu, click STORAGE SERVICES > Backup storage.
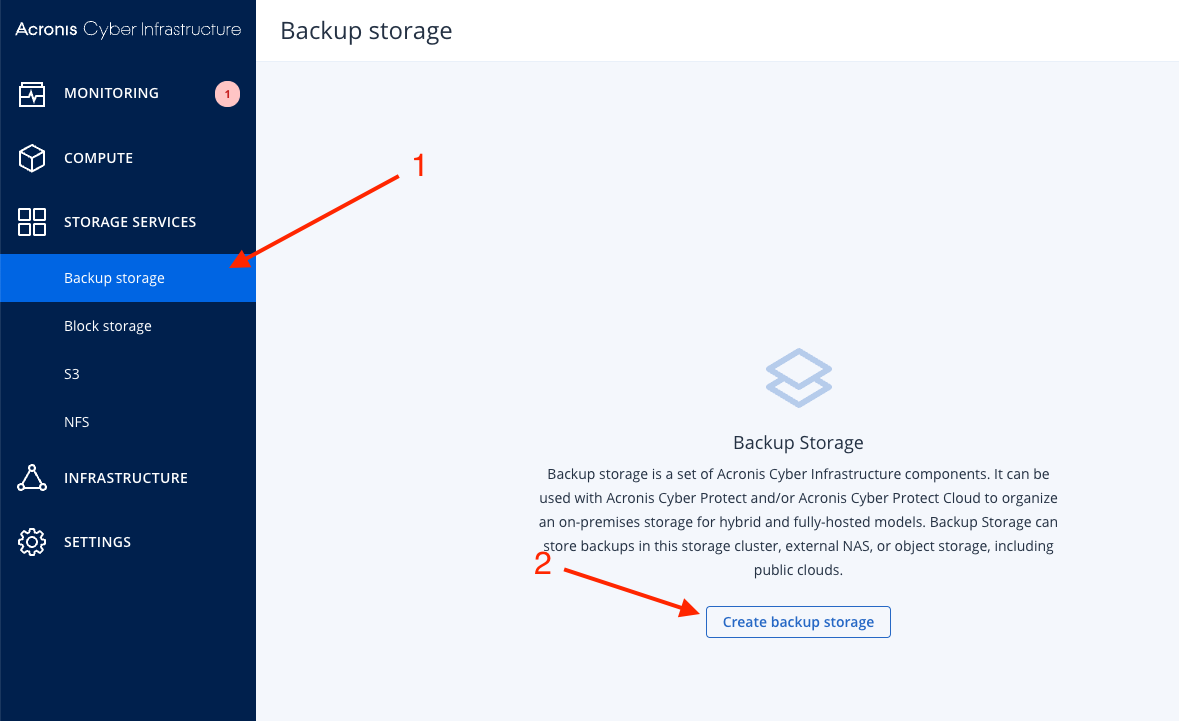
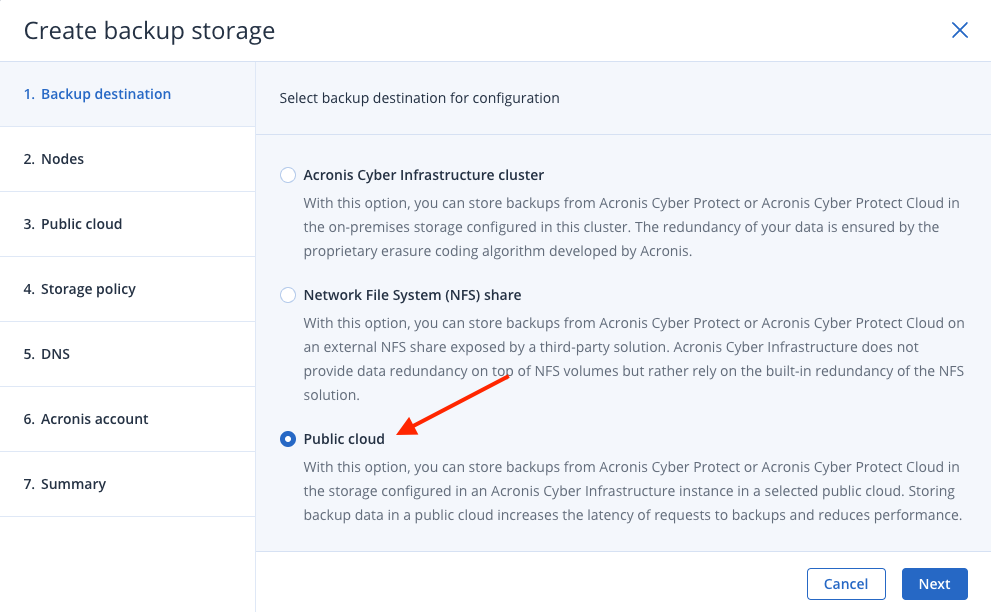
Click Create backup storage.
Select Public cloud and click next.
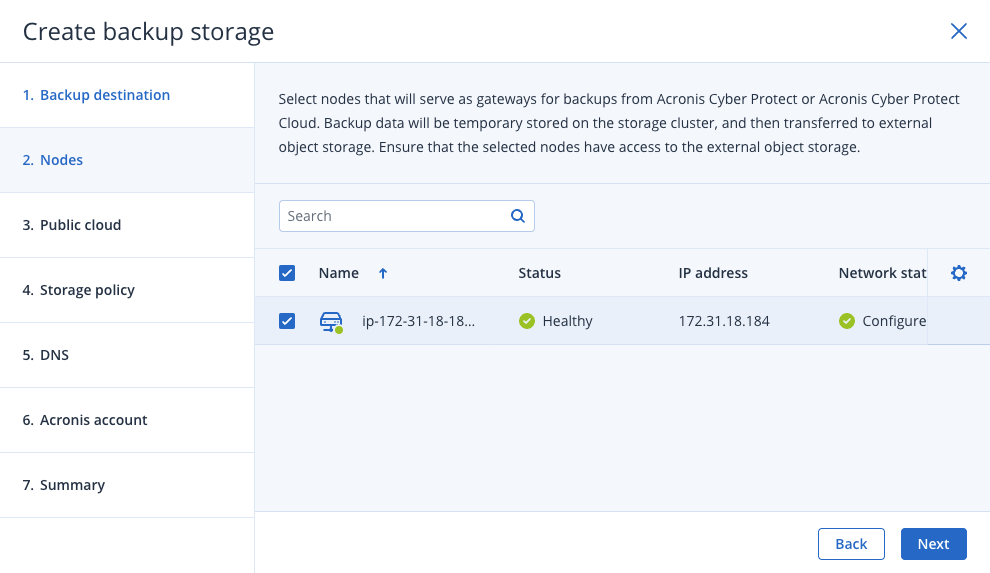
Select the node(s) to run the gateway services on and click Next
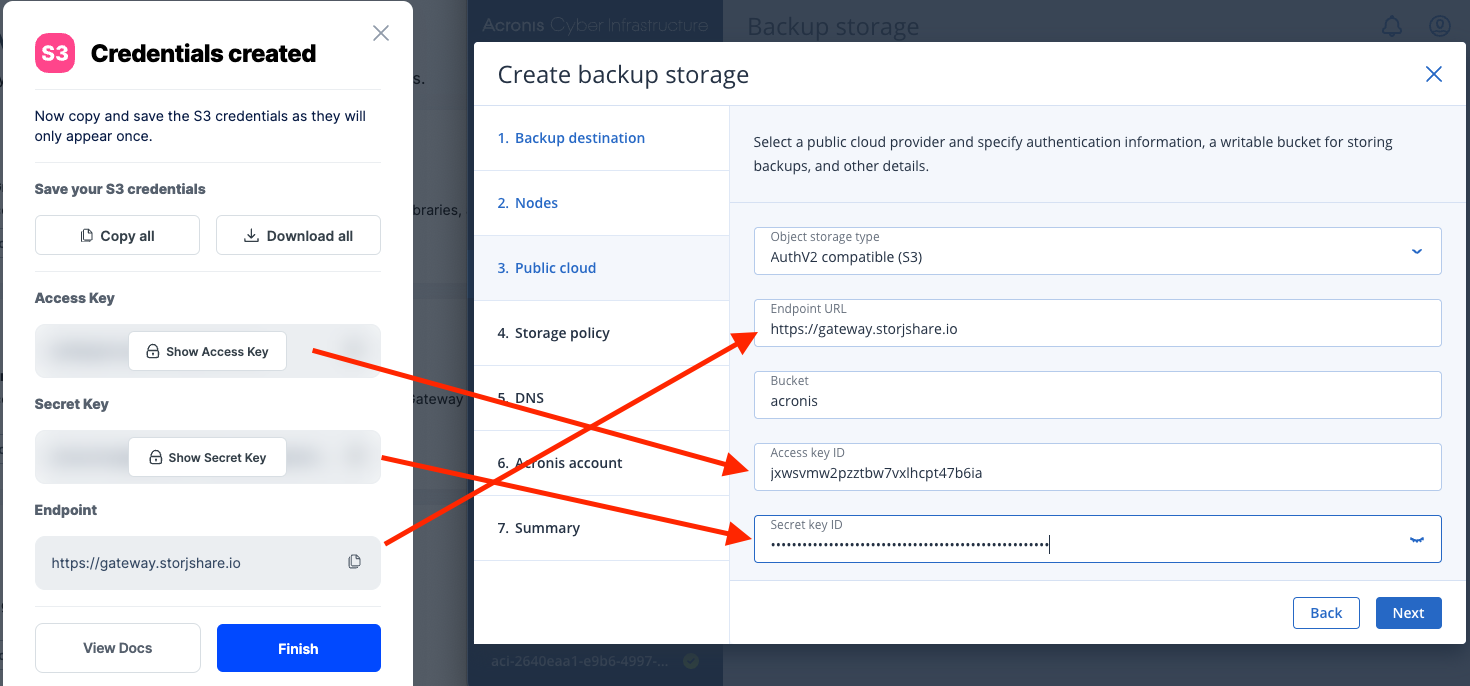
Configure Public cloud with the following in their respective fields:
Object Storage type: Select AuthV2 compatible (S3).
Endpoint URL: https://gateway.storjshare.io
Access Key: Enter the access key from the S3 credentials you generated in Storj.
Secret Key: Enter the secret key from the S3 credentials you generated in Storj.
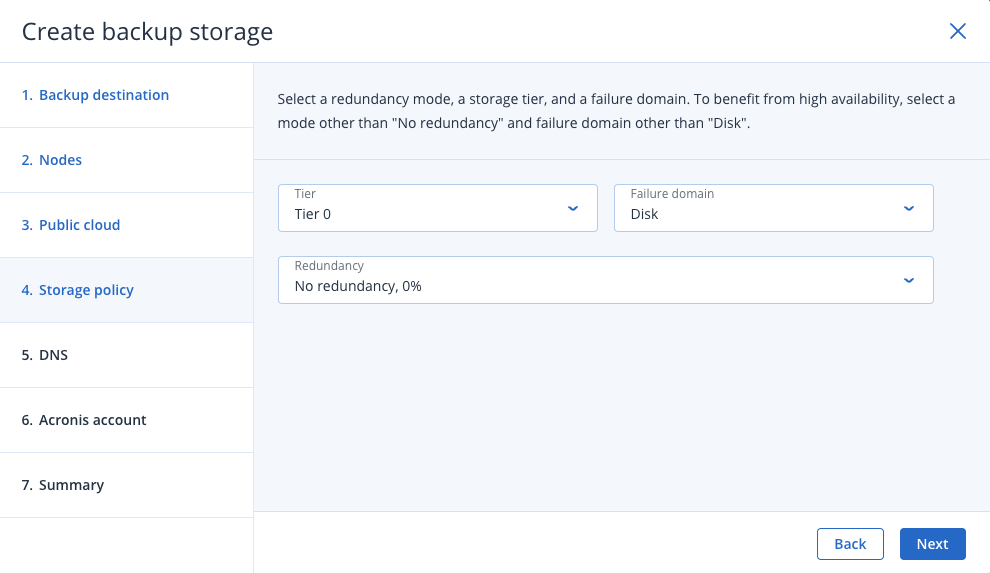
Click Next on the Storage policy.
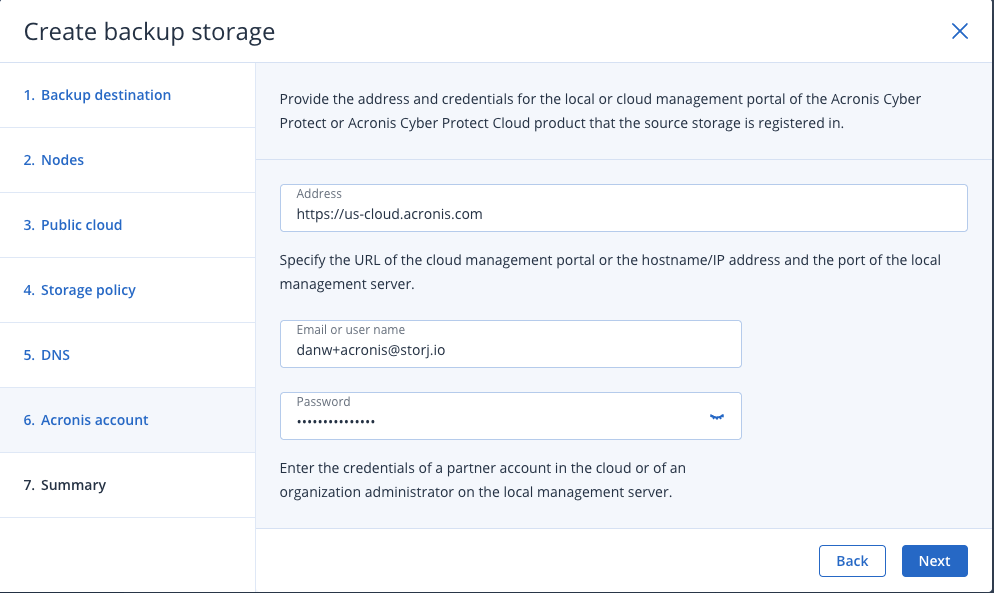
Sign in to your Acronis account and click Next.
Click Create.
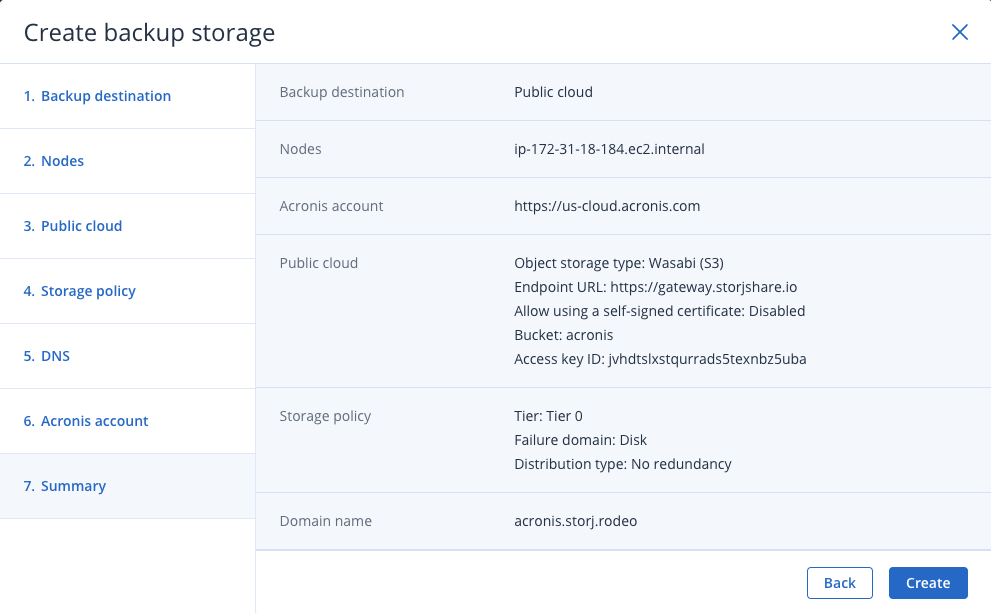
You now should be able to use Storj as a backup destination.