Livepeer
Learn to build a completely decentralized, fast video content delivery service. With over tens of thousands of Storj nodes around the world, see how simple it can be to remove your reliance on centralized providers. Gain a solid understanding of the steps required to host video files from Storj (an object storage provider) and transcode them with the Livepeer API.
First we'll set up a Storj and Livepeer account, then we'll transcode and view videos completely with decentralized technology!
Storj Account
Create a Storj Account
To begin, you will need to create a Storj account. If you already an account, go to https://storj.io/login.
Navigate to https://storj.io/signup to sign up. Enter your full name, email address, and a password, as shown below:

Install uplink
Storj has S3 compatibility that can be used familiar tools such aws-cli, but it has some limitations such that it uses a gateway to communicate to the global network. In order to communicate directly with Storage Nodes we'll be using Storj's uplink tool.
Run the following to install uplink:
Linux AMD64
For different uplink binaries see Download and Installation
Create Access Grant
Next you'll need to generate an access grant to be able to use uplink.
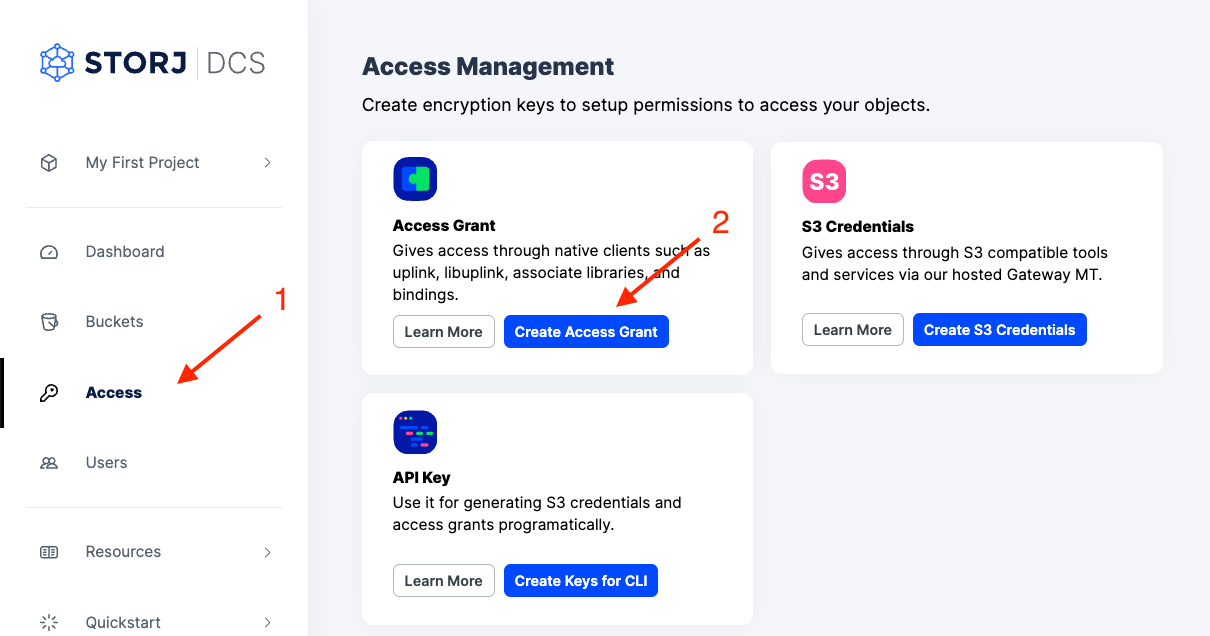
Create an Access Grant in the Storj web console:
Navigate to “Access” on the left side menu
Click “Create Access Grant” under the Access Grant block.
3. When the Create Access screen comes up, set specifications according to the following guidelines:
Type: Access Grant
Name: The name of the credentials (e.g. My Access Grant)
Permissions: All
Buckets: Feel free to limit the grant to a specific bucket or leave as “All”
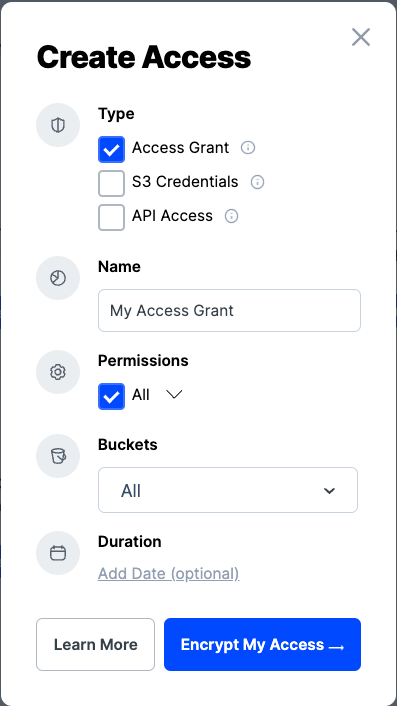
4. Select "Encrypt My Access"
5. Set an encryption passphrase and agree to the prompt
Use the same encryption passphrase for the access grant as the one you used for the web console in order to view your files in both places
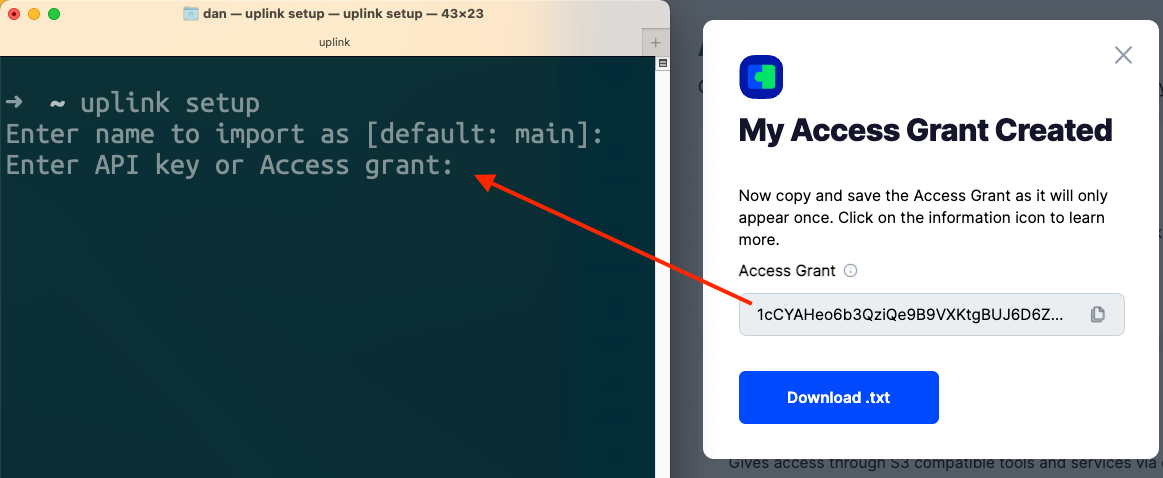
6. Run the setup command
7. Copy the access grant from the web console and paste it into the uplink prompt
Create a bucket
Once you have your Storj account and uplink configured, you create a Storj bucket which will hold the input and output files for the Livepeer transcoder.
Use uplink mb to create a bucket called livepeer
Download a video file to upload to your newly created bucket. You can use this one.
Upload the video to be used as a source file in the transcoder later.
Finally, create S3 compatible credentials.
The output will print the Access Key ID and Secret Key that will be used in the livepeer-req script below.
Livepeer Account
Complete the Livepeer quickstart guide to get a Livepeer API key to use in the livepeer-req script below.
Transcode video files to a desired format and resolution
Copy the shell script below into a file called livepeer-req.
In the livepeer-req, populate LIVEPEER_API_KEY, STORJ_ACCESS_KEY_ID, and STORJ_SECRET_ACCESS_KEY with the access credentials from each platform.
Notice the livepeer API takes a json object with the following keys:
input has been set to read the global-upload.mp4 video file and livepeer bucket created earlier.
storage is where the transcoded file will be uploaded to
outputs specifies the output path of resized/hls
profiles are options for the transcoded which is set to make a 480p and 720p video
Next you'll want to run your livepeer-req script to start the transcoding process.
It usually takes 1 to 3 minutes before your transcoded videos show output directory of /resized/hls
Livepeer will upload transcoded files as it goes. You can check on the progress by running uplink ls
View video files
Storj doesn’t have the same sort of concept of public buckets that S3 has. We support public access, but it’s able to be more fine-grained than at the bucket level with link sharing. Generating a LINKSHARINGKEY will make a certain path of the bucket public (anyone with the link can see the file).
Let's make the resized directory public so we can easily see the videos by running the following:
You’ll get a Browser URL, but the URL is not quite right. It will be of the form https://link.storjshare.io/s/LINKSHARINGKEY/livepeer/. To make the content embeddable, swap the /s/ for /raw/.
Livepeer transcoded the source video file to hls video files which means that in order to play the video, we'll need to find the index<profile name>.m3u8 and pass it to a compatible video player.
We'll use the Livepeer player (lvpr.tv) to view the index480p0.m3u8 video.
Replace the LINKSHARINGKEY in the url below, and you'll be able to see your transcoded video!
lvpr.tv/?url=https://link.storjshare.io/raw/LINKSHARINGKEY/livepeer/resized/hls/index480p0.m3u8