QNAP Storage Node App
Introduction
In this guide, we are going to walk through the installation process for the Storage Node QNAP application for your QNAP NAS Device – enabling you to:
Monetize your excess capacity on the Storj Network
Back up your NAS Device using QNAP's HBS 3 using Storj's S3-compatible API
For a video walkthrough of this process, please see below:
Prerequisites
Download the QNAP Binary
Sharing Capacity Prerequisites
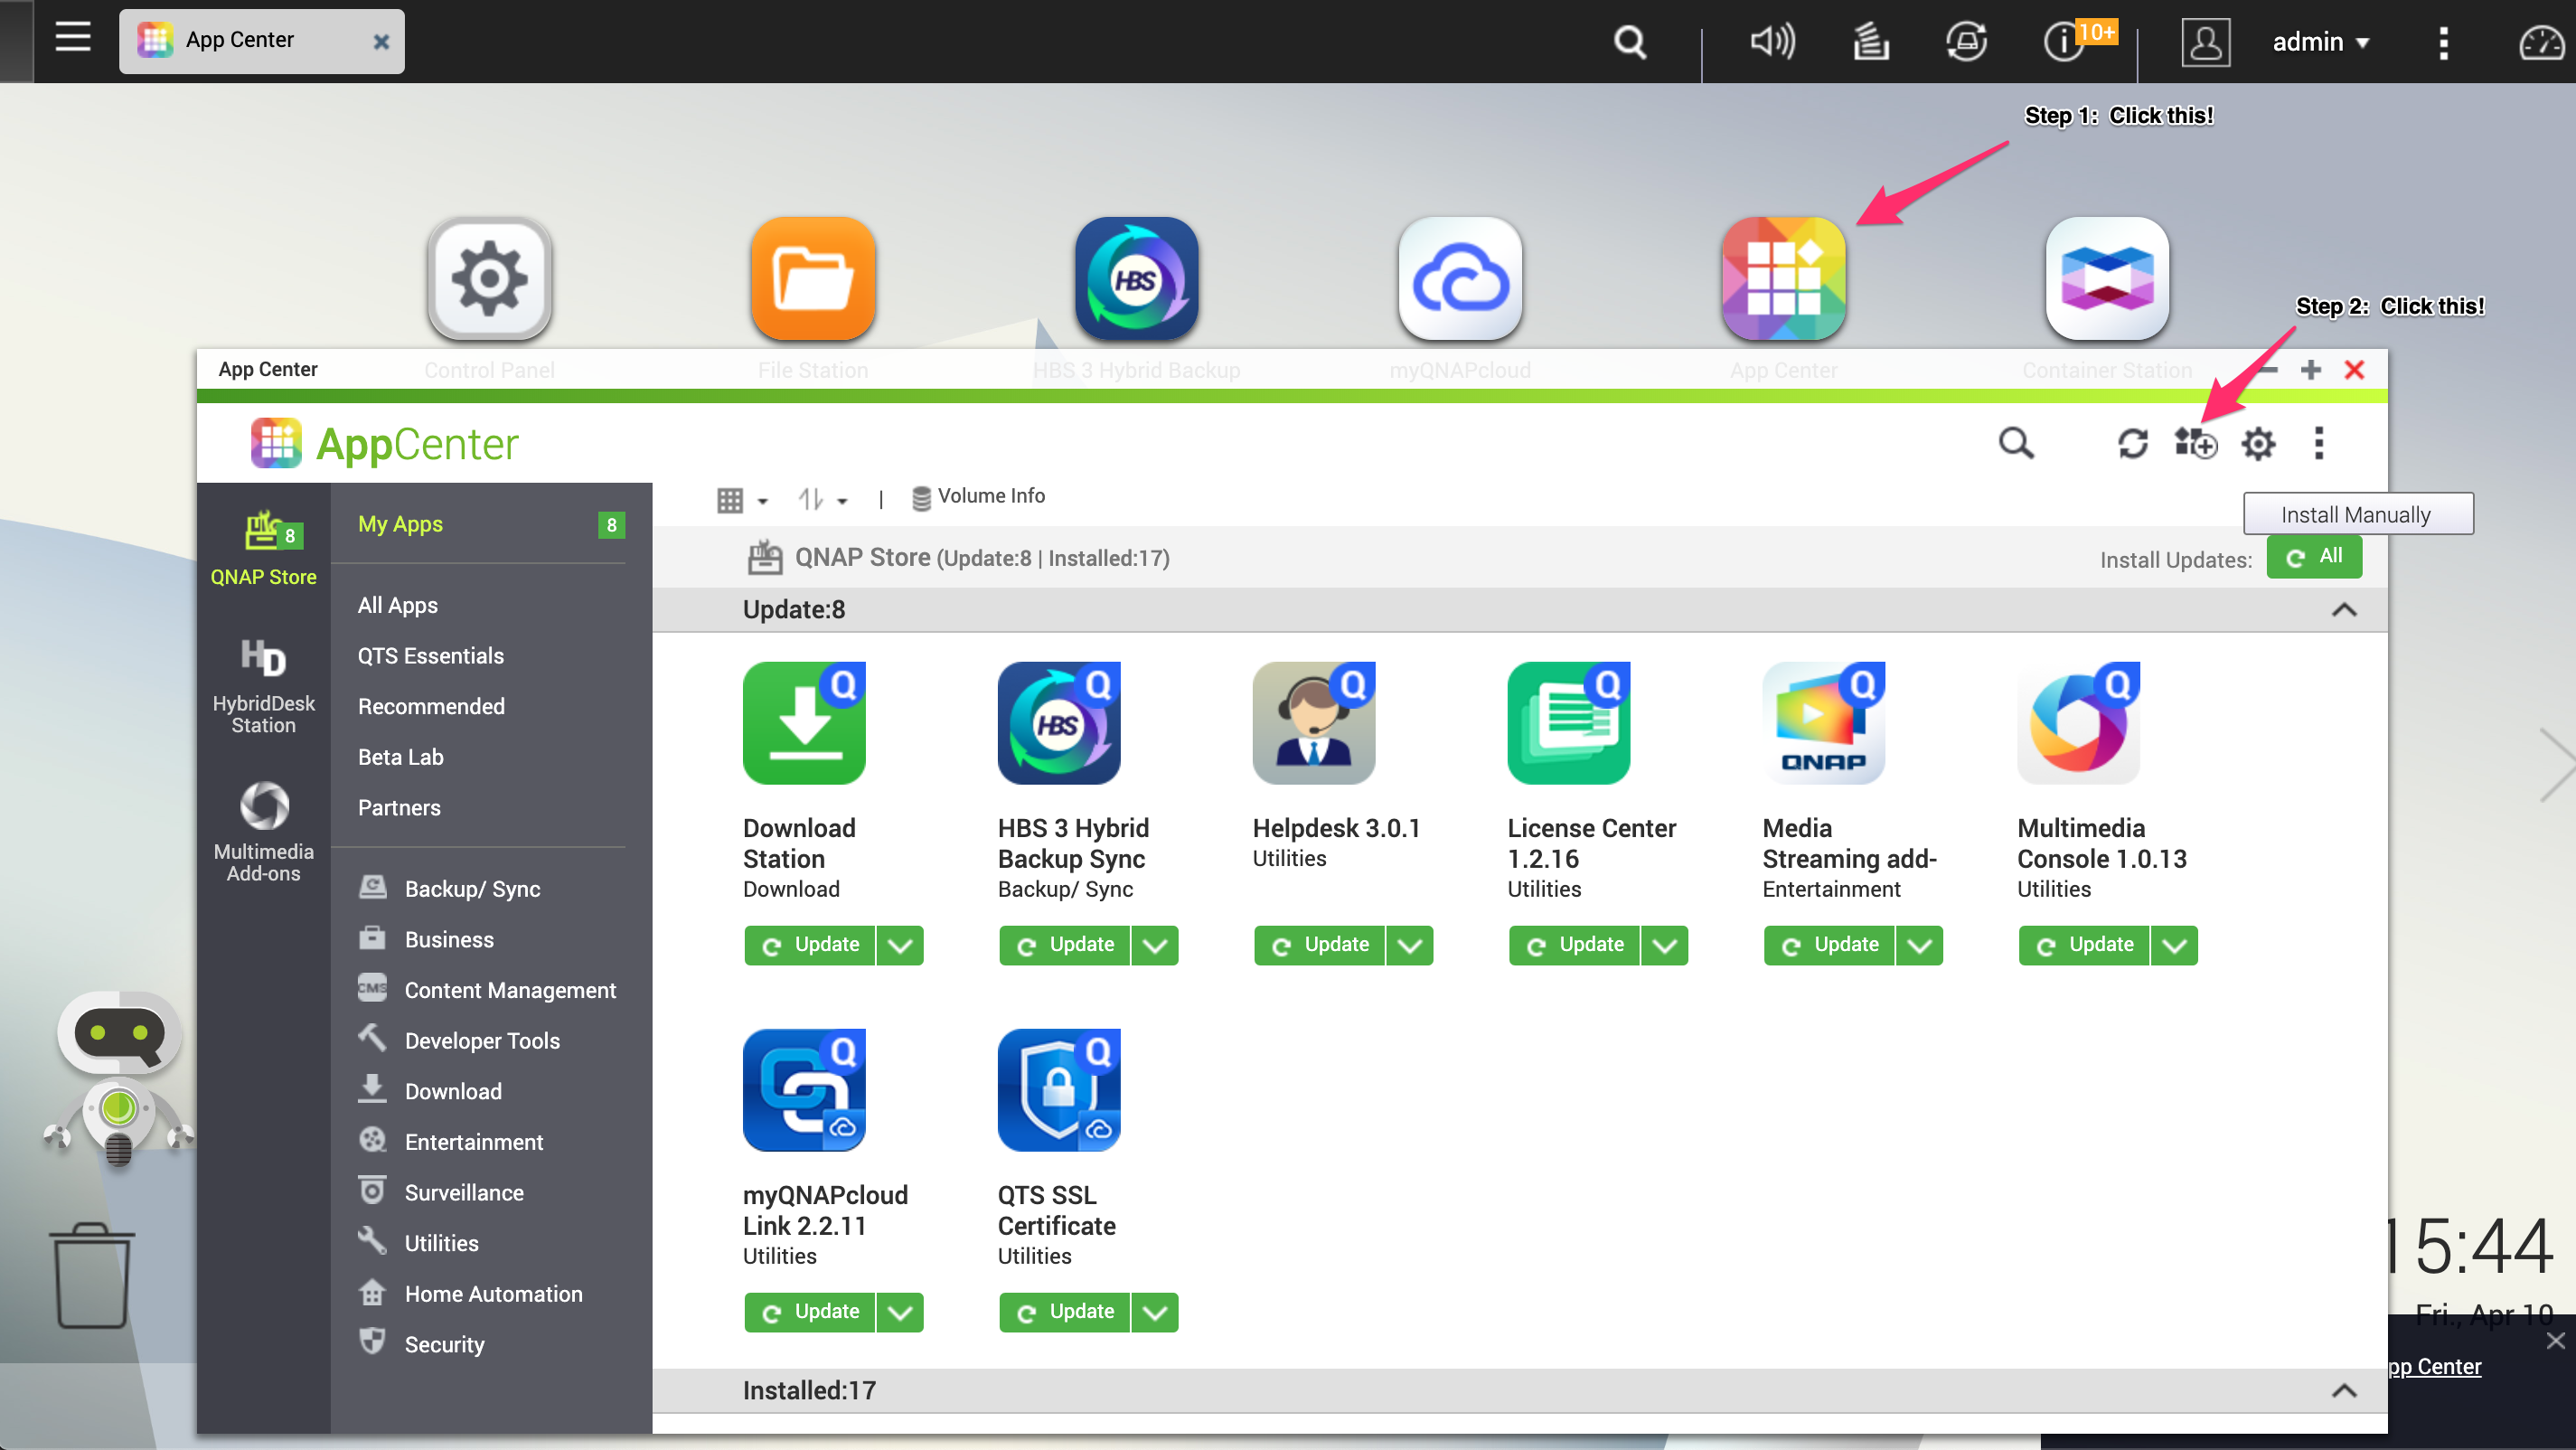
Navigate to QNAP App Center application, by double clicking on its icon on the QNAP Desktop Homepage.
Click "Install Manually" and click on the QNAP Package (downloaded above) to install the QNAP Storj application onto the device.
Hit accept when prompted to accept that the application has no official digital signature:
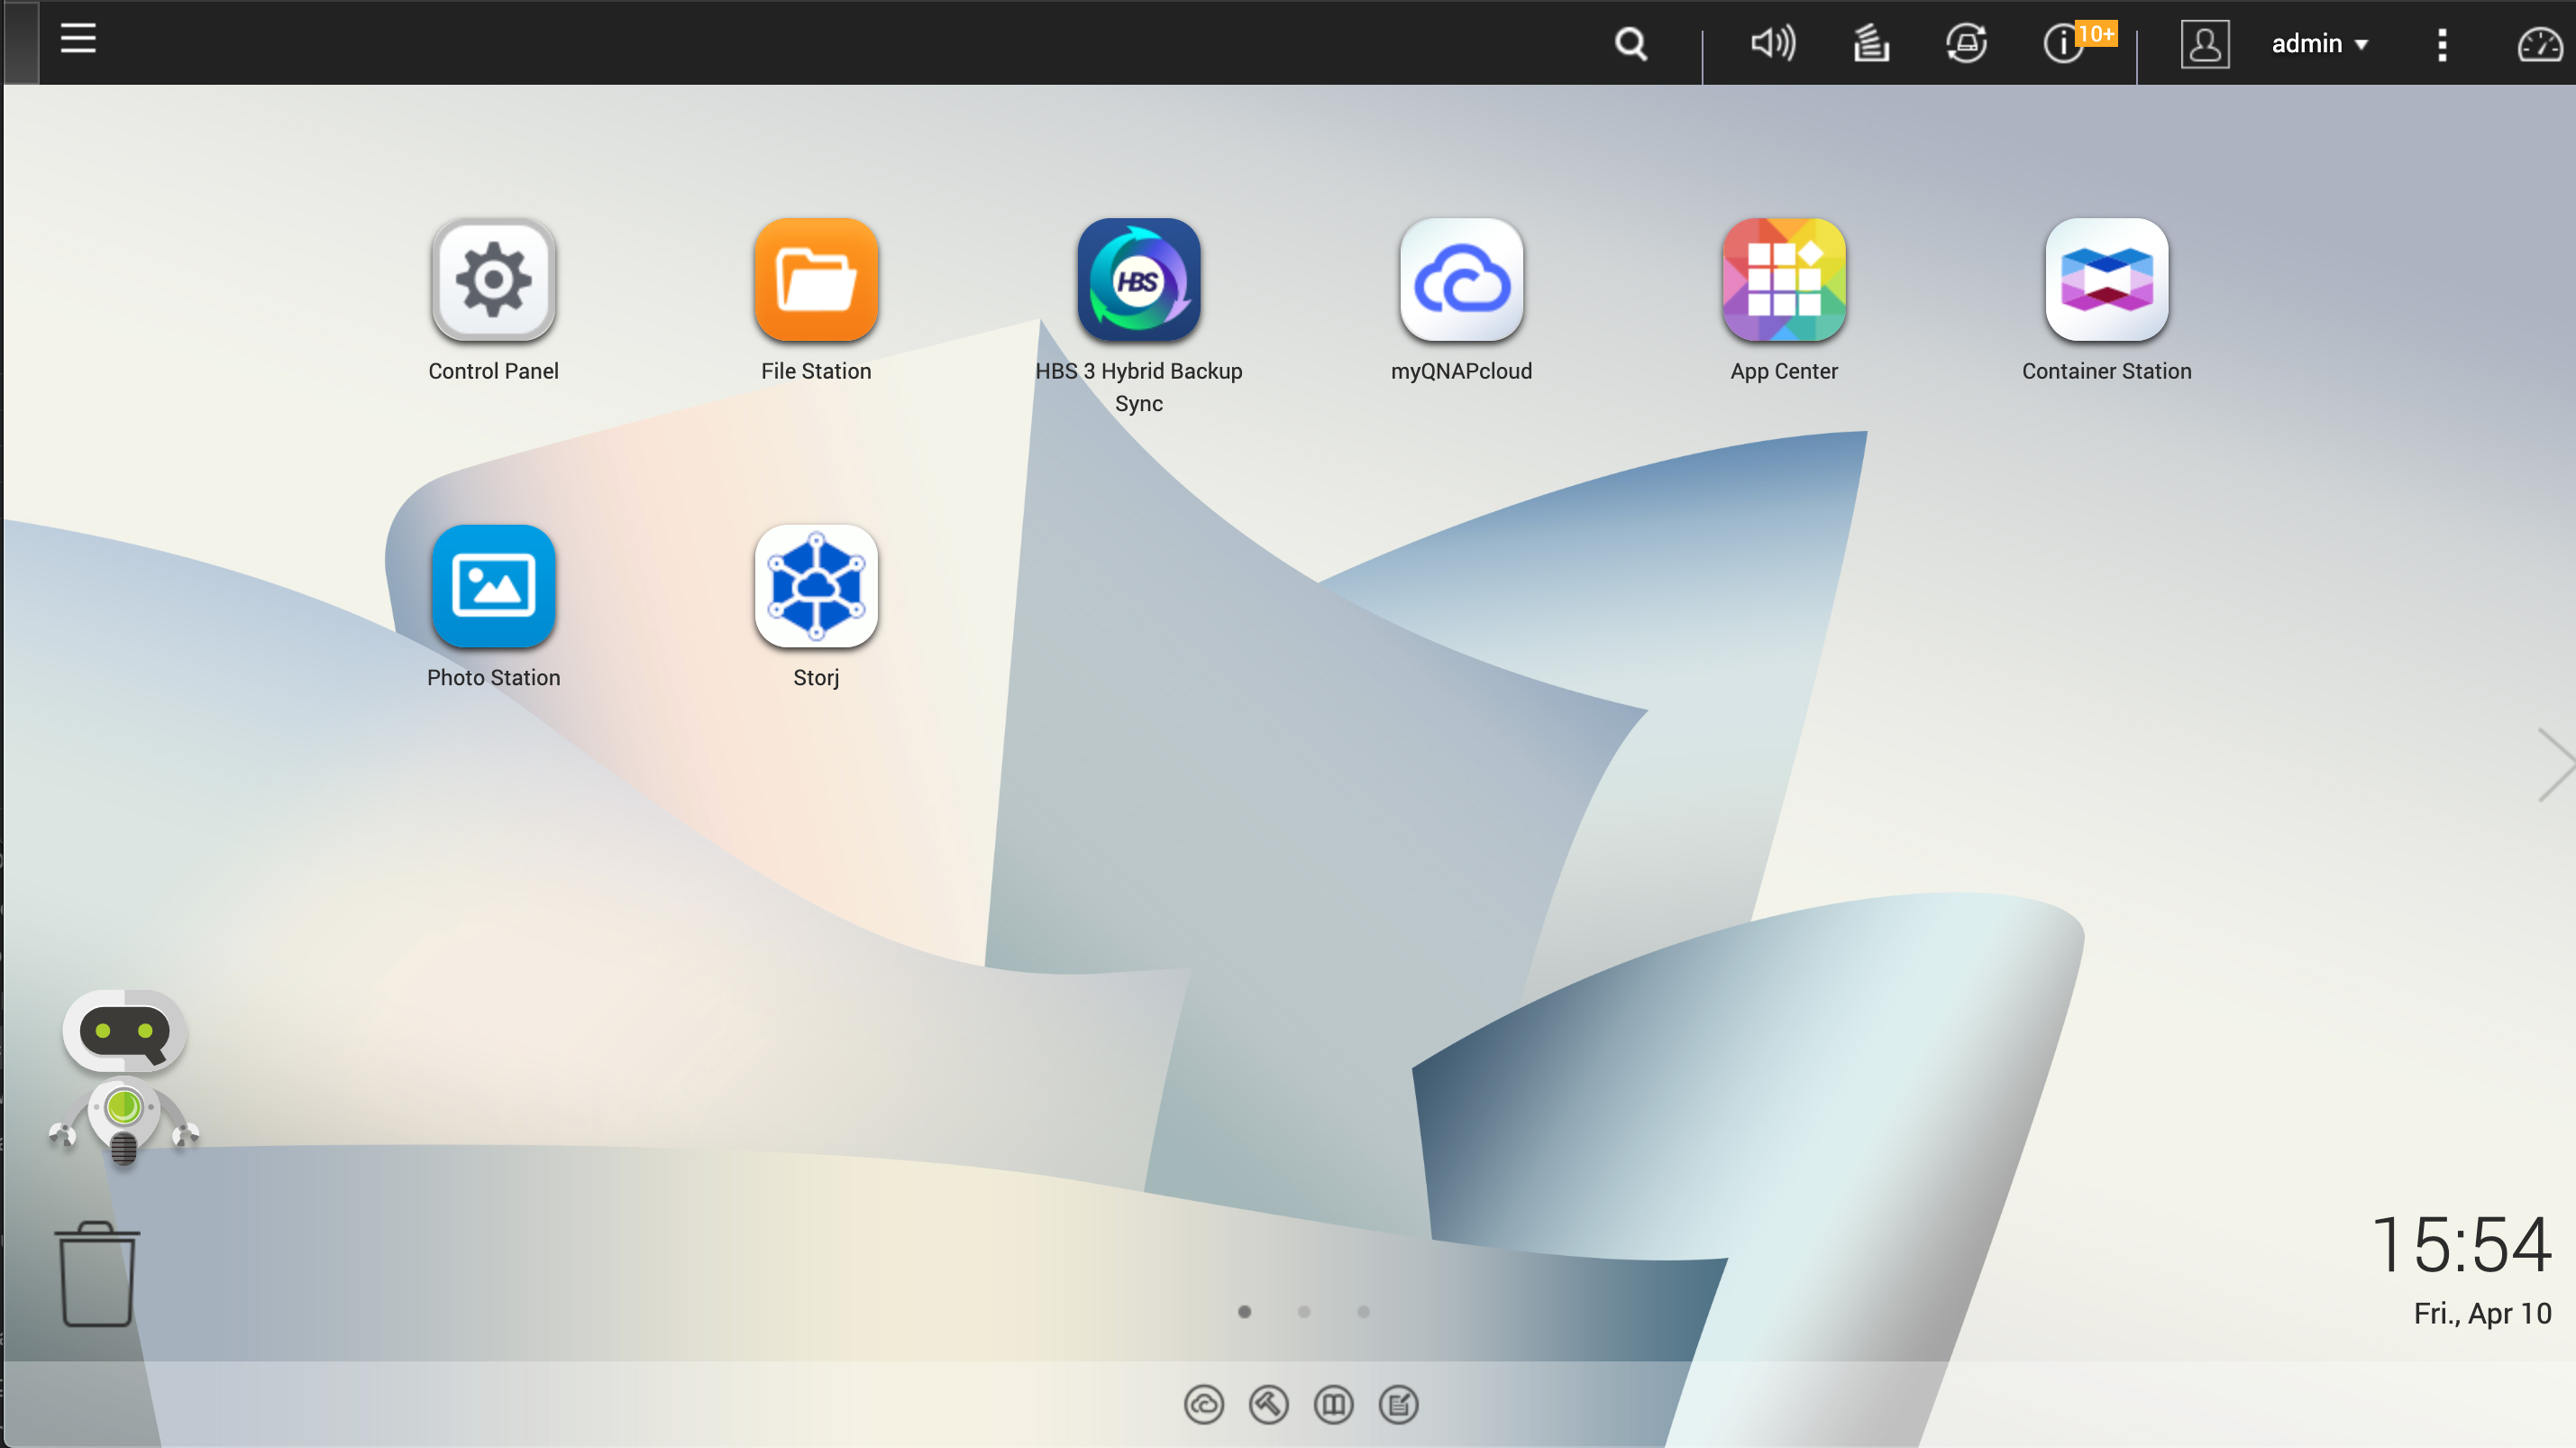
Once the installation is completed, the Storj Storage Node app will be available through the App Center, as well as be visible on the desktop.
Don't see the Storj app?
Go to Control Panel -> Privileges, double click the storage node app and put a checkmark in the Allow box of the user you're logging in with. After that it should appear in the start menu.
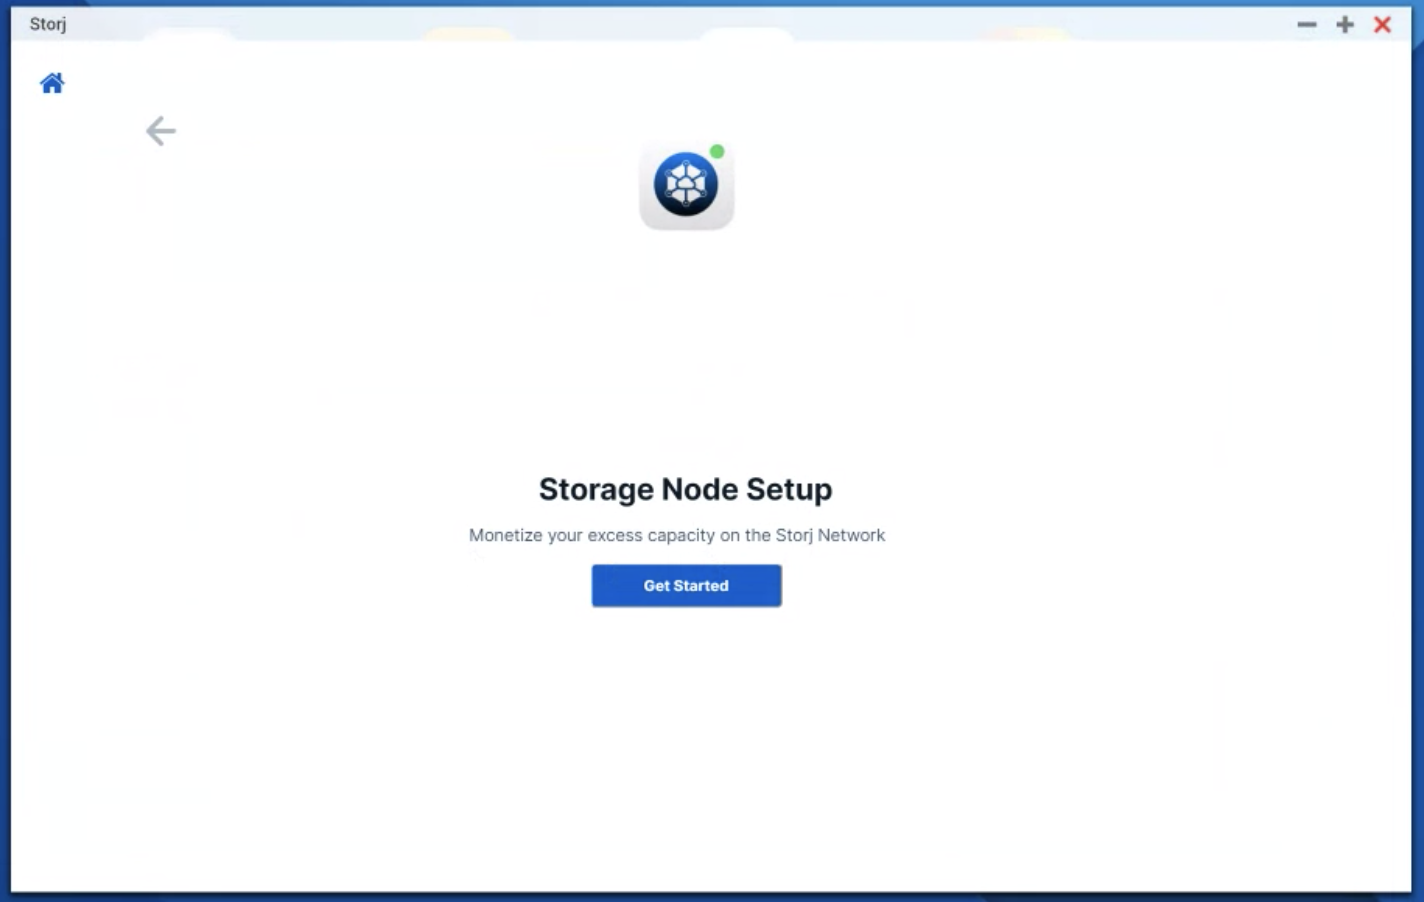
Open the application, and click "Wizard" in the sidebar. You will be prompted with a walkthrough of the application, like so:
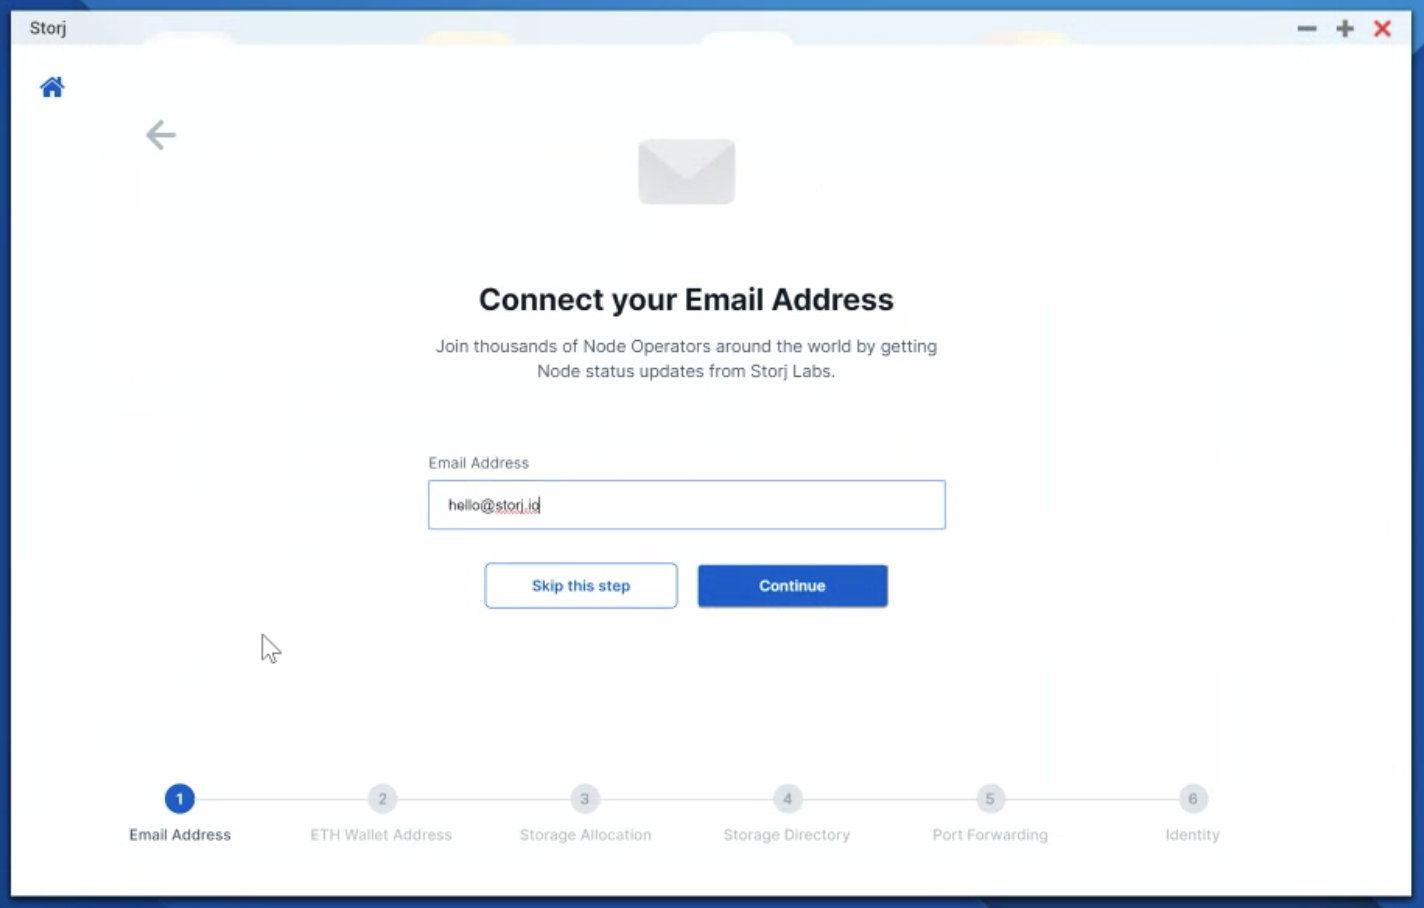
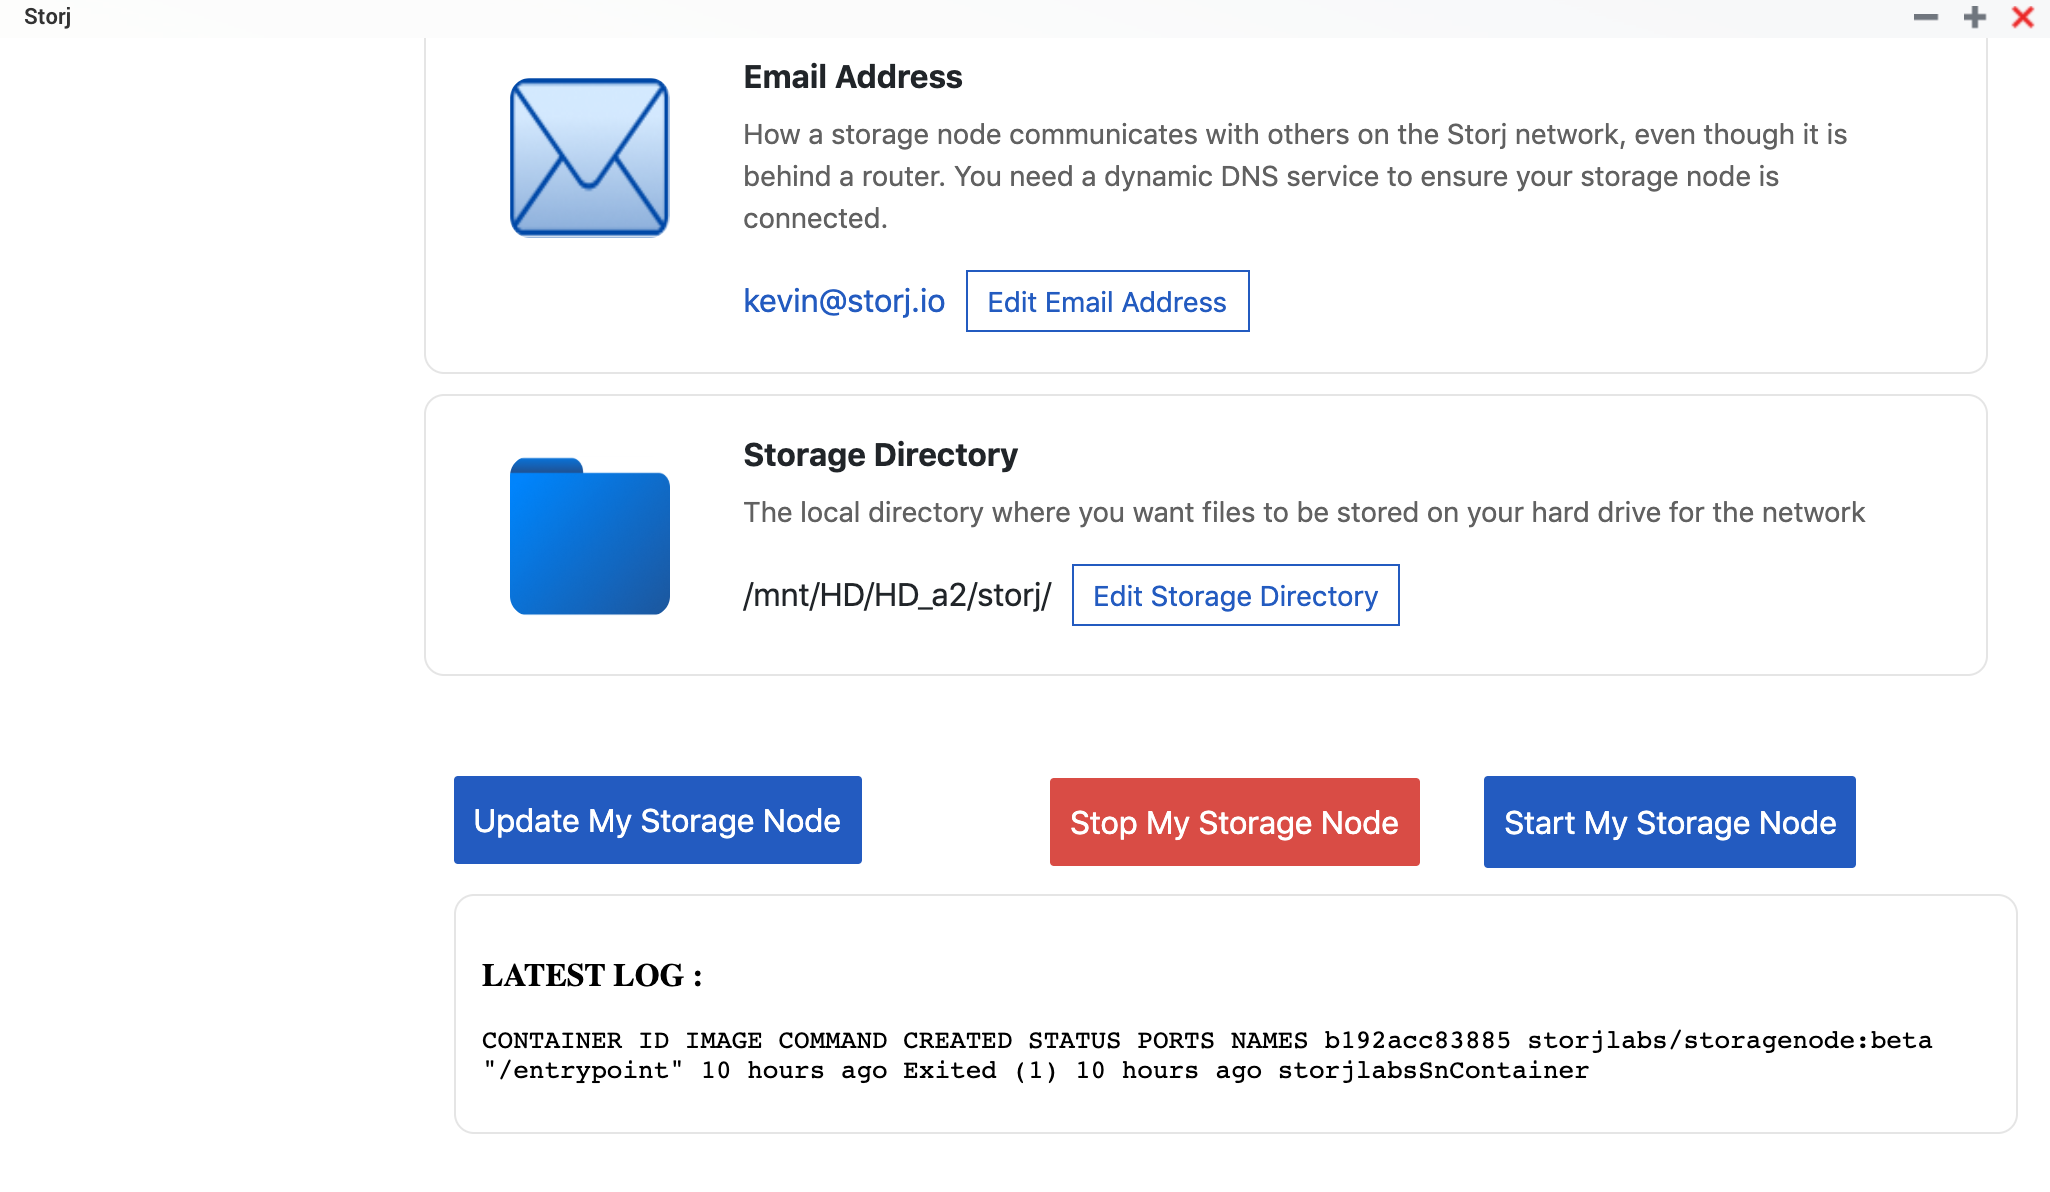
Enter your email address that you would like associated with notifications for your node:
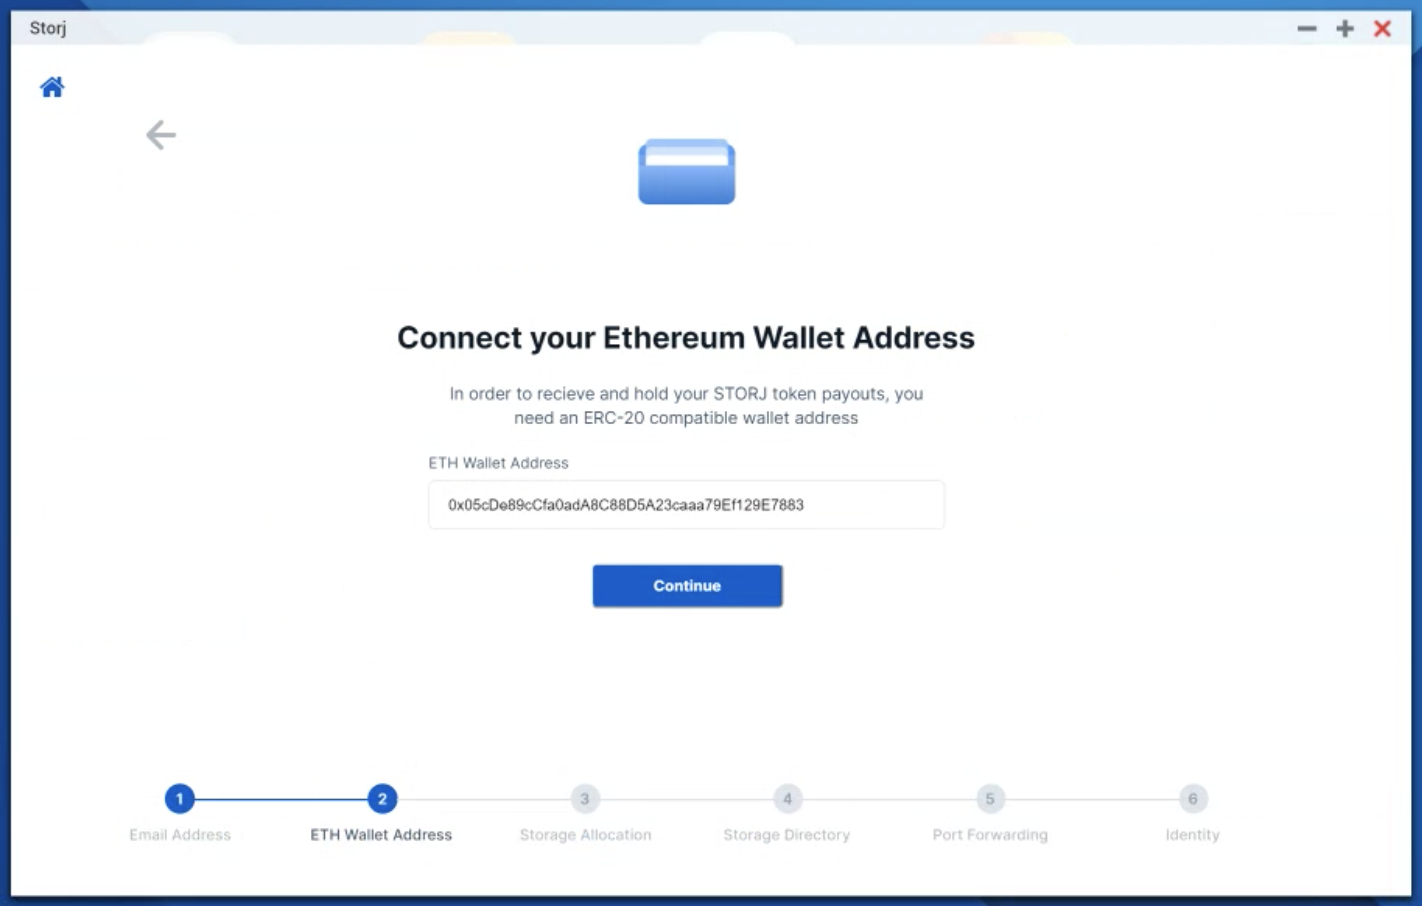
Add your ERC-20 Token Compatible Wallet Address for payouts.
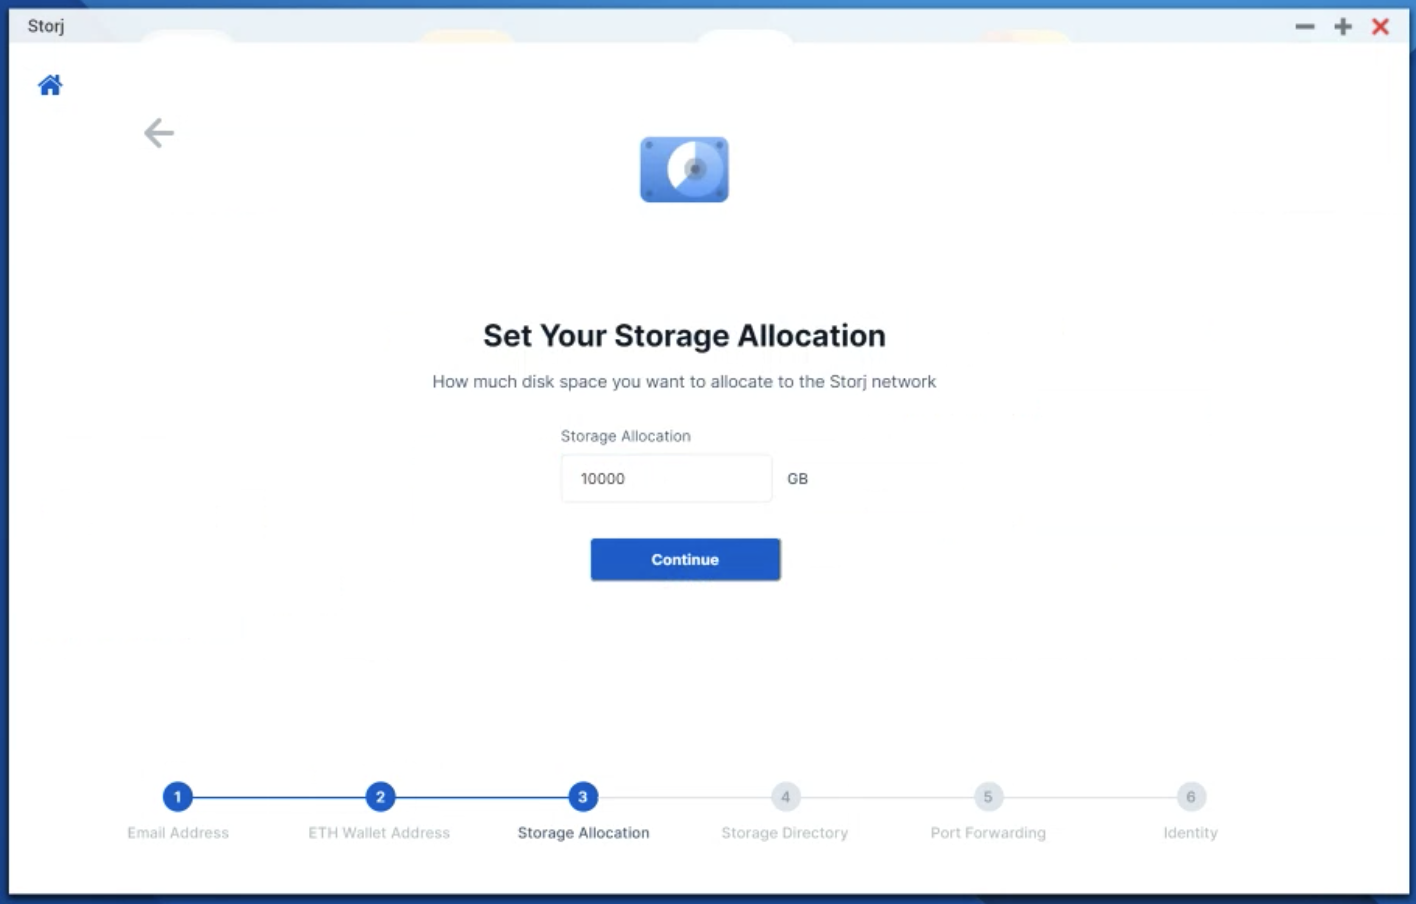
Configure Storage Allocation, and set the amount of excess storage capacity you would like to share with the network.
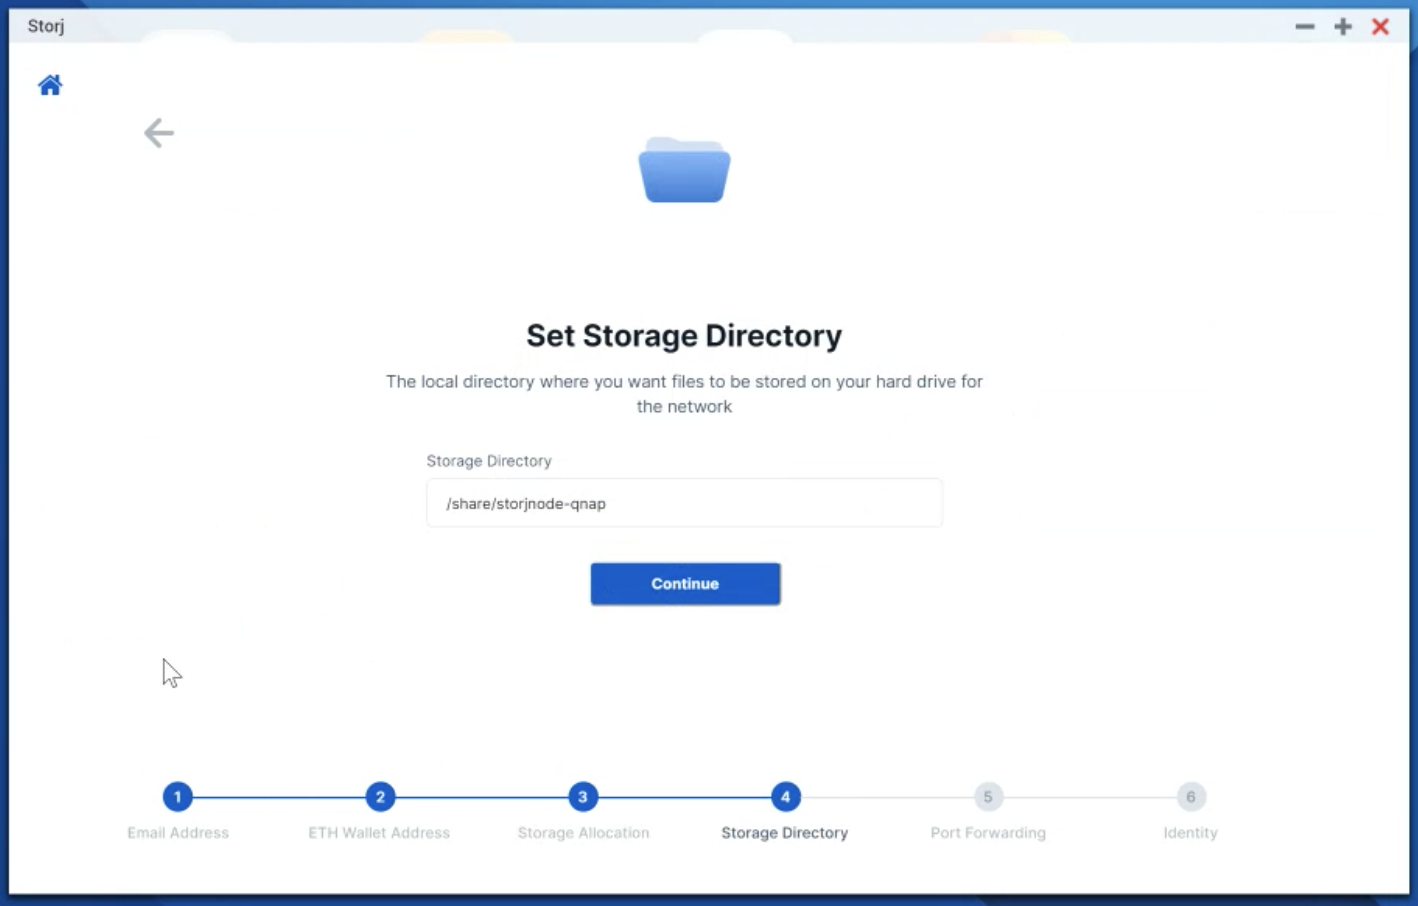
Input a selected Storage Directory (which specifies the path where the data will be stored).
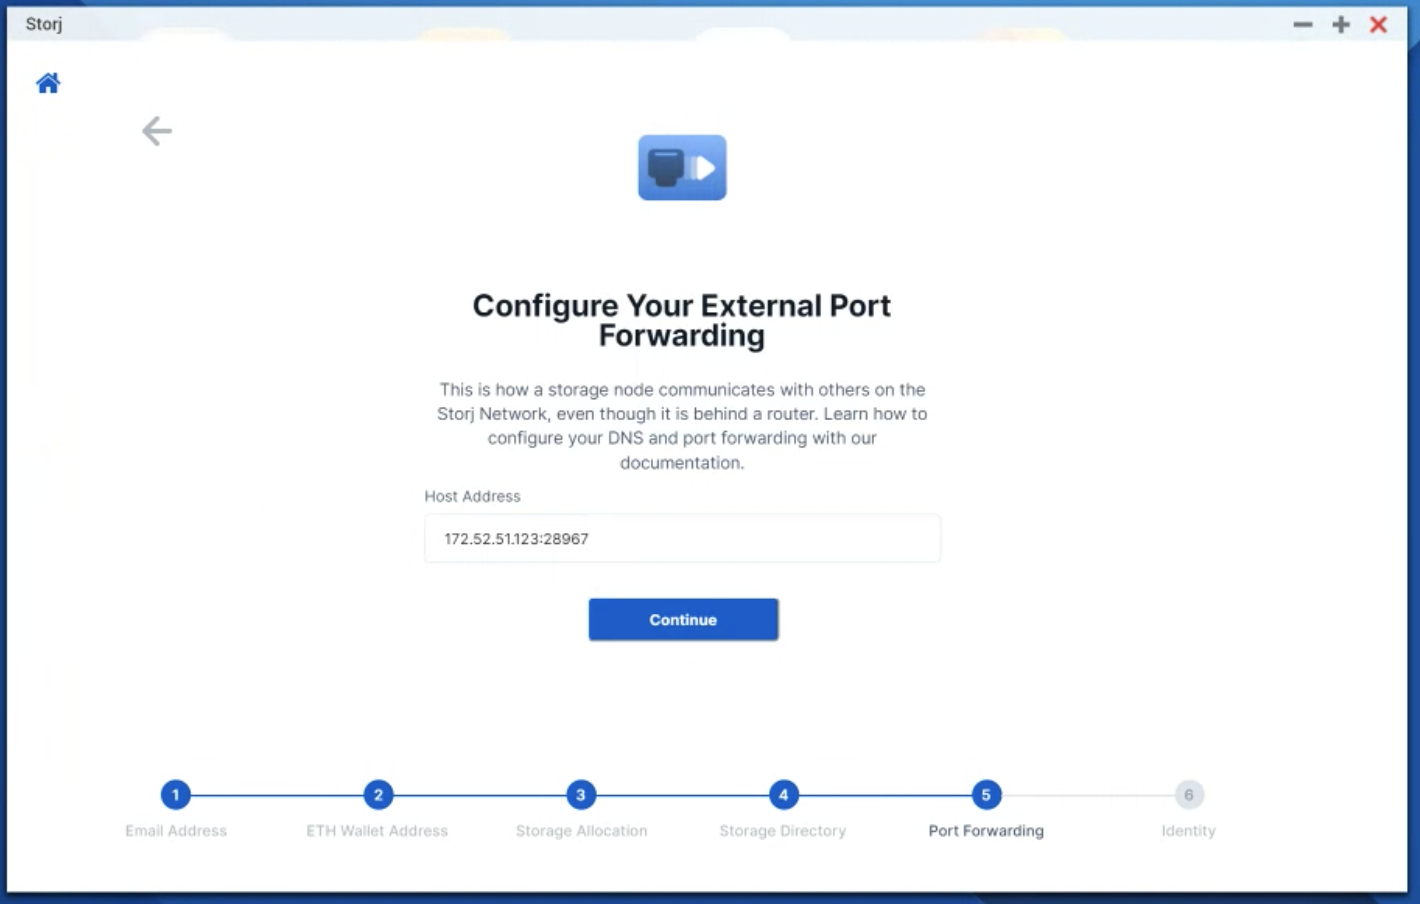
Configure the external Step 3. Setup Port Forwarding
This allows the connection for the Storj Network to come in, and communicate with the software running on the NAS.
Set the location for your node's identity certificate, like so:
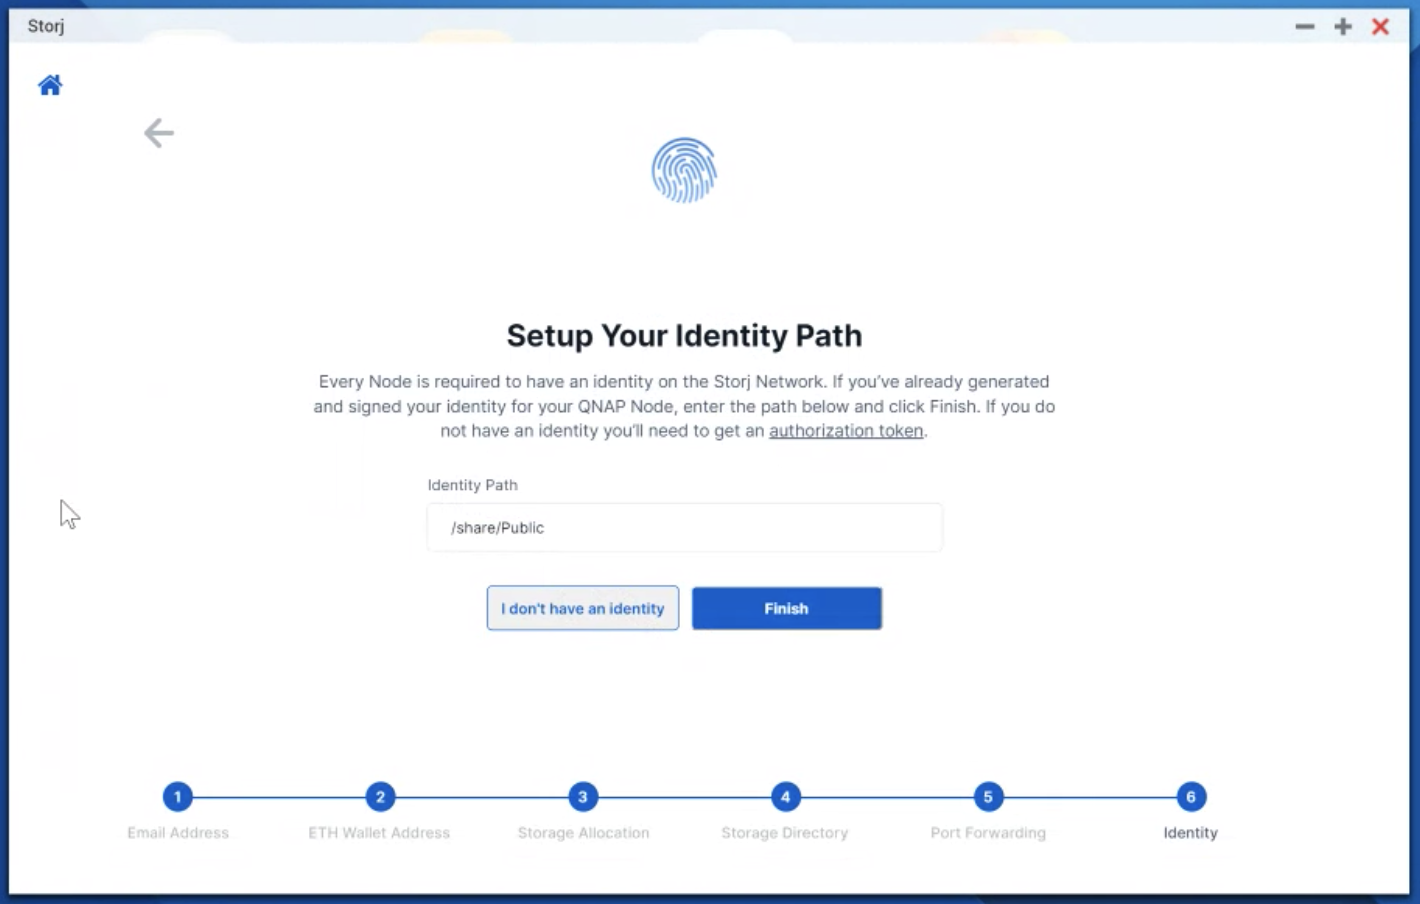
Hit finish, and you have successfully completed that setup wizard for your QNAP device.
Run the Application
After following the configuration steps above,
Click Start My Storage Node
Look for the log output, which indicates that the image is running.
You have successfully shared your excess capacity on your QNAP Device with the Storj Network.
Click the Dashboard Option to view your current stats - and keep an eye on that payout address!