Unitrends
Unitrends provides backup appliances, backup software, and cloud data protection that leverage cutting-edge technology to automate manual tasks, eliminate management complexity, and deliver tested hardware and software resilience. The Unitrends backup software identifies and resolves software issues that threaten backup and recovery before they happen. Unitrends backup appliances help IT administrators save more time on data backups. Its** **intuitive management console lets you quickly and easily search, filter, manage, and recover thousands of backups.
Find more information on the Unitrends website. Request a free trial of Unitrends, as well.
Advantages of Unitrends with Storj
Unitrends provides ultra-low-cost secondary cloud storage and aligns storage costs with data value.
Unitrends backup provides a simple, centralized management hub that acts as a command center for data storage and recovery.
Unitrends utilizes AI-based ransomware detection and predictive analytics to monitor data characteristics and alert administrators of ransomware attacks in real-time.
Security features in Unitrends allow users to meet compliance requirements.
Integration
To integrate Storj with Unitrends, you will need to create S3 credentials in Storj to be used for Unitrends. Those credentials will need to be added within the Unitrends appliance through their web-based interface.
Requirements
An active Storj account. Navigate to https://storj.io/signup?partner=unitrends to sign up, or log in to https://storj.io/login if you already have an account.
A bucket for Unitrends in your Storj instance.
A Unitrends appliance
Obtain a free trial of Unitrends from their website.
Create a Storj Account
To begin, you will need to create a Storj account. If you already an account, go to https://storj.io/login.
Navigate to https://storj.io/signup to sign up. Enter your full name, email address, and a password, as shown below:

Create a Bucket
Once you have your Storj account you can create a bucket for your data to be stored in.
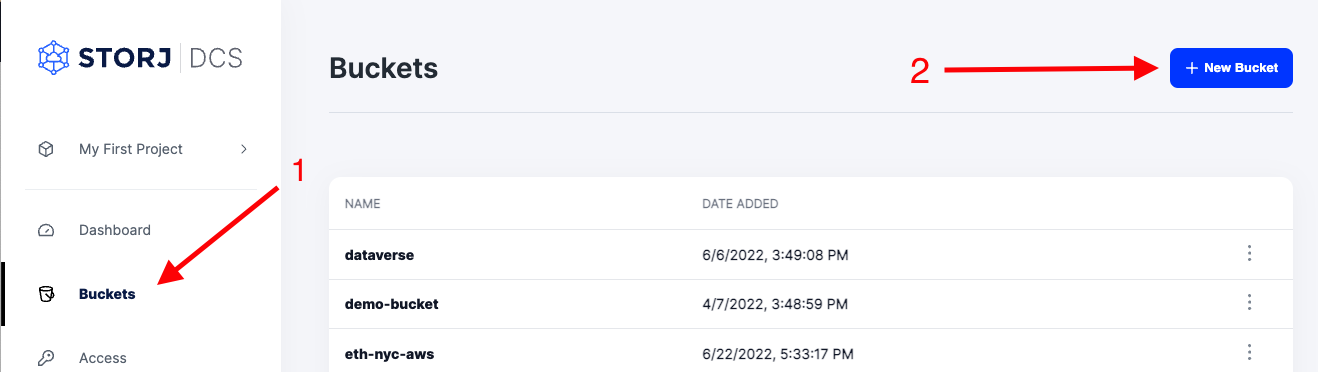
1. Navigate to “Buckets” on the left side menu.
2. Click “New Bucket” on the top right.
3. Assign the bucket an easily identifiable name, such as "my-bucket".
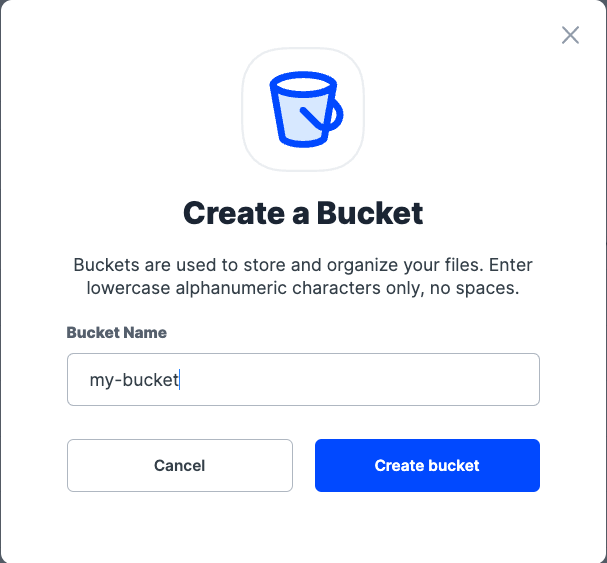
4. Click Create bucket
Generate S3 credentials
Storj has an Amazon S3 compatible API and you'll need generate S3 credentials to use it. S3 credentials consist of an access key, secret key, and endpoint.
Create S3 credentials in the Storj web console:
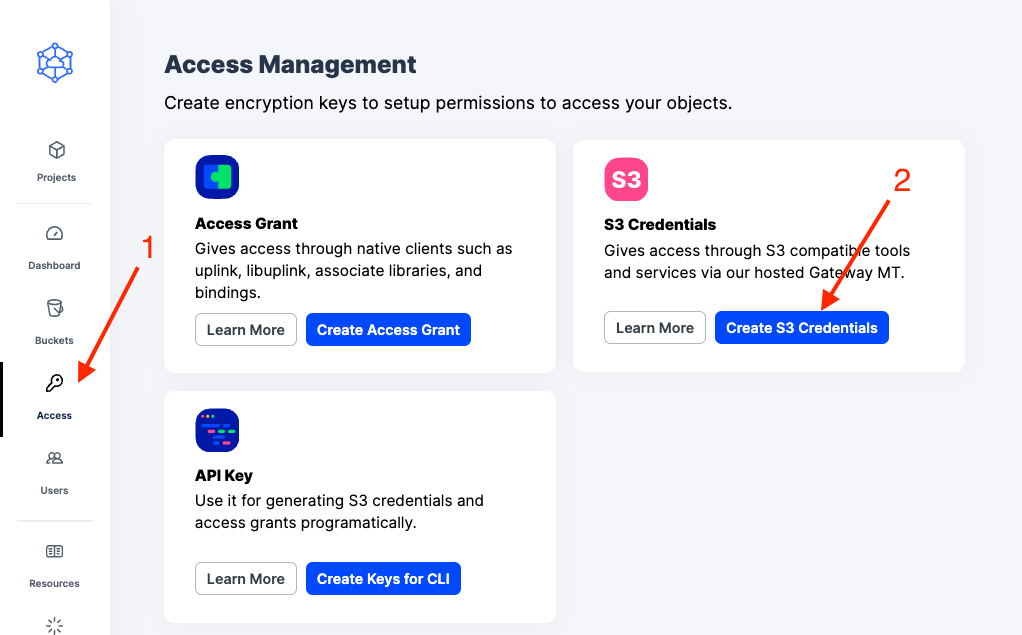
1. Navigate to Access on the left side menu.
2. Click Create S3 Credentials under the S3 Credentials block.
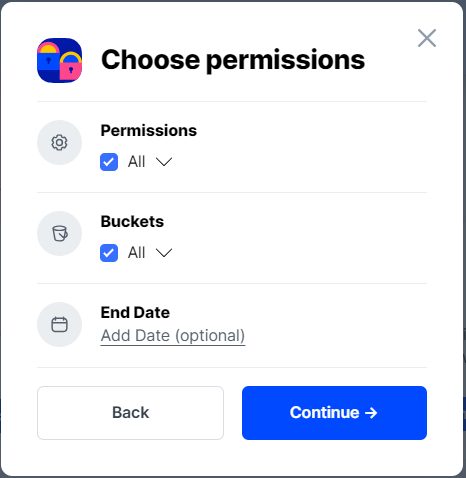
3. When the Create Access screen comes up, set specifications according to the following guidelines:
Type: S3 Credentials
Name: The name of the credentials (e.g. my-access)
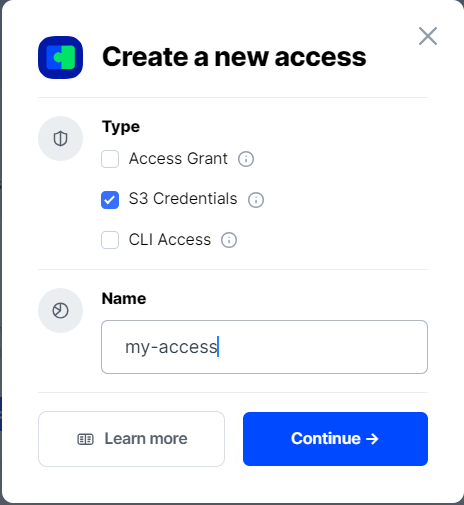
4. Click Continue to provide permissions
Permissions: All
Buckets: Feel free to specify the bucket you created above (e.g. my-bucket), or leave as “All”
End date: provide an expiration date for these credentials (optional)
5. Click Continue to provide Access encryption Information
Use the current passphrase: this is default option
Advanced: you may provide a different encryption phrase either your own or generate a new one.
Enter a new passphrase: use this option, if you would like to provide your own new encryption phrase
Generate 12-word passphrase: use this option, if you would like to generate a new encryption phrase
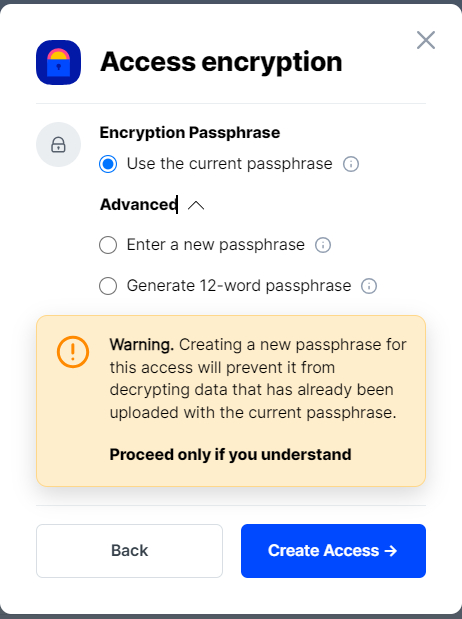
In order to see the data uploaded to your bucket in the web console, you must unlock the bucket with the same encryption passphrase as the credentials.
6. Click Create Access to finish creation of your S3 credentials
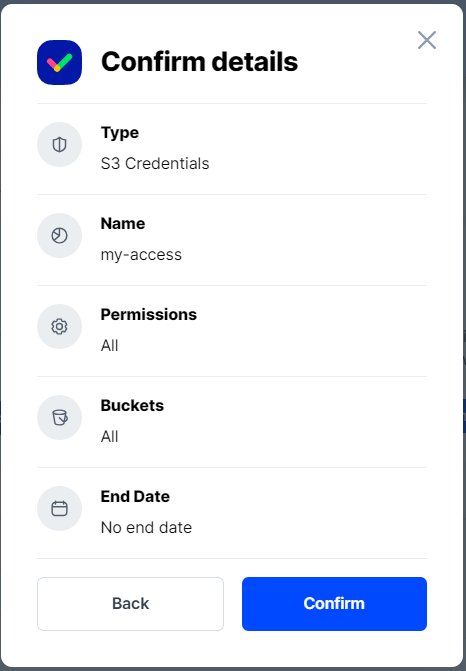
7. Click Confirm the Confirm details pop-up message
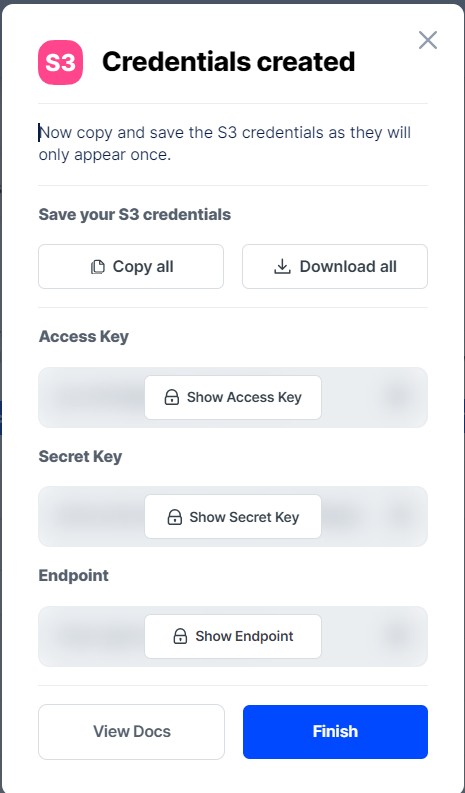
8. Your S3 credentials are created. Write them down and store them, or click the Download all button. You will need these credentials for the following steps.
Connecting Unitrends to Storj
Configuration the Unitrends Appliance
Cloud storage must be added to the Unitrends by adding the cloud storage option through the Unitrends system manager. Manage the system using the web-based interface at one of the following:
http://192.168.4.251
ens192
Note: a cloud storage bucket can only be connected to one Unitrends appliance.
Follow the steps below to complete the integration:
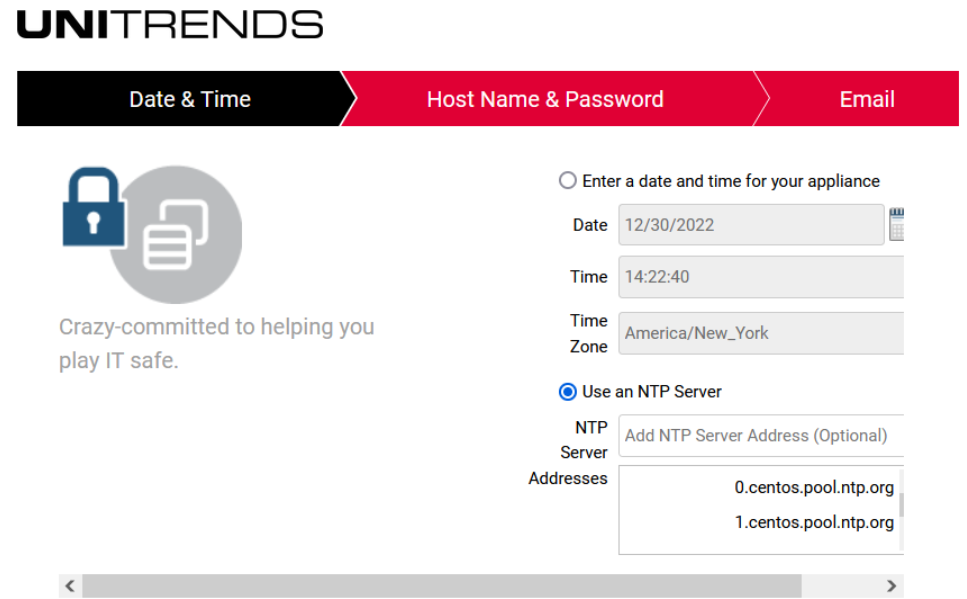
1. On the initial Unitrends setup screen, check the Use an NTP Server option. Then select Next.
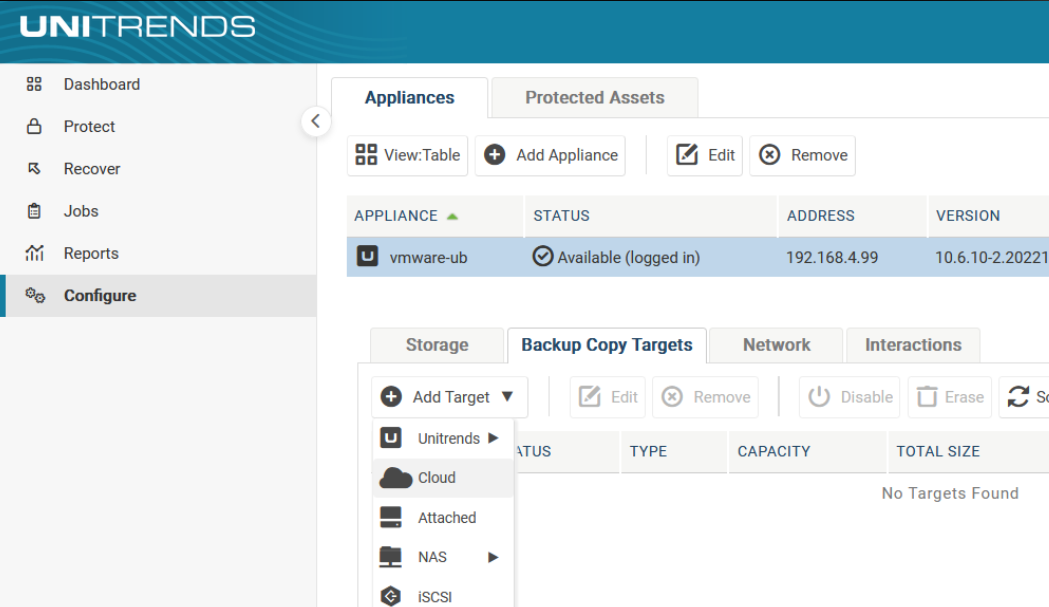
2. In the Unitrends dashboard, select Configure > Backup Copy Targets > Add Target.
3. From the drop-down menu, select Cloud.
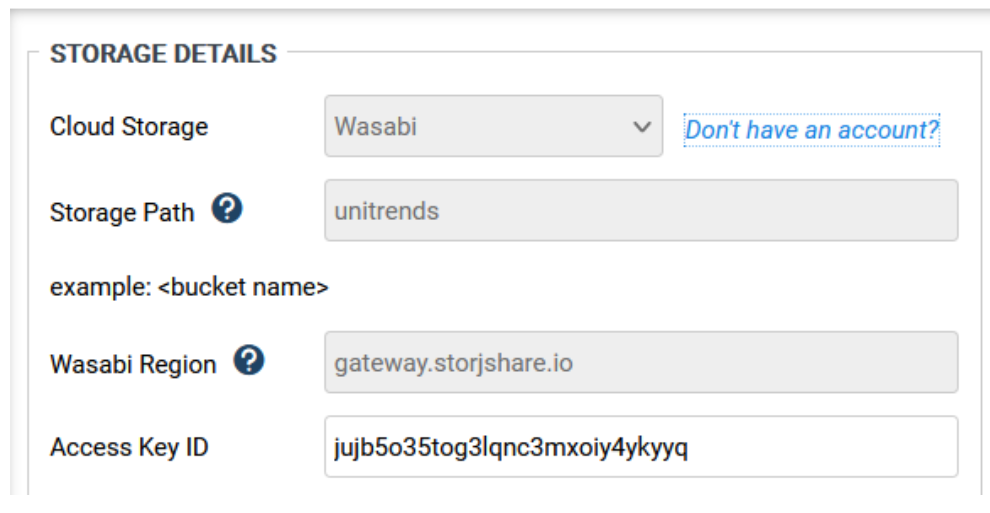
4. In the Storage Details window, fill out the appropriate connection data:
Select Wasabi as the cloud storage provider from the **Cloud Storage ** drop-down menu.
In the Storage Path field, enter the name of your bucket for Unitrends in your Storj account. In this demo, we named the bucket "unitrends."
Enter the endpoint address in the Wasabi Region field. This will be: gateway.storjshare.io.
Enter the access key in the **Access Key ID **field.
Enter the secret key in the **Secret Key **field.
If desired, check the box next to the Specify Purging Threshold field. This sets a size limit for your cloud archive storage. Enter a number in gigabytes for the limit. If no purging threshold is specified, there is no limit to the amount of data the appliance can archive to the cloud storage.
5. Select Confirm to complete setting up your Storj account to Unitrends.
Success!
To view your Storj cloud storage, select Archive > Media. You can manually click the scan icon to scan your Storj bucket for new media if it doesn't appear to be happening automatically.
Now you can archive backups to your cloud storage. See Archiving backups to the cloud reference documentation on the Unitrends website for more information.