Tesla Sentry Mode Backup
Introduction
In this How To, we'll demonstrate how to automatically transfer Tesla Sentry Mode and Dashcam video clips over WiFi to Storj and make room for more videos the next day. We'll use a Raspberry Pi (a small, low cost, low power computer) plugged into the USB port in the dashboard to store the video files. When the Tesla pulls into your garage at night, the Raspberry Pi will connect via WiFi and upload all the videos to Storj, then clear off the drive for use the next day. This will also work for videos recorded in Track Mode if you have one of the performance models, and you can easily share any of the videos with your friends.
What you'll need
You'll need some hardware, some software and a Storj account for this project.
Hardware required
All in, you’re looking at right around $60 of hardware to get going (prices as of April 2021). Here’s the hardware you’ll need:
Raspberry Pi Zero W : ID 3400 : $10.00 (We used a different model, but this is better)
Adafruit Raspberry Pi Zero Case : ID 3252 : $4.75 (It should look good - you can 3d print your own for extra credit)
SanDisk 256GB High Endurance Video microSDXC Card $37 (Very important to have high quality storage with high write endurance. This gives you room for a few days in case you don’t connect to WiFi and won't wear out too quickly)
USB Cable to plug into the car USB A to Micro-B - 3 foot long
Storj cloud storage - Secure, private and decentralized.
Optional hardware for easier setup:
- Mini HDMI to HDMI Cable - 5 feet : ID 2775: $5.95 Makes it easier to set everything up by connecting the Pi to a monitor
Software required
The code used in this tutorial is open source and uses, among other things, Rlcone which includes native support for Storj. The GitHub Repository for the code is available at: https://github.com/marcone/teslausb and the project was originally described on the /r/teslamotors subreddit.
Storj Account
If you have not yet signed up, please do so now.
Step-by-step guide
Using the software in the teslausb project with Storj is a multipart process, we will accomplish the following:
Generate Credentials for Storj
- This occurs through the storj.io website
Configure your Raspberry Pi with the teslausb kit
Part 1 - One-step setup
- This is done by flashing a preconfigured Raspbian image and then filling out a config file.
Part 2 - Rclone Configuration with Storj via hosted Gateway MT
- This is done by accessing the Pi via SSH and installing/configuring Rclone
Sign Up for a Storj Account
If you have not yet signed up, please head here to sign up for the free tier.
Please consult Storj Console for details on setting up an account and using the Satellite Admin Console.
Generate Credentials to the Gateway MT
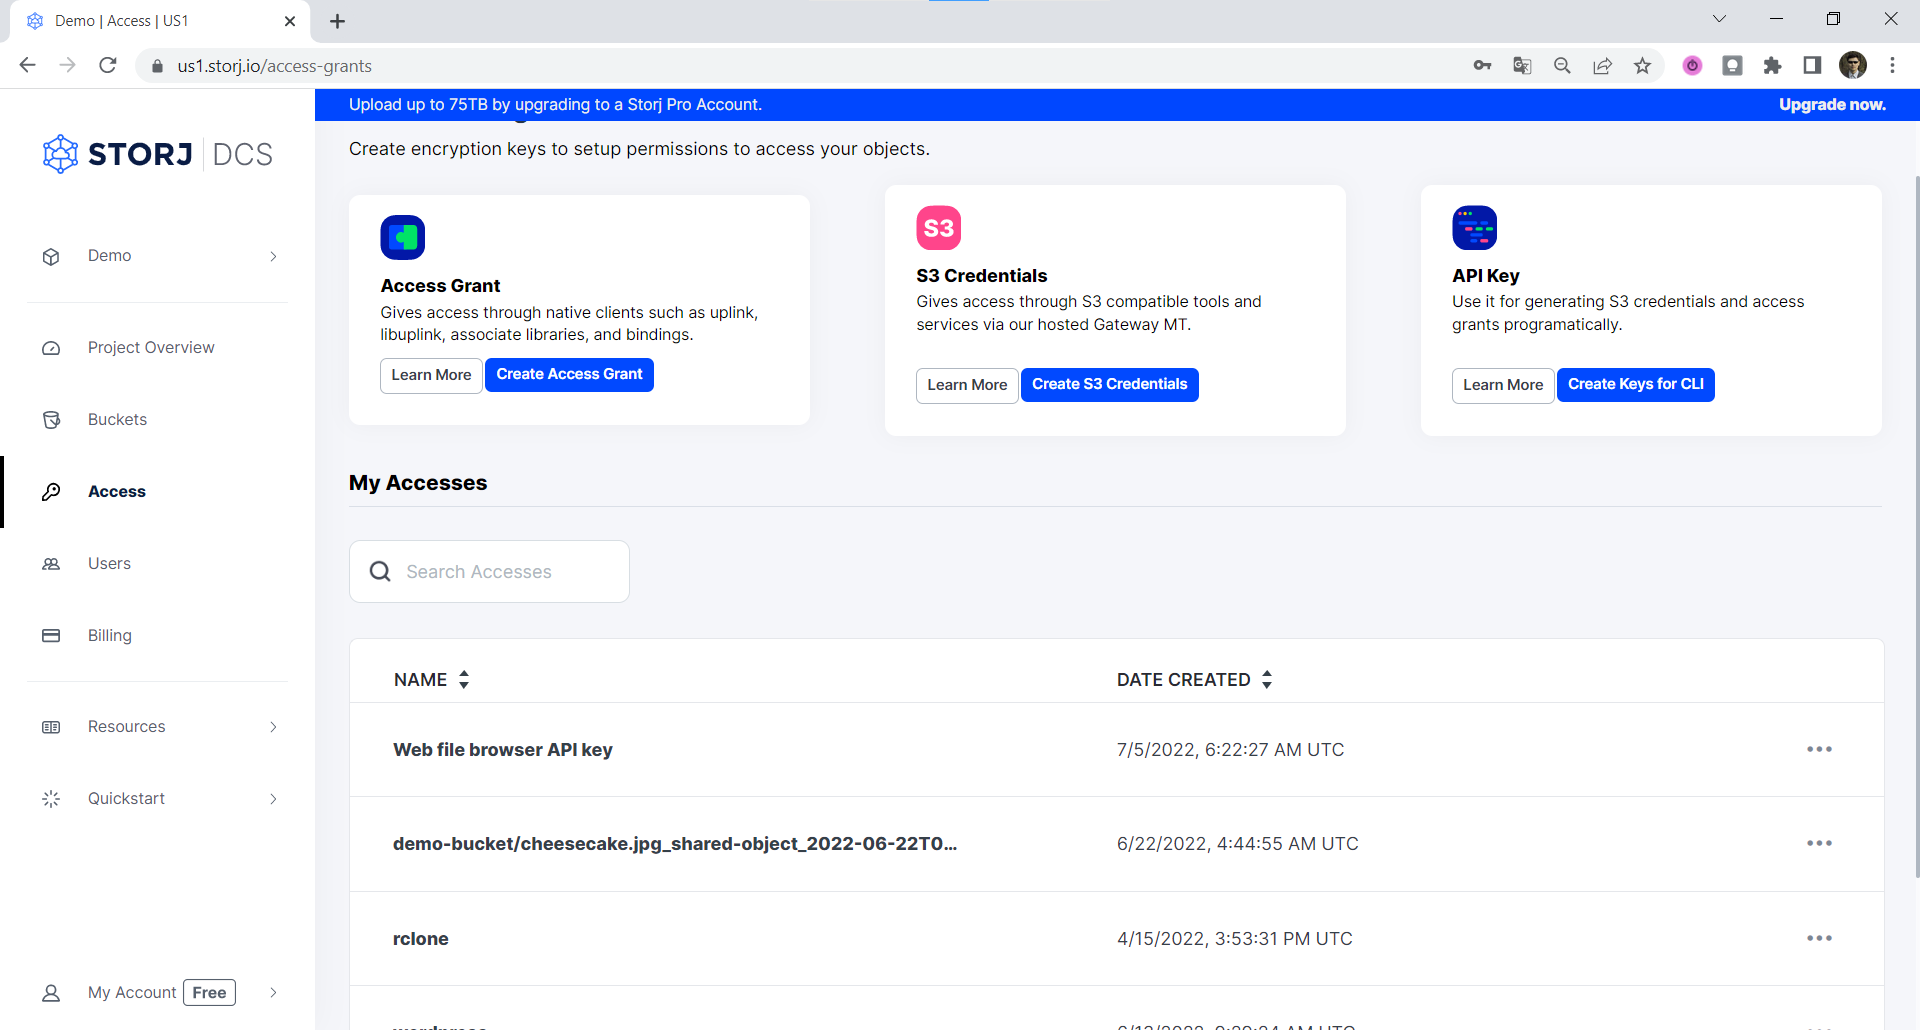
Navigate to the Access page within your project and then click on Create S3 Credentials. A modal window will pop up where you should enter a name for this access grant.
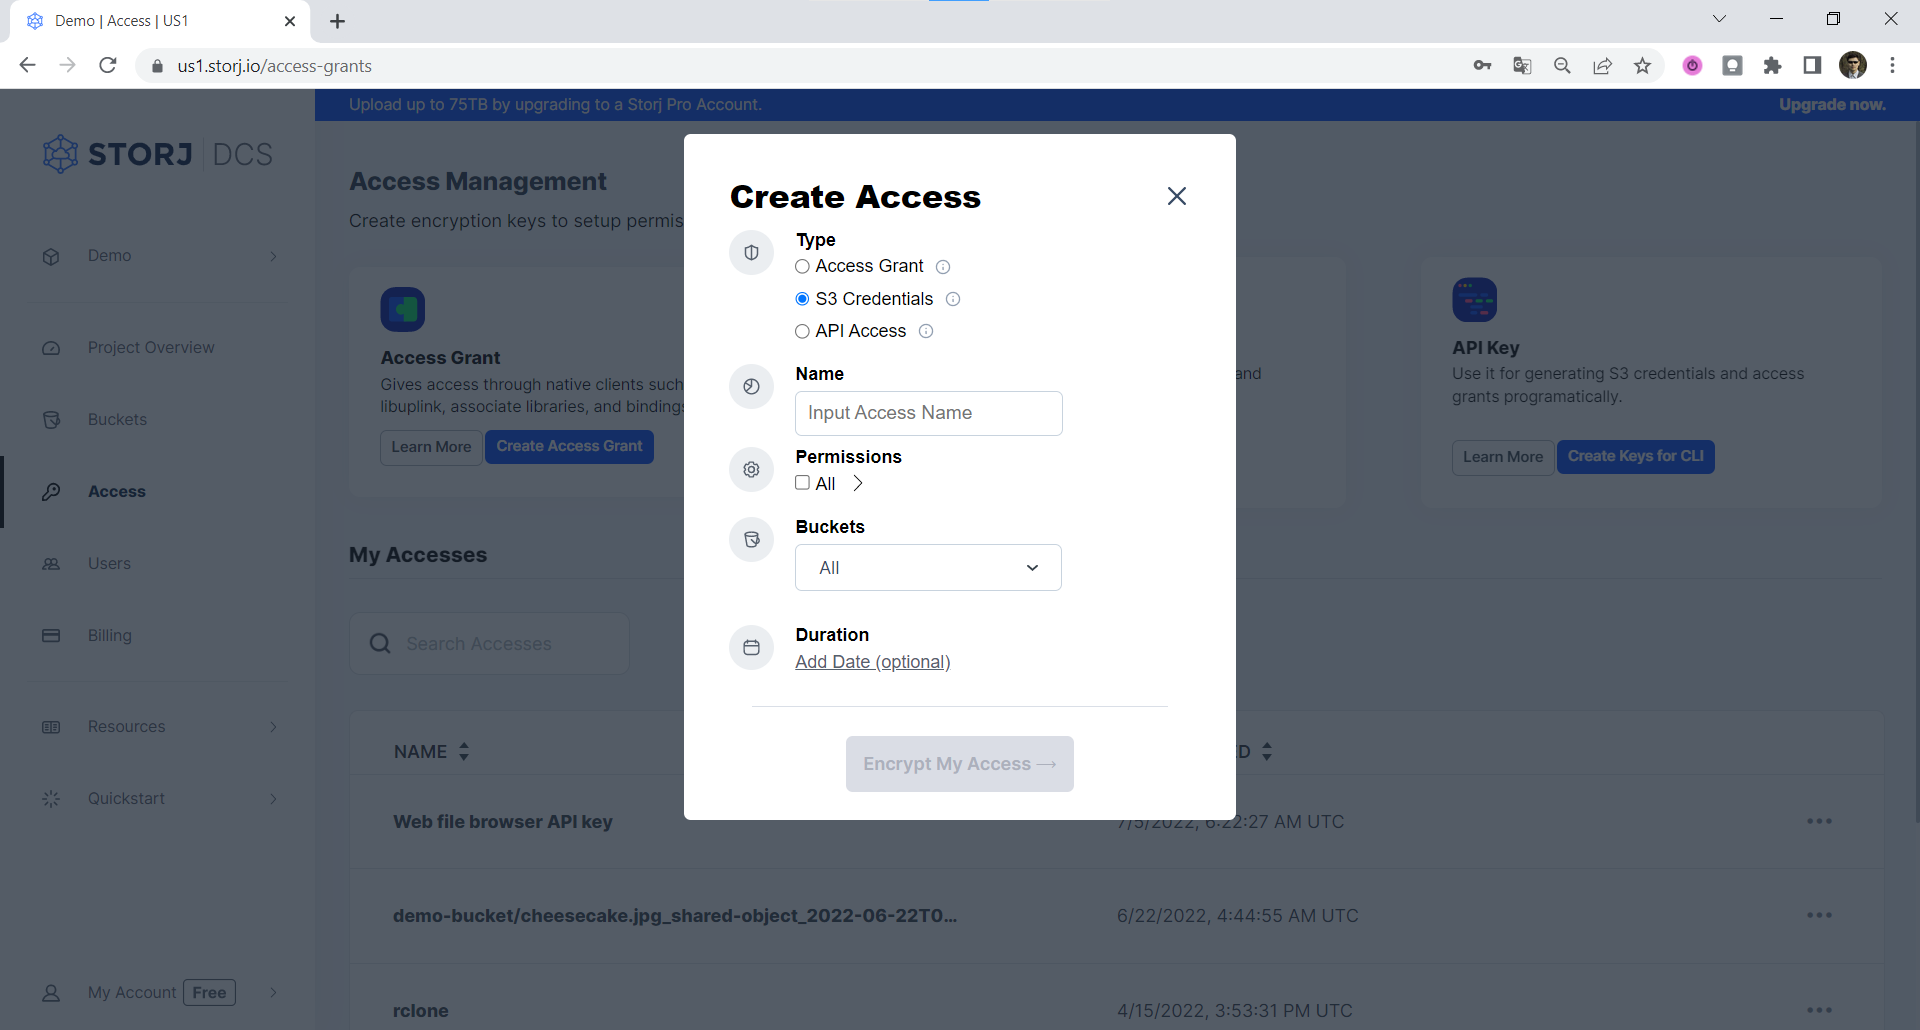
Assign the permissions you want this access grant to have, then click on Encrypt My Access:
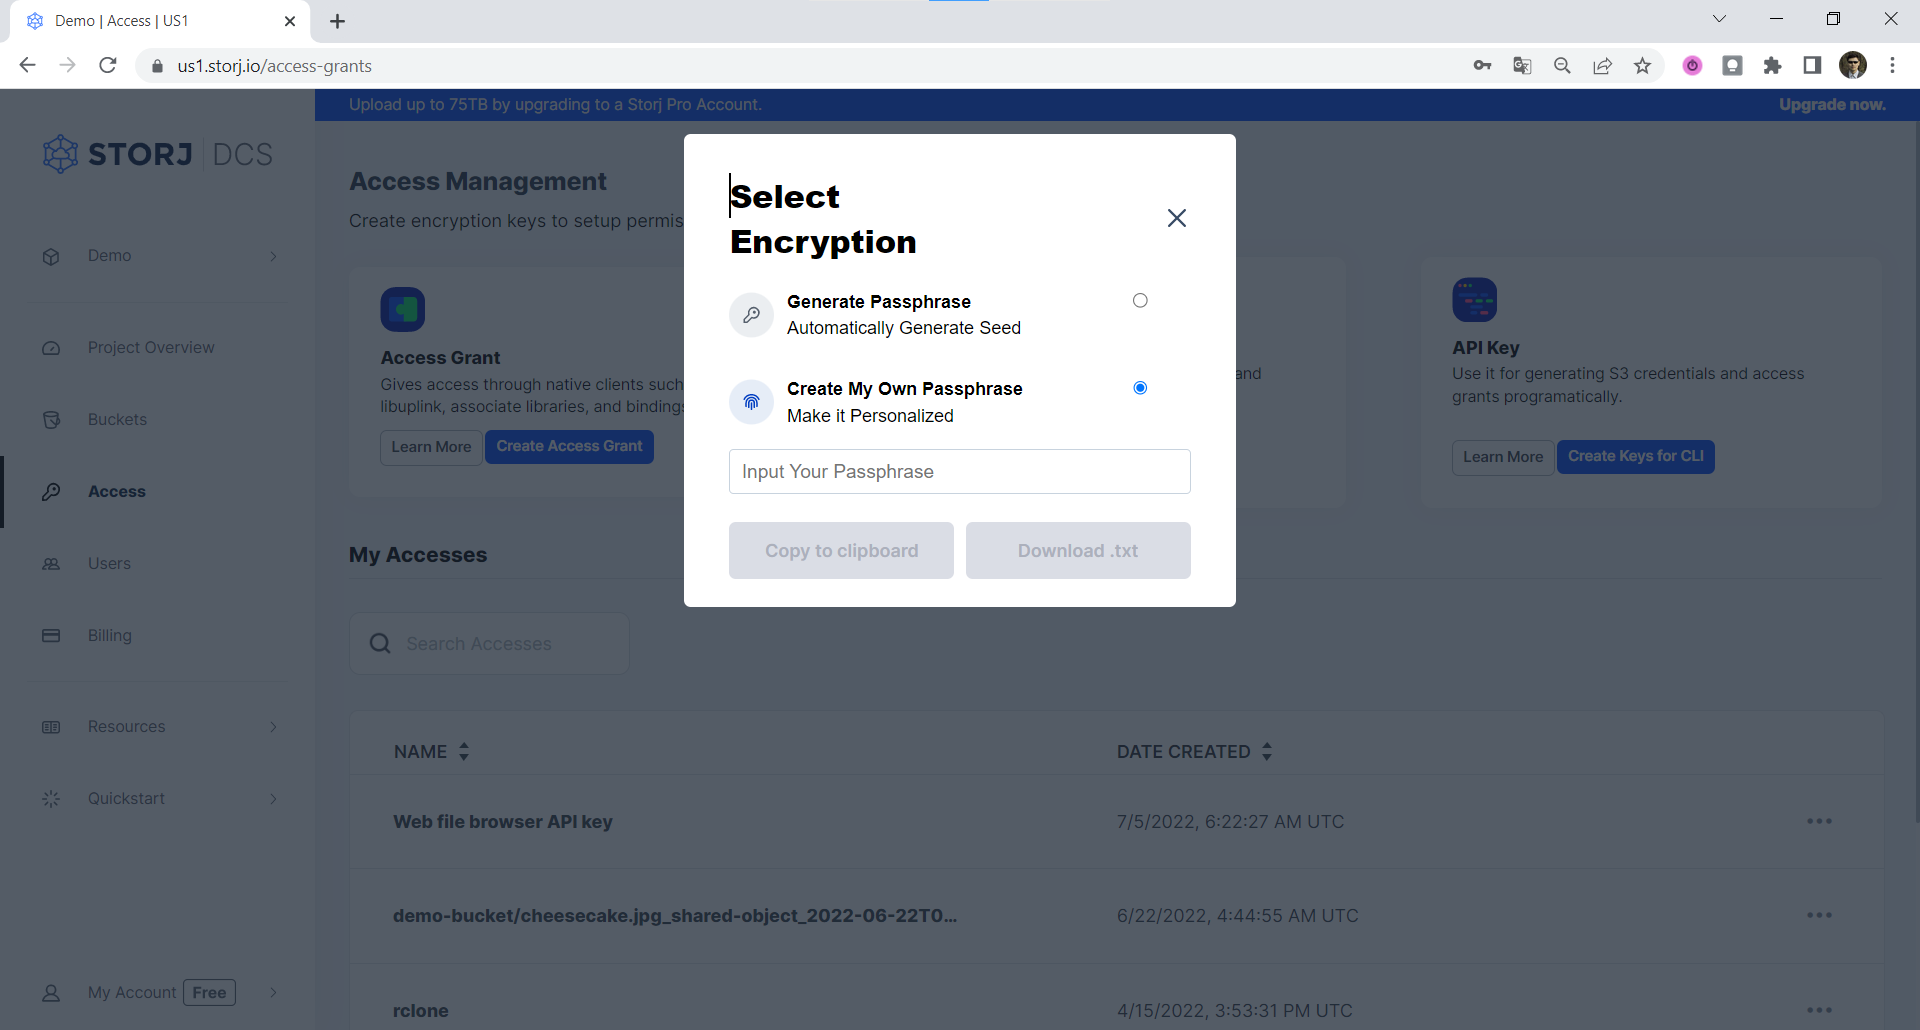
Enter the Encryption Passphrase you used for your other access grants. If this is your first access grant, we strongly encourage you to use a mnemonic phrase as your encryption passphrase (The GUI automatically generates one on the client-side for you.)
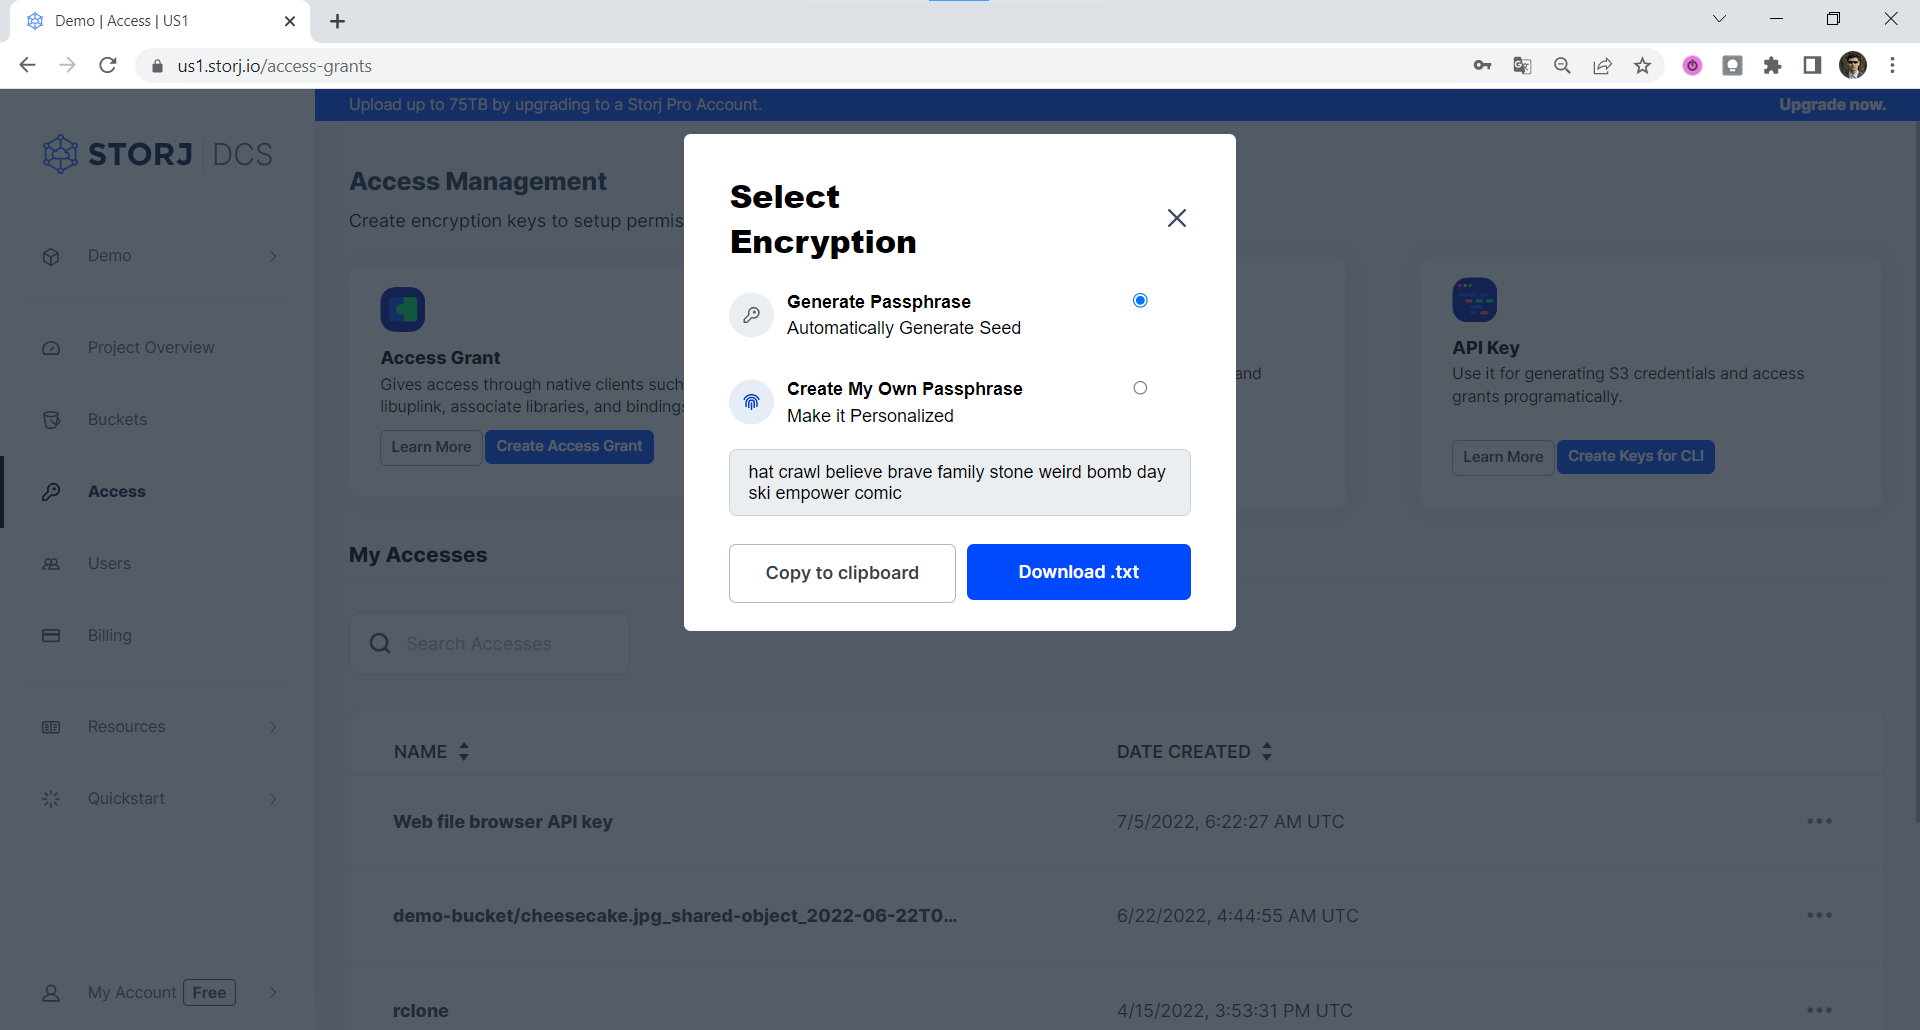
Click either on the Copy to clipboard link or Download .txt and then confirm that you copied your Encryption Phrase to a safe place.
Please save this Encryption Passphrase in a safe place as it will be required to decrypt and view your sentry mode videos from the web.
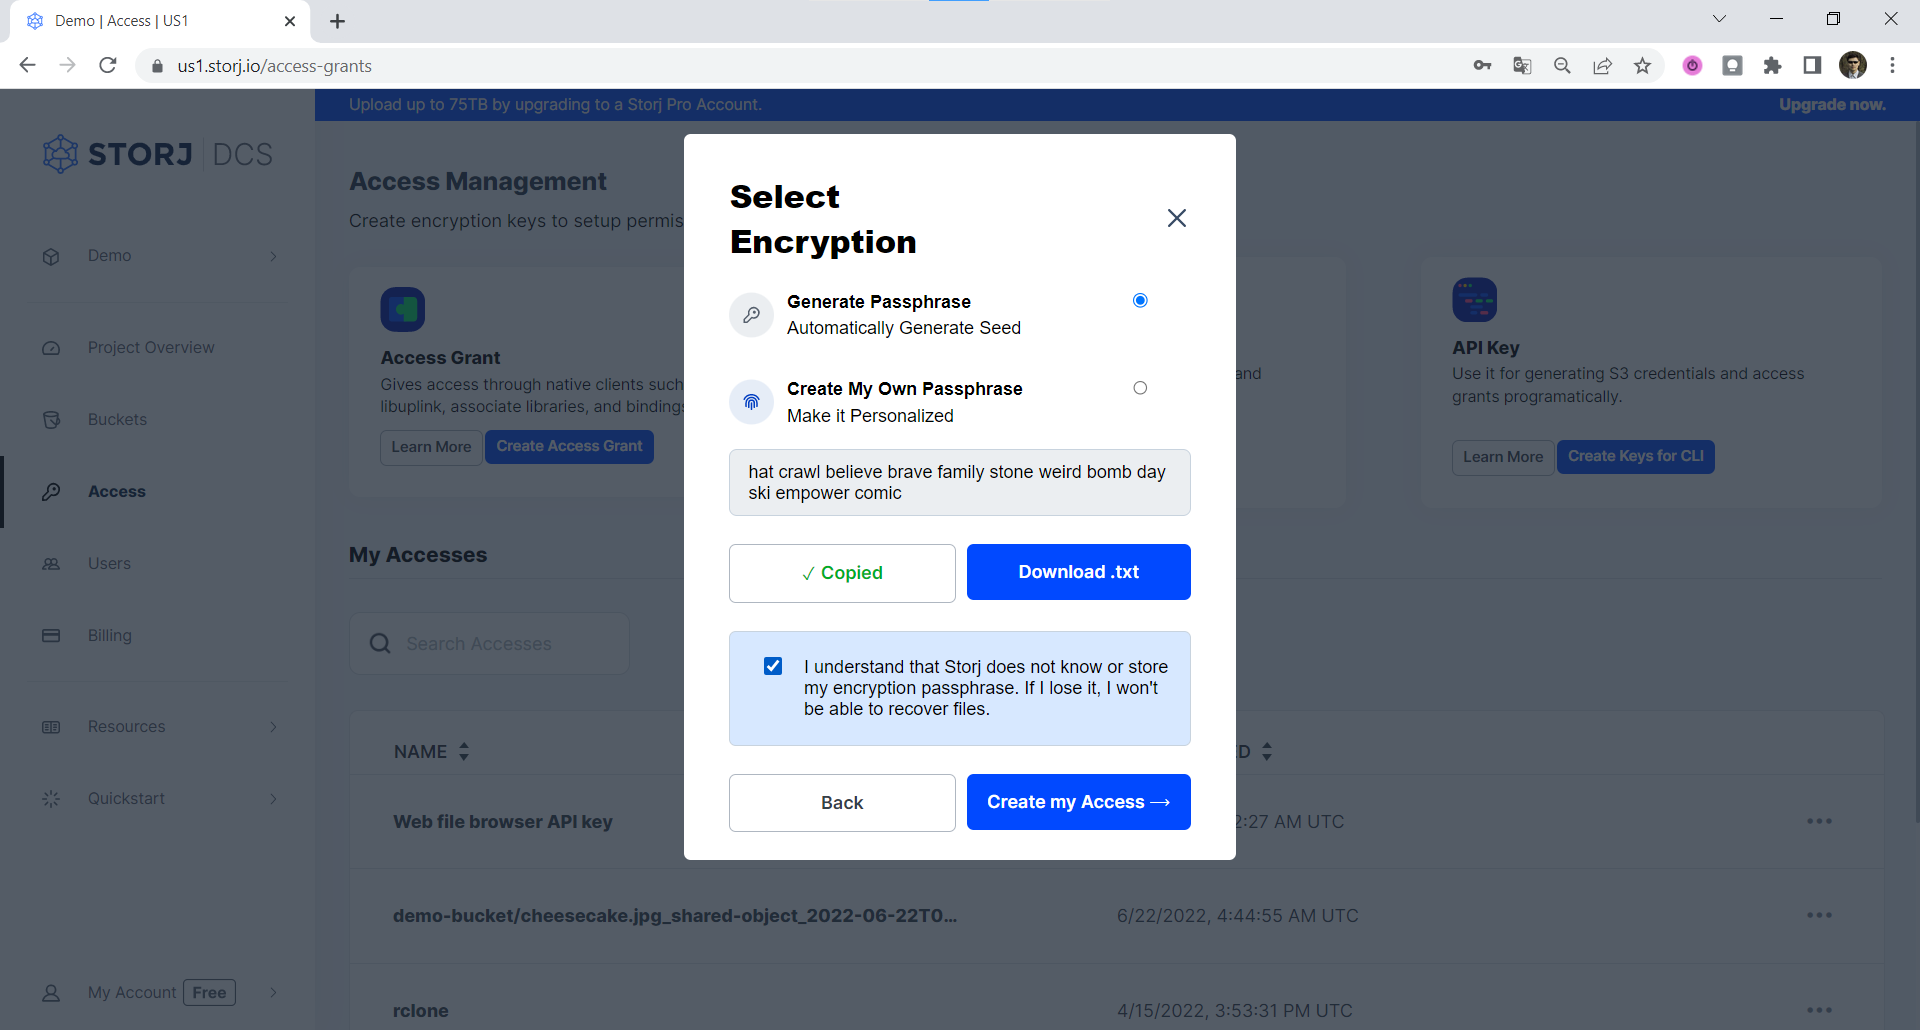
Click the Create my Access link to finish generating of S3 credentials.
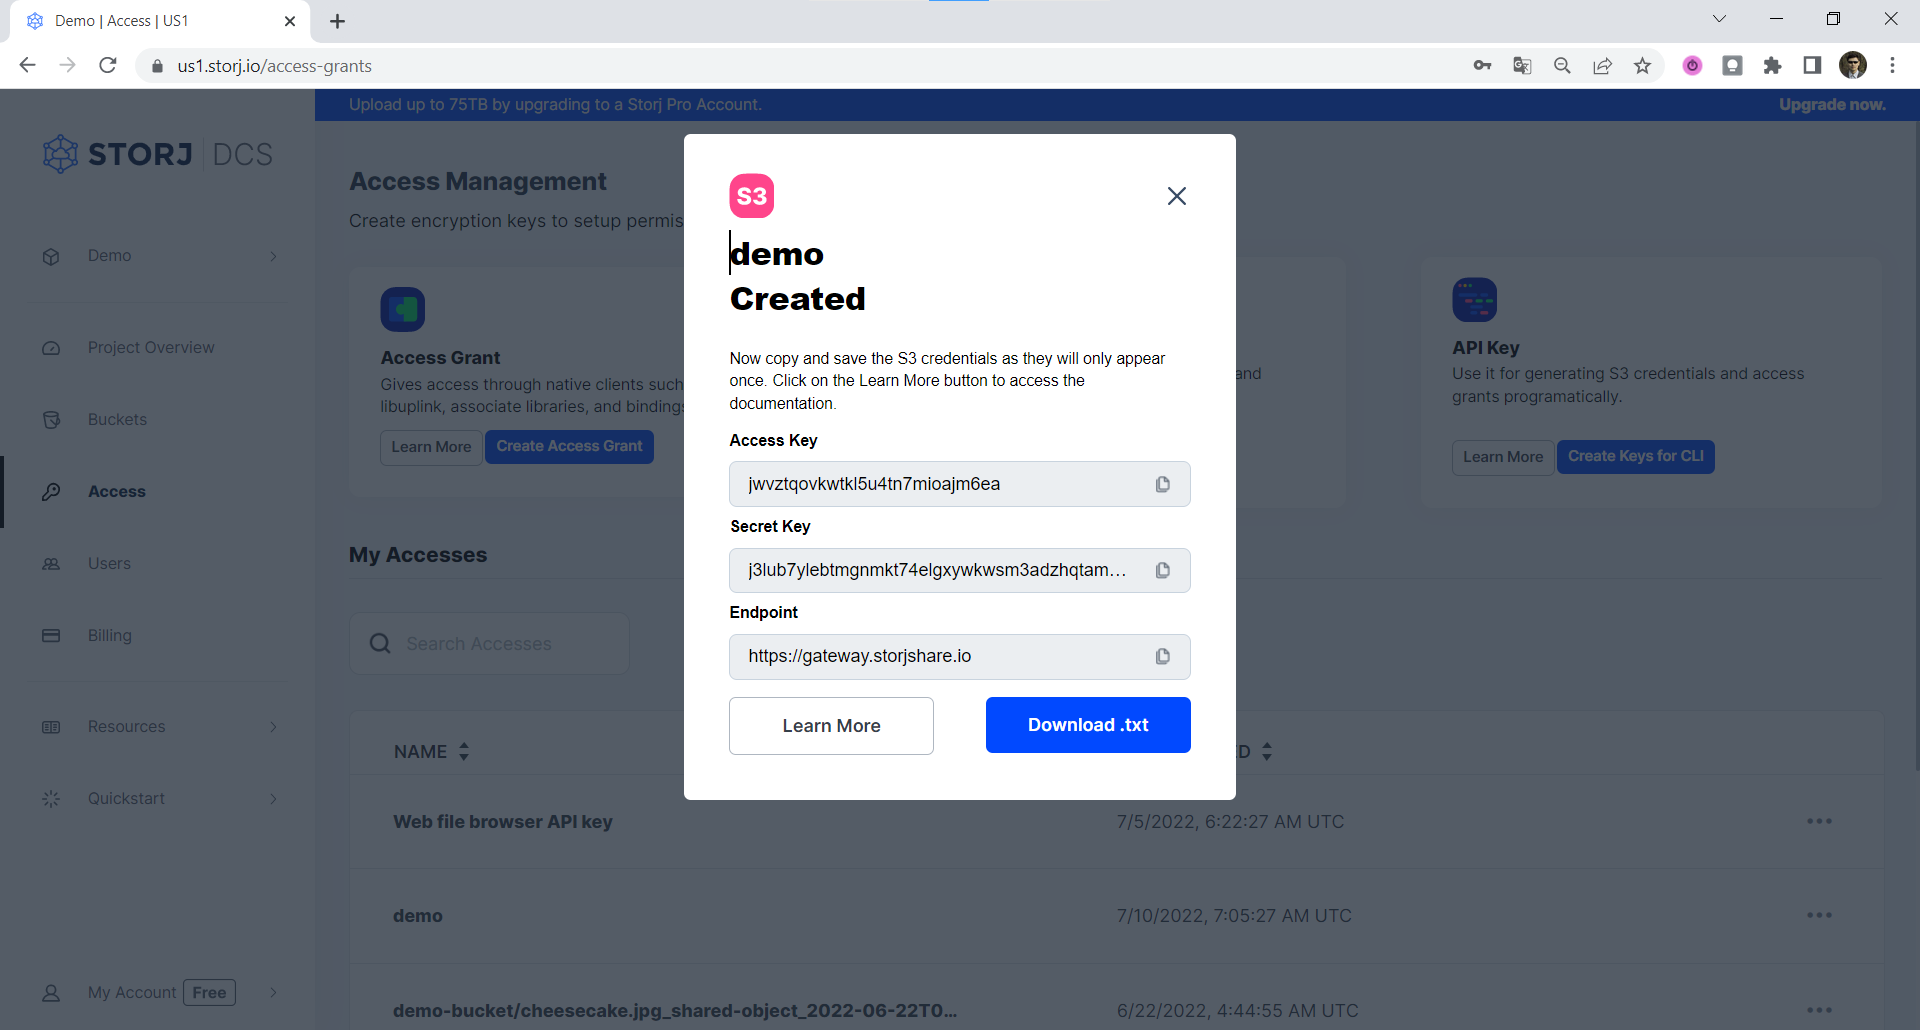
Copy your Access Key, Secret Key, and Endpoint to a safe location. We will use this information later to configure Rclone with the hosted Gateway MT.
Now we have our credentials and can move on to configuring teslausb.
Overview of credentials collected
Encryption Passphrase
- We will need this to view and/or retrieve clips in the browser later
Access Grant
- Not used for this lab but please record it anyway for your reference
Gateway MT (S3) Credentials
Used to connect to the hosted gateway via Rclone
Access Key
Secret Key
Endpoint
Learn more about Access Management on Storj and using Access Grants.
Configure teslausb
Teslausb is the open source software that will run on the Raspberry Pi to send your videos to Storj. Now that you have your gateway credentials for Storj, you need to set up teslausb on the Raspberry Pi and configure it for use with those Storj credentials.
Part 1 - One-step setup
You'll find the one-step setup guide for testlausb in this GitHub repo: https://github.com/marcone/teslausb/blob/v2.5/doc/OneStepSetup.md
Quick Instructions
Download the latest release of the pre-built image from the repository’s releases page: https://github.com/marcone/teslausb/releases/latest
Flash the image to the SD card you plan on using in your Raspberry Pi. For this we can use belena Etcher (https://www.balena.io/etcher/) or any similar image flashing software, you can find some examples here.
Mount the SD card to edit the initial configuration file located in the
bootdirectory. Create ateslausb_setup_variables.confA sample config file is located in thebootfolder on the SD card. The latest sample is also available from GitHub via pi-gen-sources/00-teslausb-tweaks/files/teslausb_setup_variables.conf.sample.Specifically, set the `ARCHIVE_SYSTEM` to `none`. This is because we need to boot the Pi to install some additional software to push our sentry clips in Storj. Please also set your Wifi settings. Save the file when you are done editing.
Below is a small portion of the config file showing 'export ARCHIVE_SYSTEM=none' as well as the wifi settings.
Part 2 - Rclone Configuration
Now that Raspbian is installed and configured, it's time to set up Rclone, the software that will actually transfer the files from the Raspberry Pi to Storj. (If you're not familiar with Rclone, it's Rsync for cloud storage.) Boot up that Pi and let' s keep it moving.
The Rclone Setup Guide for teslausb is available at: https://github.com/marcone/teslausb/blob/v2.5/doc/SetupRClone.md
The steps you need to follow are also provided below:
SSH into the Pi, become root and remount the file system's read-write:
Install Rclone:
Configure Rclone with the settings and Storj gateway credentials created above:
Create a bucket tesla-m3-cam for saving clips:
Update your teslausb_setup_variables.conffile in the boot directory with the following information. Ensure your Wifi variables are also set. If your variables have any spaces, please put your variables in quotes like this: "variable"
Shut down your Pi and plug it into your Tesla: If you are using a RPi4, you only need to plug the Pi via its USB-C cable into one of the Tesla's USB-C ports, this will provide power and data transfer. If using a RPi Zero W, you will need to use the usb/data USB port on the Pi.
To test that everything is set up correctly, you can navigate to the Pi’s web interface at <rpi ip address>:80. Enable Honk to Save Clips on your Tesla, and then under the Tools page of your Raspberry Pi’s web interface, click the Trigger archive/sync button.
Follow along on the Archive log page to see your clips being acknowledged and pushed to Storj.
Finally, log in to your Storj account and take advantage of the Object Browser to manage and share your clips!