Splunk
Splunk is a data analytics platform that provides data-driven insights across all aspects of a company.
Visit https://www.splunk.com/ for more information.
Advantages of Splunk with Storj
Adds powerful features to your data storage. Monitor, analyze, and visualize data.
Access your data from anywhere thanks to Splunk's unified hybrid experience.
Integration
Integrating Splunk with Storj requires S3 credentials from Storj that will be added to the indexes.conf in Splunk.
Splunk Enterprise integrates with any S3-compatible cloud storage platform.
To complete the integration, you will need:
A Storj account
An on-premises instance of Splunk
Splunk is compatible with Windows, Mac, and Linux OS.
To complete the integration, follow the steps below.
Create a Storj Account
To begin, you will need to create a Storj account. If you already an account, go to https://storj.io/login.
Navigate to https://www.storj.io/signup?partner=splunk to sign up. Enter your full name, email address, and a password, as shown below:

Create a Bucket
Once you have your Storj account you can create a bucket for your data to be stored in.
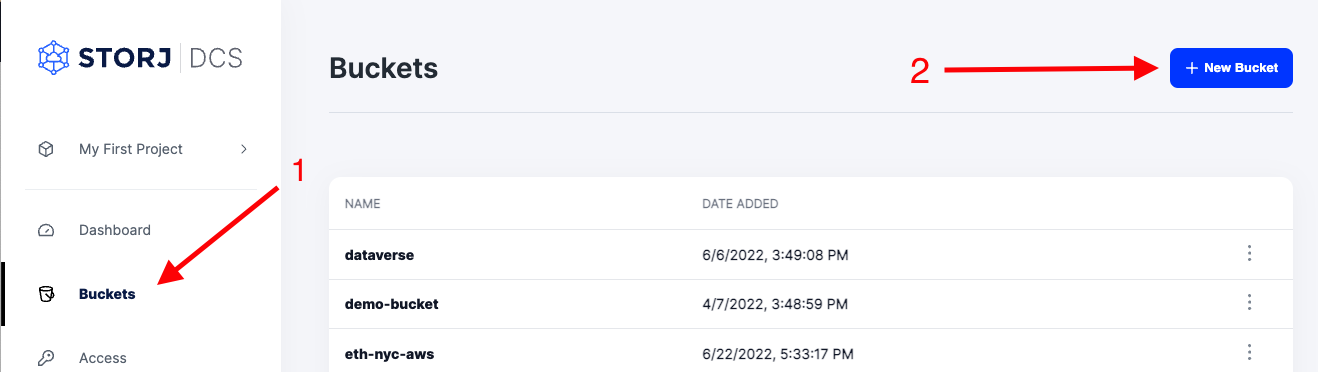
1. Navigate to “Buckets” on the left side menu.
2. Click “New Bucket” on the top right.
3. Assign the bucket an easily identifiable name, such as "my-bucket".
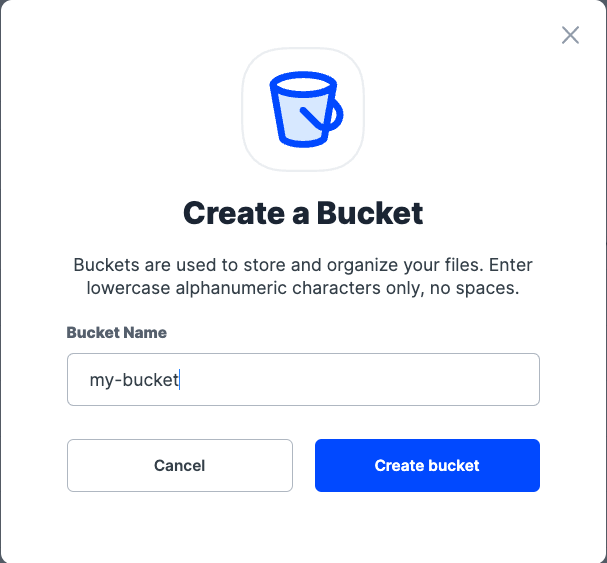
4. Click Create bucket
Generate S3 credentials
Storj has an Amazon S3 compatible API and you'll need generate S3 credentials to use it. S3 credentials consist of an access key, secret key, and endpoint.
Create S3 credentials in the Storj web console:
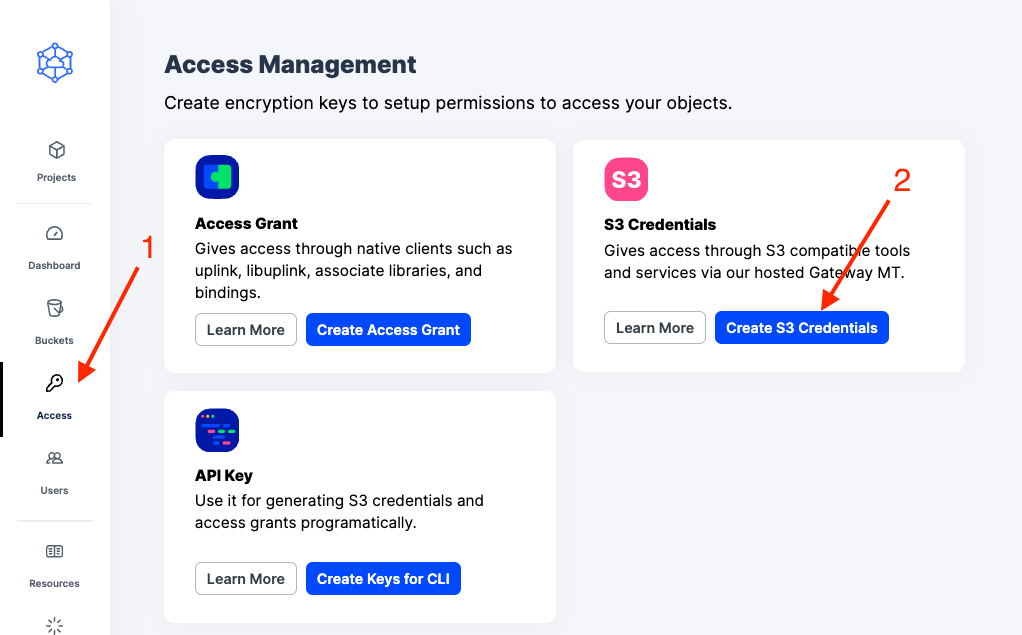
1. Navigate to Access on the left side menu.
2. Click Create S3 Credentials under the S3 Credentials block.
3. When the Create Access screen comes up, set specifications according to the following guidelines:
Type: S3 Credentials
Name: The name of the credentials (e.g. my-access)
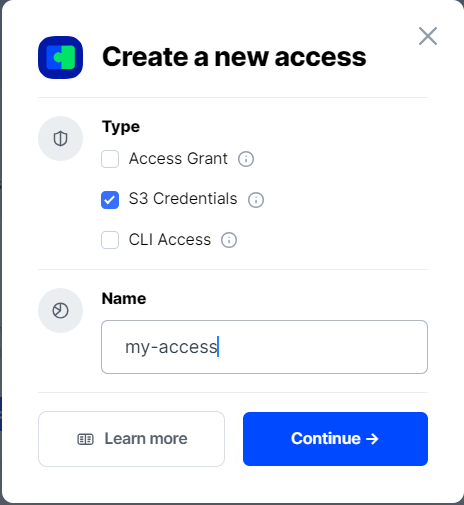
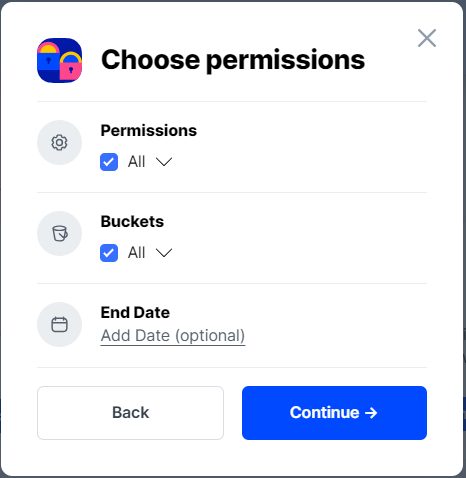
4. Click Continue to provide permissions
Permissions: All
Buckets: Feel free to specify the bucket you created above (e.g. my-bucket), or leave as “All”
End date: provide an expiration date for these credentials (optional)
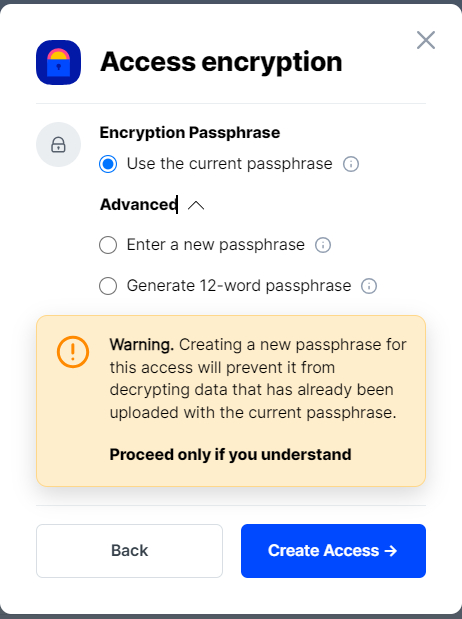
5. Click Continue to provide Access encryption Information
Use the current passphrase: this is default option
Advanced: you may provide a different encryption phrase either your own or generate a new one.
Enter a new passphrase: use this option, if you would like to provide your own new encryption phrase
Generate 12-word passphrase: use this option, if you would like to generate a new encryption phrase
In order to see the data uploaded to your bucket in the web console, you must unlock the bucket with the same encryption passphrase as the credentials.
6. Click Create Access to finish creation of your S3 credentials
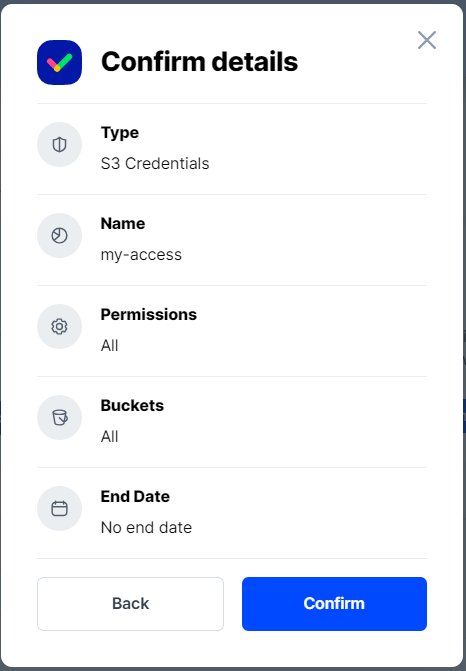
7. Click Confirm the Confirm details pop-up message
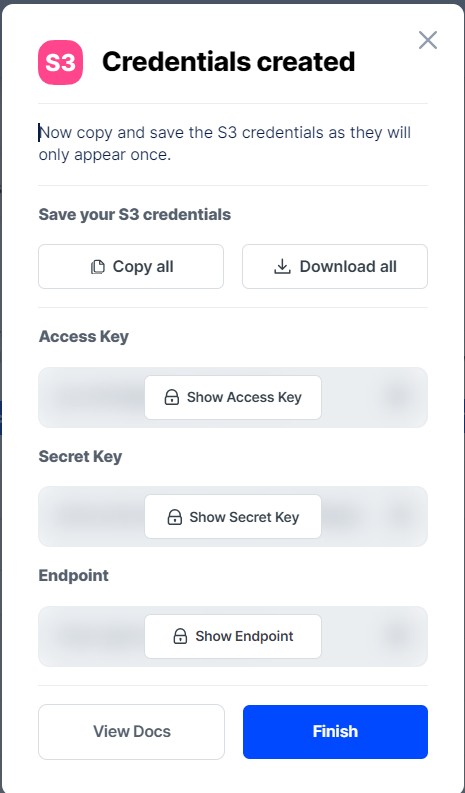
8. Your S3 credentials are created. Write them down and store them, or click the Download all button. You will need these credentials for the following steps.
Connecting Splunk to Storj
To complete the integration, you will need the S3 credentials created in the previous steps and an instance of Splunk Enterprise on your local machine.
Splunk Access
To get started with Splunk Enterprise, visit https://www.splunk.com/en_us/products/splunk-enterprise.html. Either request a free trial or contact the Splunk sales team.
Connect Storj remote storage
1. To connect Storj remote storage to Splunk, add Storj volume information to indexes.conf. This is usually added at the top of the file.
See Splunk's indexes.conf documentation for more details.
Name this volume Storj and specify credentials underneath.
The access key, secret key, and endpoint are those generated in Storj in the previous steps of this tutorial.
For the
path, uses3://splunk/.
2. Restart Splunk
Verify Connectivity
1. Create a test file using the following command:
2. Use Splunk to attempt to push the test file into Storj using the Storj volume just created in Splunk:
3. You should see the file listed in the shell and in your Storj web UI.
Add the remote storage to a provisioned index
1. In Splunk, create an index and name it something memorable such as "Storj". This is the index you will add the Storj volume to.
2. Mount the Storj volume under the Storj index stanza in indexes.conf:
3. Restart Splunk
4. Force a data roll from hot to warm for testing purposes by performing an internal rest call. You will need to authenticate with your Splunk username and password.
Alternate call without credentials. You will still be prompted for credentials:
Success!
Once the bucket is rolled to warm, it will populate in its own folder within the Storj bucket. Smart Store has been fully enabled for the index.
Smartstore allows many other items to be configured, please reference the following documentation for additional configuration options: