MSP360
MSP360 Managed Backup and from Cloudberry Labs is a cross-platform storage backup and disaster recovery solution designed for internal IT departments and managed service providers. It integrates with any S3-compatible cloud storage.
For more information, visit msp360.com, or sign up for a free trial.
Advantages of MSP360 with Storj
Outstanding security features, including immutability, or object lock, encryption, and 2-factor authentication.
The ability to save on costs by optimizing storage using the GFS retention policy.
A centralized SaaS control allows for simple management of backups.
Integration
MSP360 integrates with Storj cloud storage through the S3 protocol.
To integrate MSP360 with Storj, you will need to create S3 credentials for MSP360 in Storj and pass them to the MSP360 managed backup server through the MSP360 web interface or SaaS control.
Requirements
An active Storj account
- Navigate to https://storj.io/signup?partner=MSP360 to sign up, or log in https://storj.io/login if you already have an account.
A bucket for MSP360 in your Storj instance.
An MSP360 Managed Backup account.
Access to the MSP360 Web UI.
If you do not have an MSP360 account already, you can request a demo from their website.
Create a Storj Account
To begin, you will need to create a Storj account. If you already an account, go to https://storj.io/login.
Navigate to https://storj.io/signup to sign up. Enter your full name, email address, and a password, as shown below:

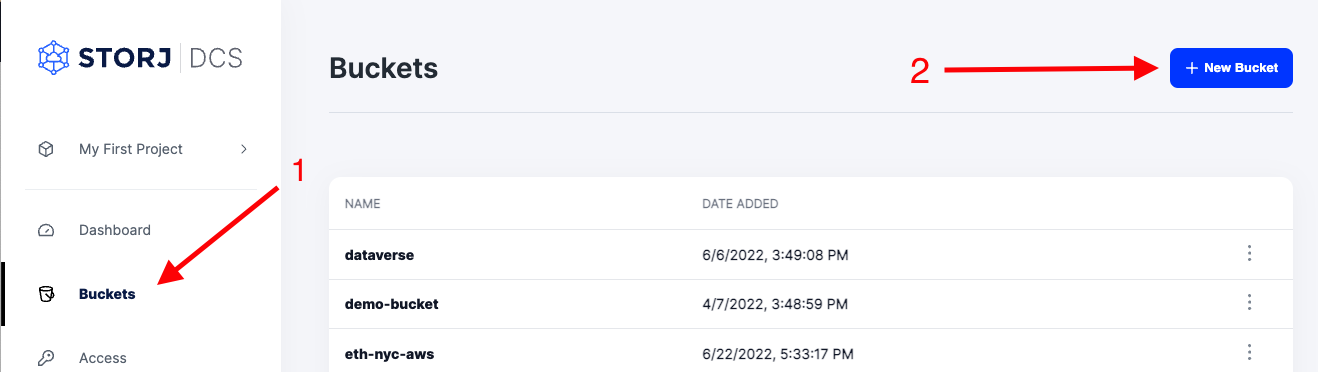
Create a Bucket
Once you have your Storj account you can create a bucket for your data to be stored in.
1. Navigate to “Buckets” on the left side menu.
2. Click “New Bucket” on the top right.
3. Assign the bucket an easily identifiable name, such as "my-bucket".
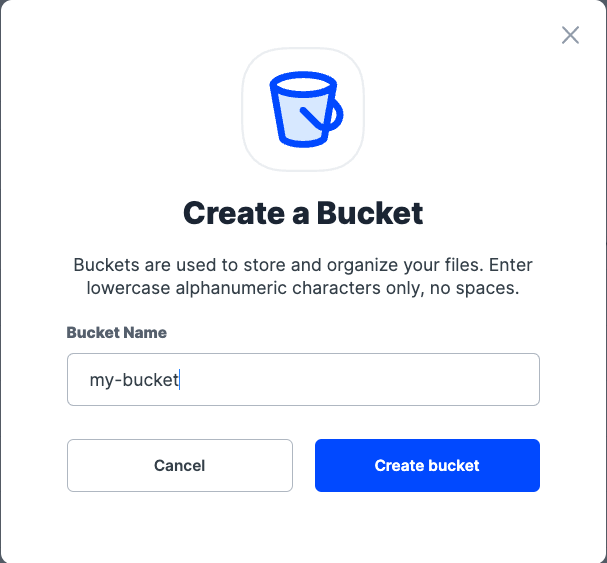
4. Click Create bucket
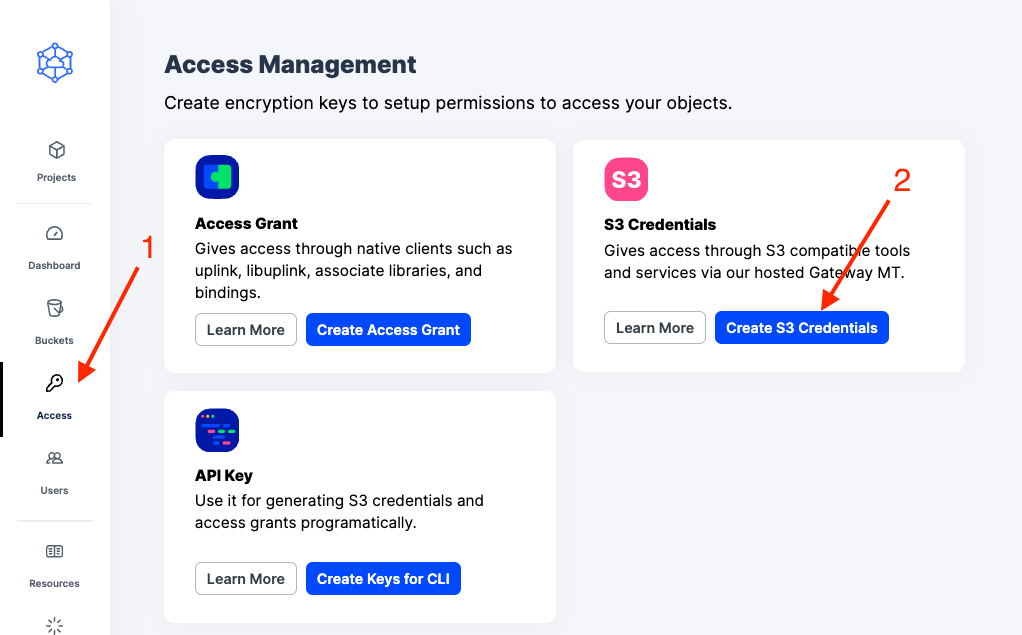
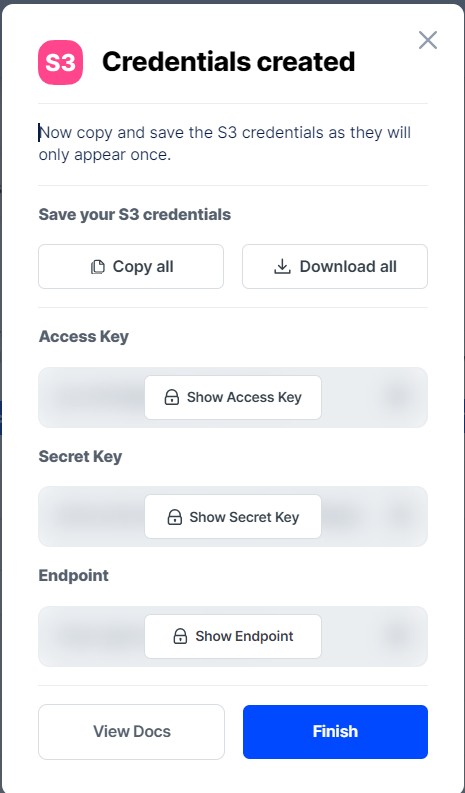
Generate S3 credentials
Storj has an Amazon S3 compatible API and you'll need generate S3 credentials to use it. S3 credentials consist of an access key, secret key, and endpoint.
Create S3 credentials in the Storj web console:
1. Navigate to Access on the left side menu.
2. Click Create S3 Credentials under the S3 Credentials block.
3. When the Create Access screen comes up, set specifications according to the following guidelines:
Type: S3 Credentials
Name: The name of the credentials (e.g. my-access)
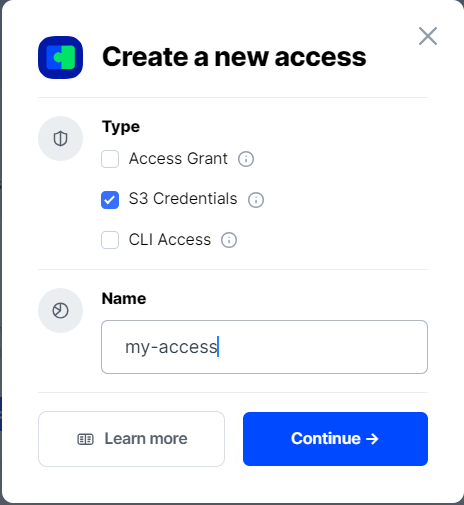
4. Click Continue to provide permissions
Permissions: All
Buckets: Feel free to specify the bucket you created above (e.g. my-bucket), or leave as “All”
End date: provide an expiration date for these credentials (optional)
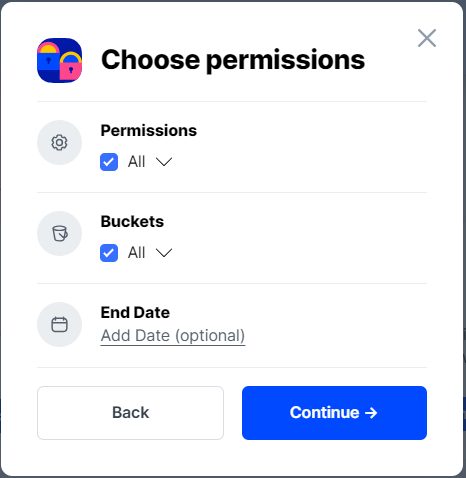
5. Click Continue to provide Access encryption Information
Use the current passphrase: this is default option
Advanced: you may provide a different encryption phrase either your own or generate a new one.
Enter a new passphrase: use this option, if you would like to provide your own new encryption phrase
Generate 12-word passphrase: use this option, if you would like to generate a new encryption phrase
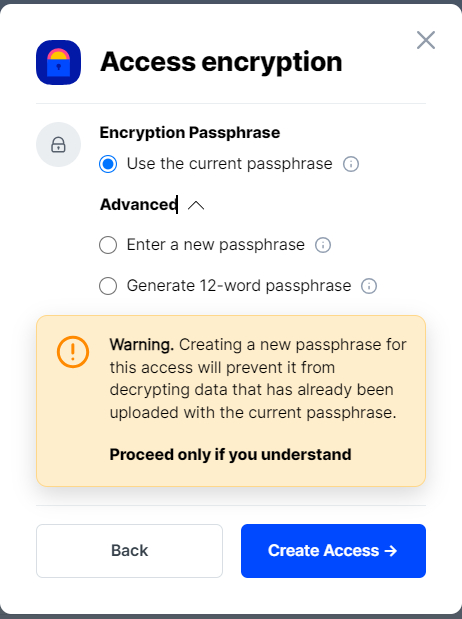
In order to see the data uploaded to your bucket in the web console, you must unlock the bucket with the same encryption passphrase as the credentials.
6. Click Create Access to finish creation of your S3 credentials
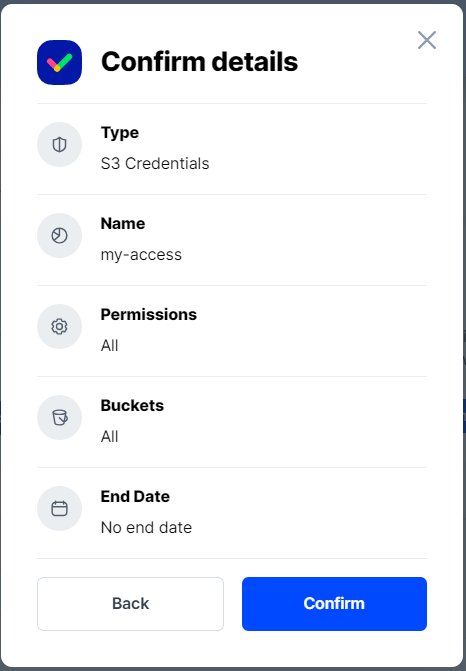
7. Click Confirm the Confirm details pop-up message
8. Your S3 credentials are created. Write them down and store them, or click the Download all button. You will need these credentials for the following steps.
Connecting MSP360 to Storj
MSP360 Configuration
1. Either request a demo of MSP360 managed storage, or log into your MSP360 managed storage account, if you have one.
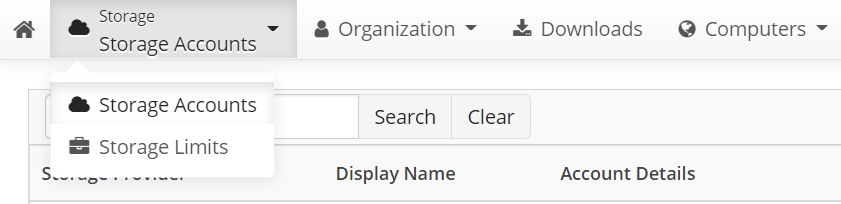
2. In the MSP360 web UI, select Storage > Storage Accounts in the upper left hand corner.
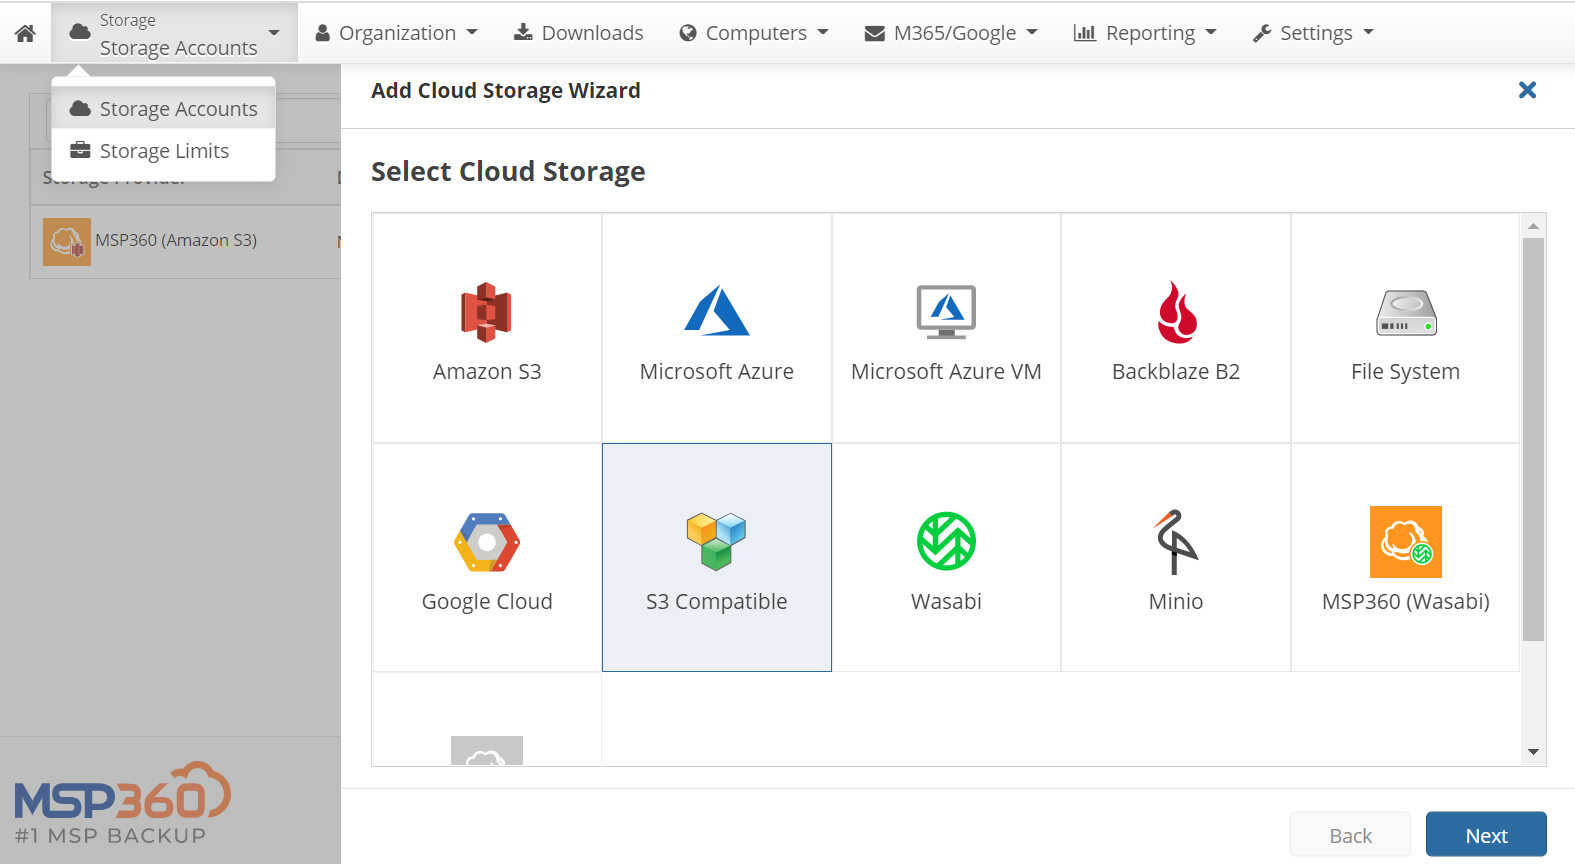
3. Select Add Account in the upper right.
4. Choose "S3 Compatible" from the account options. Then select Next.
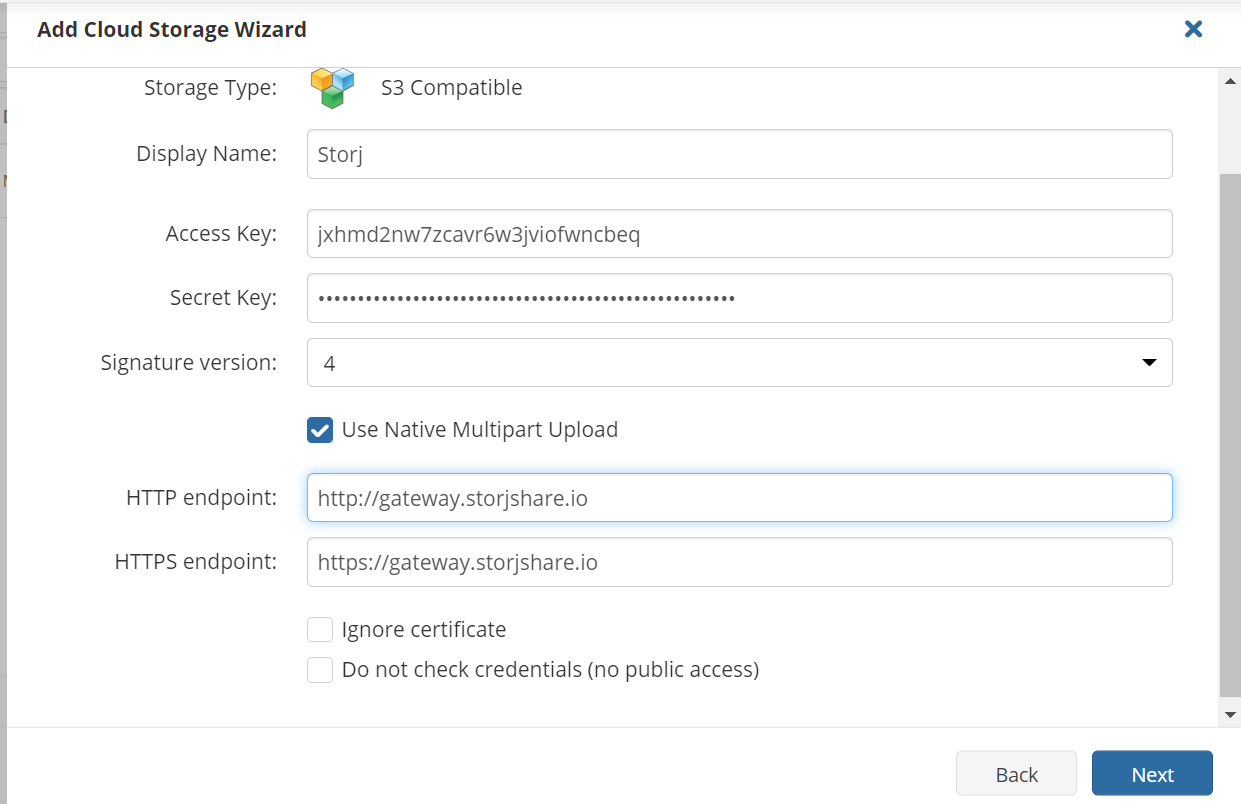
5. Complete the required fields in the S3 Compatible connection window:
Under Display Name, enter something recognizable, such as "Storj".
Under Access Key, enter the access key from the S3 credentials you generated for MSP360 in Storj.
Under Secret Key, enter the secret key from the S3 credentials you generated for MSP360 in Storj.
Leave Signature Version at 4, if desired.
Check Use Native Multipart Upload, if desired.
Enter the HTTP endpoint, HTTPS endpoint, or both. This endpoint appears with the generated S3 credentials.
If desired, check the Ignore certificate checkbox.
If desired, check the Do not check credentials box.
6. Select Next.
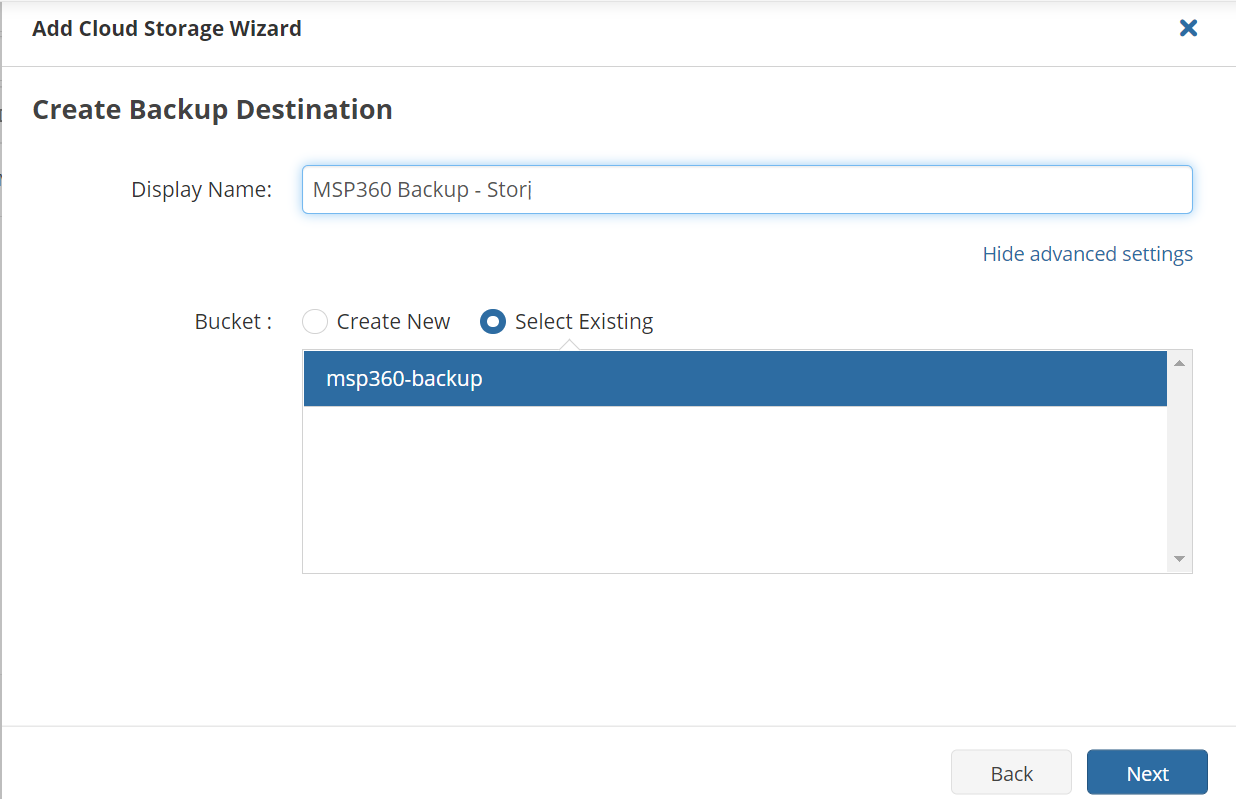
7. Under Create Backup Destination, choose something memorable for the display name, such as "MSP360-Backup - Storj".
8. Select Show Advanced Settings, and next to Bucket, select the Select Existing bubble. This pulls up the existing buckets in your Storj instance that have access to the S3 credentials for MSP360.
9. Select the bucket(s) you would like to sync with MSP360. In this case, choose the "msp360-backup" bucket you created in Storj earlier. Then select Next.
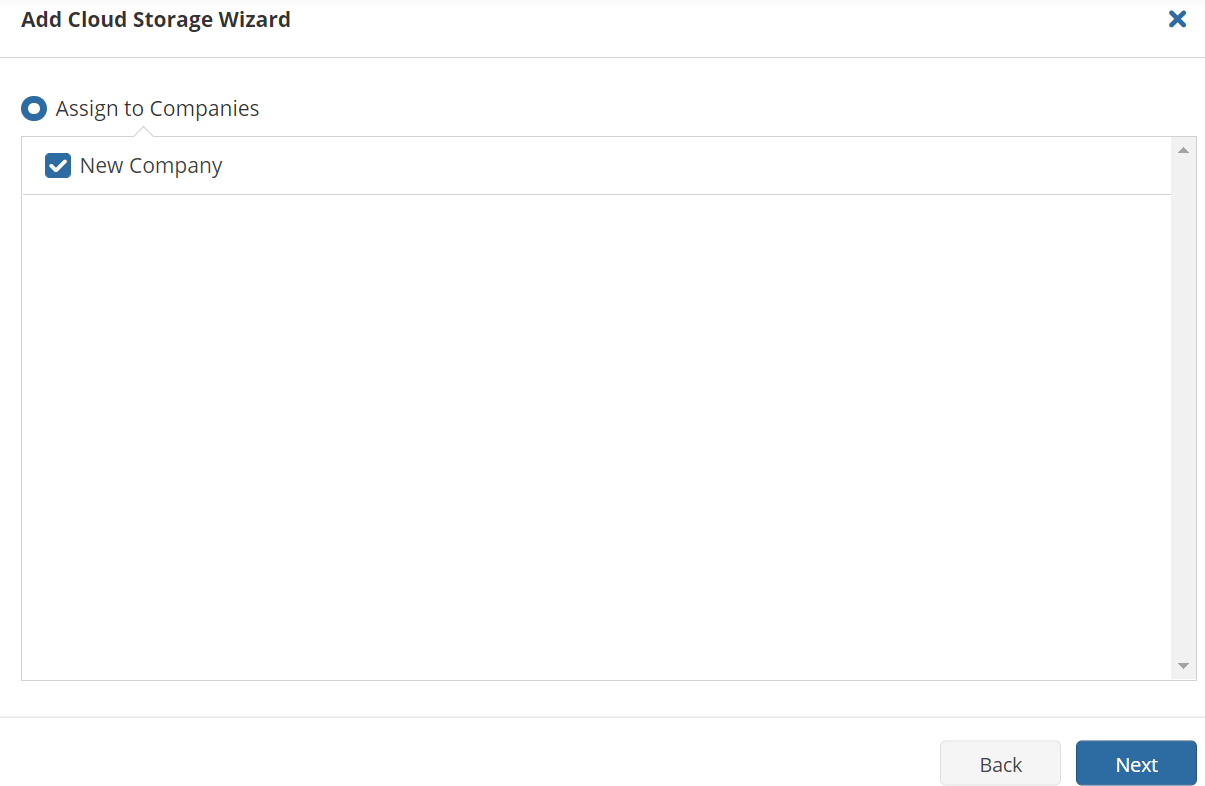
8. Under Assign To Company, select New Company. Then select Next.
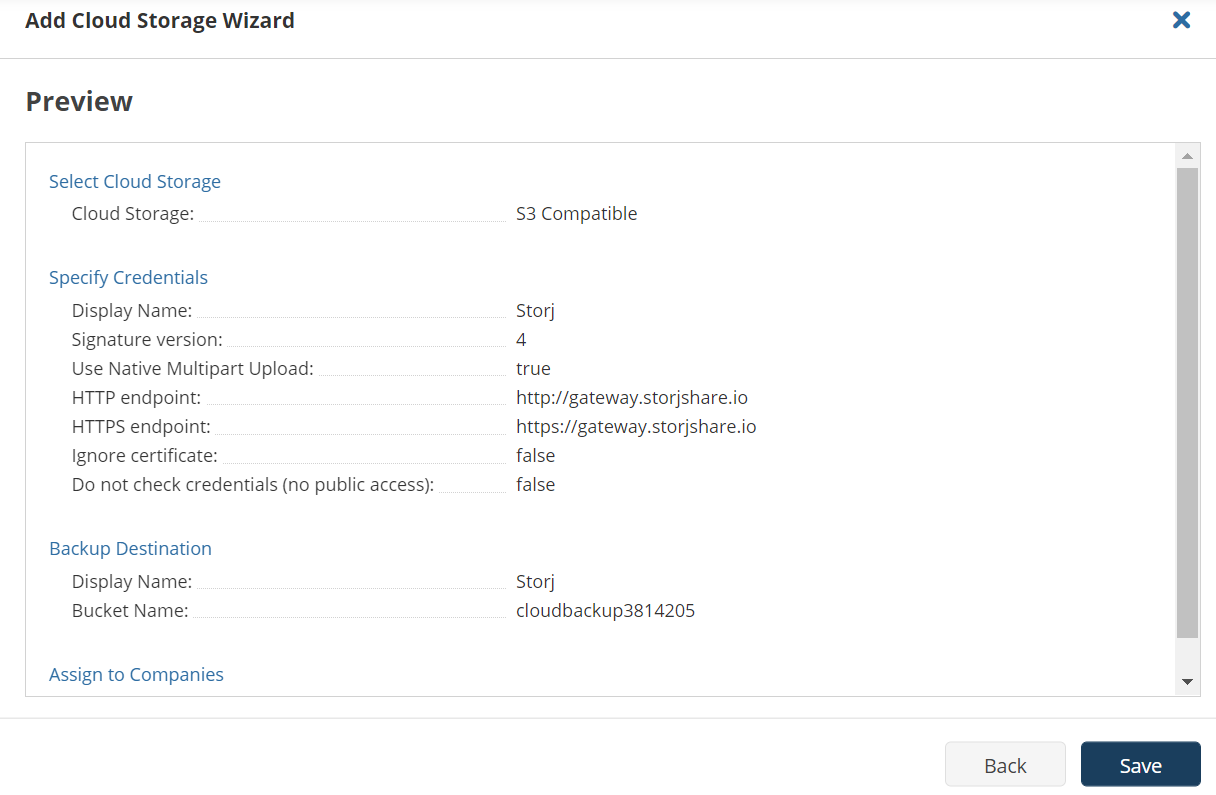
9. Preview the information in the preview window, then select Save.
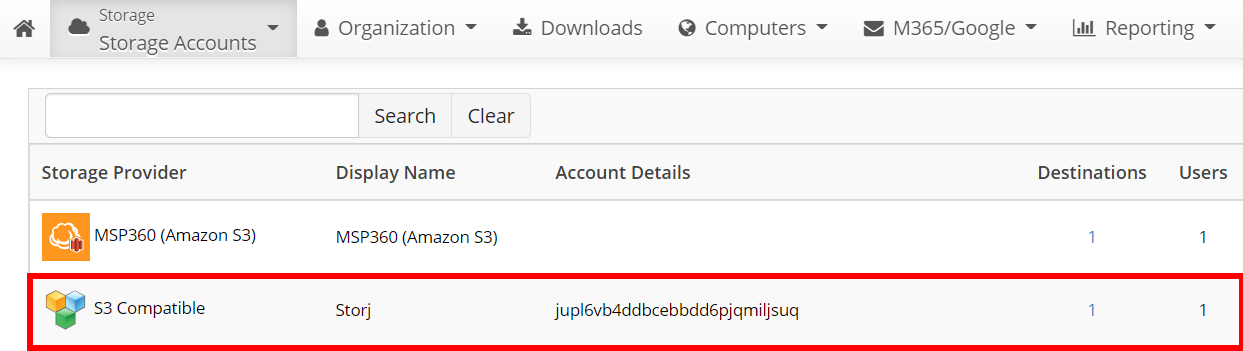
10. Once the account is saved, you will be able to see it in the list of all connected accounts under Storage Accounts.