Hammerspace
Hammerspace is a software solution that creates a global data environment mimicking the experience of local access to globally distributed data. Data connected under Hammerspace can include different, typically incompatible storage types, such as data centers and cloud storage, as well as locations. Hammerspace provides a unified view and control over all connected data as a single, easily accessible dataset.
Contact Hammerspace for a demo.
Advantages of Hammerspace with Storj
Universal data access layer: read and write to data from anywhere worldwide.
Unify your Storj data with data residing in legacy DAS, NAS, SAN, object storage, and other cloud storage environments.
Multiple mechanisms to protect data from disasters and attacks: snapshots, undelete, WORM (write once read many), and file versioning.
Unified view of files with a rich metadata layer: only necessary data is replicated when a file is accessed and worked on.
Integration
To integrate Storj with Hammerspace, you will need to create S3 credentials in Storj and add them within Hammerspace. Veeam uses a wizard to guide users in adding S3-compatible cloud storage.
Requirements
To begin, you will need to create a Storj account.
Navigate to https://storj.io/signup?partner=hammerspace to sign up, or log in https://storj.io/login if you already have an account.
A bucket for Hammerspace in your Storj instance.
A working Hammerspace environment.
Schedule a Hammerspace demo, or contact the Hammerspace team.
Create a Storj Account
To begin, you will need to create a Storj account. If you already an account, go to https://storj.io/login.
Navigate to https://storj.io/signup to sign up. Enter your full name, email address, and a password, as shown below:

Create a Bucket
Once you have your Storj account you can create a bucket for your data to be stored in.
1. Navigate to “Buckets” on the left side menu.
2. Click “New Bucket” on the top right.
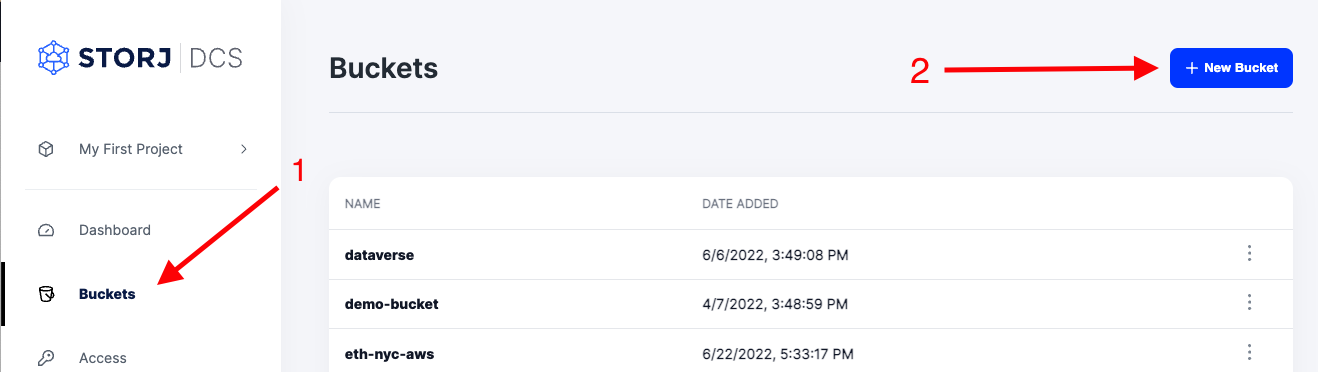
3. Assign the bucket an easily identifiable name, such as "my-bucket".
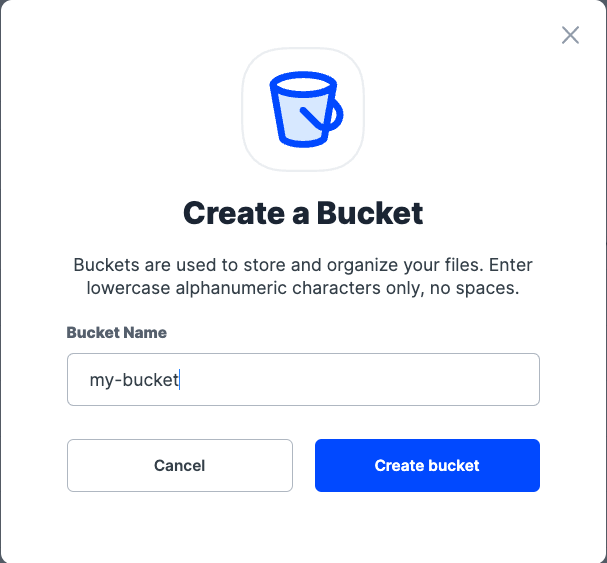
4. Click Create bucket
Generate S3 credentials
Storj has an Amazon S3 compatible API and you'll need generate S3 credentials to use it. S3 credentials consist of an access key, secret key, and endpoint.
Create S3 credentials in the Storj web console:
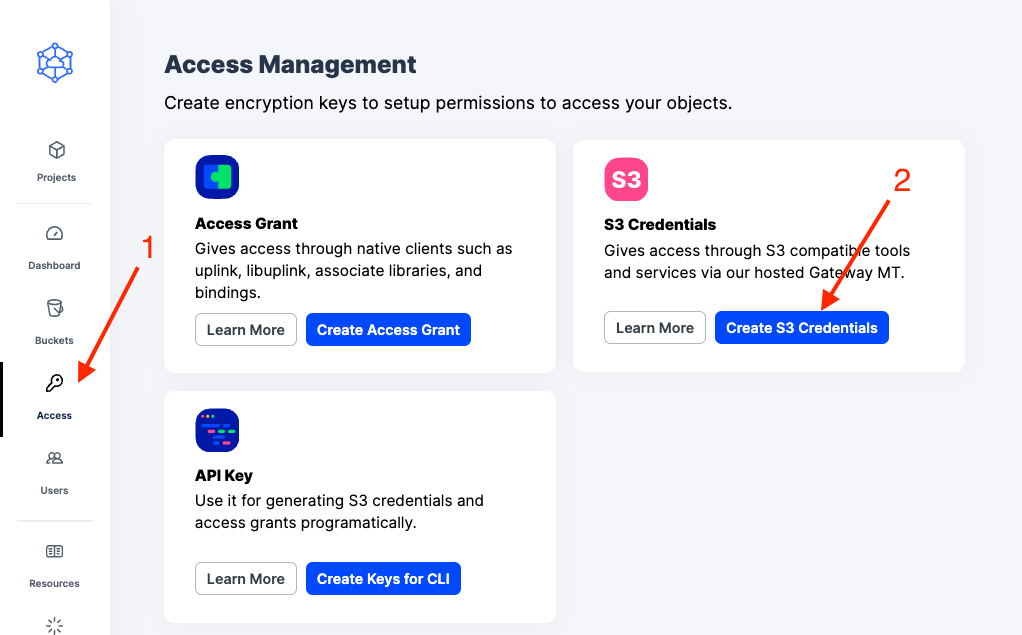
1. Navigate to Access on the left side menu.
2. Click Create S3 Credentials under the S3 Credentials block.
3. When the Create Access screen comes up, set specifications according to the following guidelines:
Type: S3 Credentials
Name: The name of the credentials (e.g. my-access)
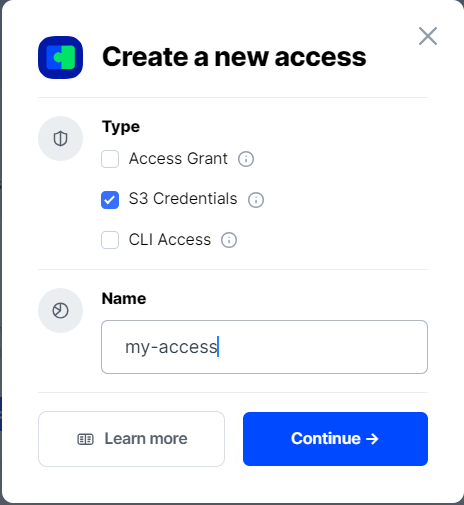
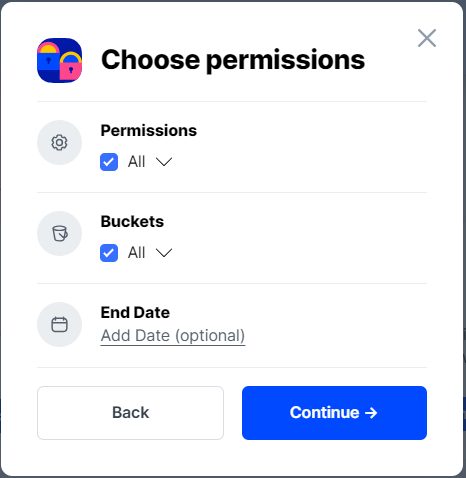
4. Click Continue to provide permissions
Permissions: All
Buckets: Feel free to specify the bucket you created above (e.g. my-bucket), or leave as “All”
End date: provide an expiration date for these credentials (optional)
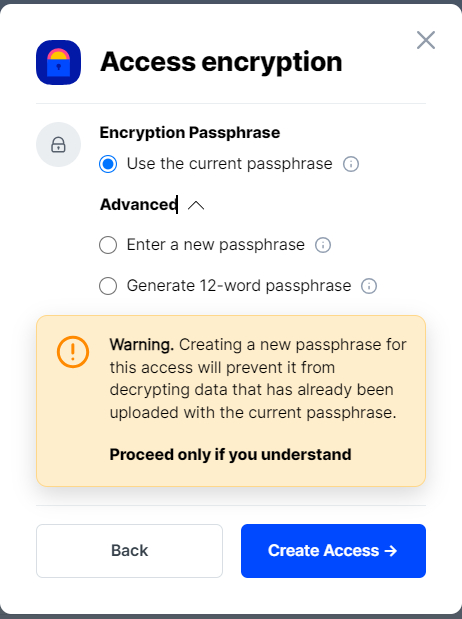
5. Click Continue to provide Access encryption Information
Use the current passphrase: this is default option
Advanced: you may provide a different encryption phrase either your own or generate a new one.
Enter a new passphrase: use this option, if you would like to provide your own new encryption phrase
Generate 12-word passphrase: use this option, if you would like to generate a new encryption phrase
In order to see the data uploaded to your bucket in the web console, you must unlock the bucket with the same encryption passphrase as the credentials.
6. Click Create Access to finish creation of your S3 credentials
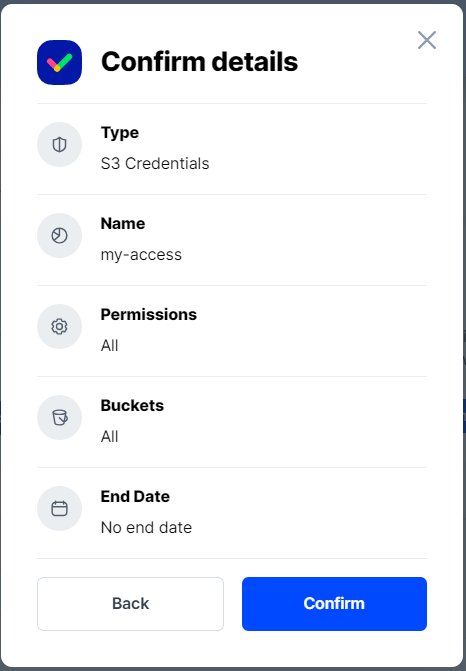
7. Click Confirm the Confirm details pop-up message
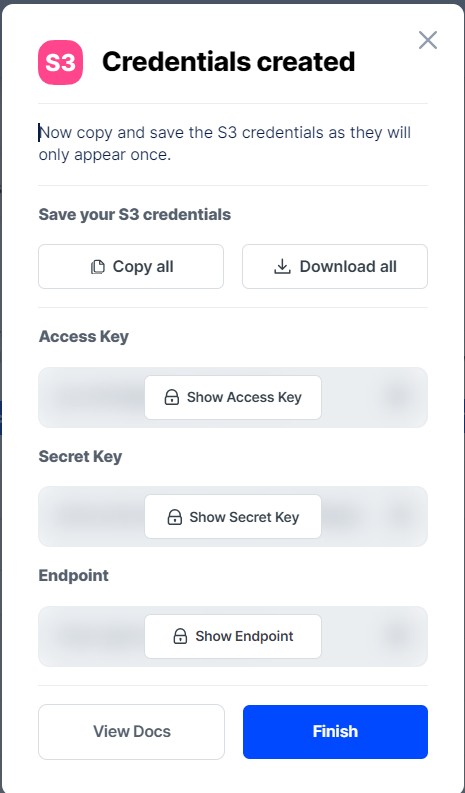
8. Your S3 credentials are created. Write them down and store them, or click the Download all button. You will need these credentials for the following steps.
Integrating Hammerspace with Storj
Hammerspace Configuration
This integration guide assumes that you have access to an active Hammerspace environment. To add Storj to your Hammerspace environment, follow the steps below:
1. Log in to your Hammerspace environment.

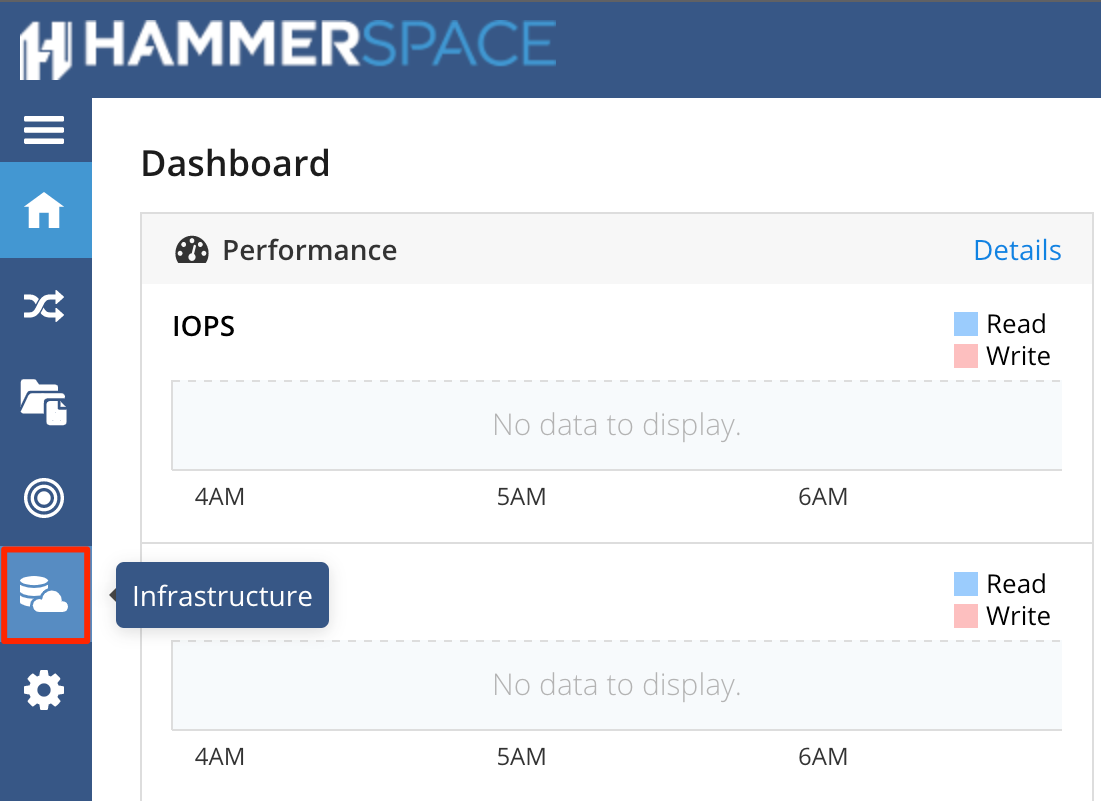
2. Select the cloud and storage Infrastructure icon on the lefthand menu.
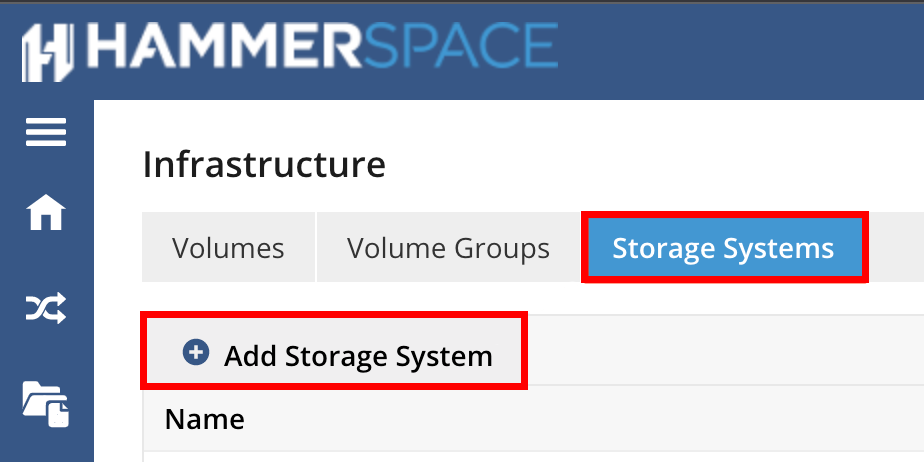
3. Select the Storage Systems tab, then the Add Storage System button.
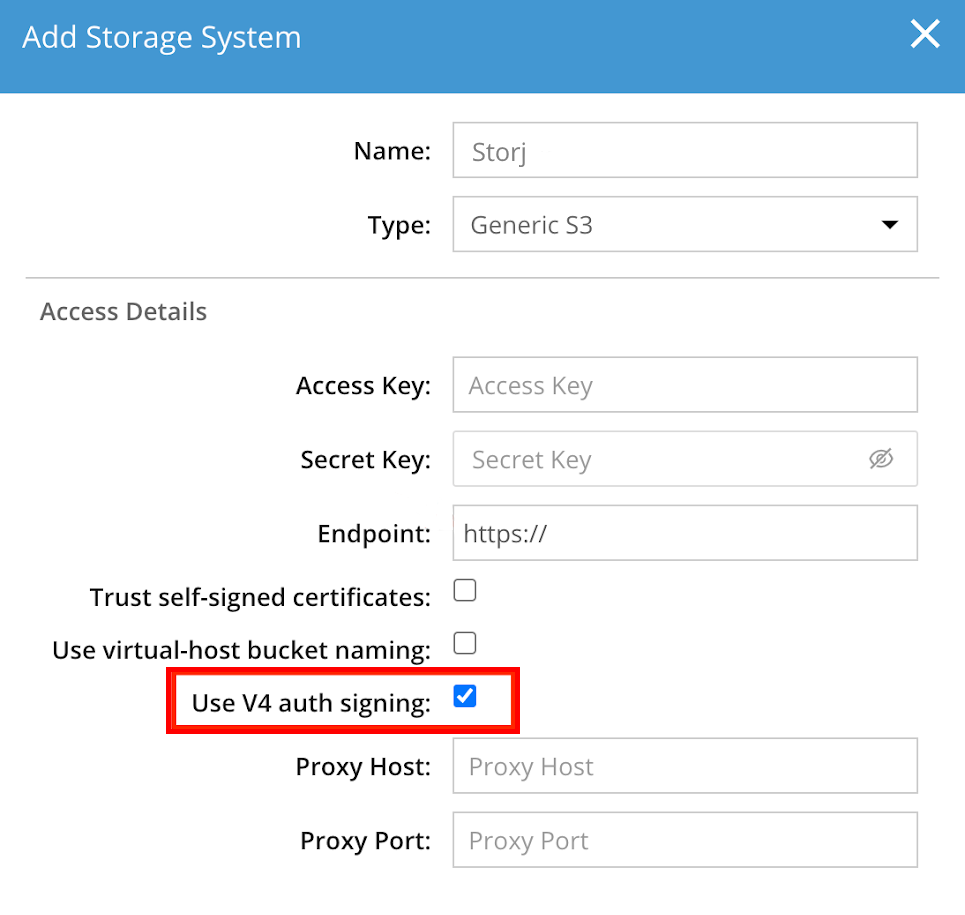
4. In the Add Storage System window, enter something recognizable, such as "Storj", in the Name field. Then, in the Type drop-down, select the "Generic S3" option.
5. Enter the S3 credentials you generated earlier in the tutorial:
Add the access key in the Access Key field.
Add the secret key in the Secret Key field.
Add the endpoint, which should be "https://gateway.storjshare.io", in the Endpoint field.
Check the Use V4 auth signing box.
Select Add Storage System.
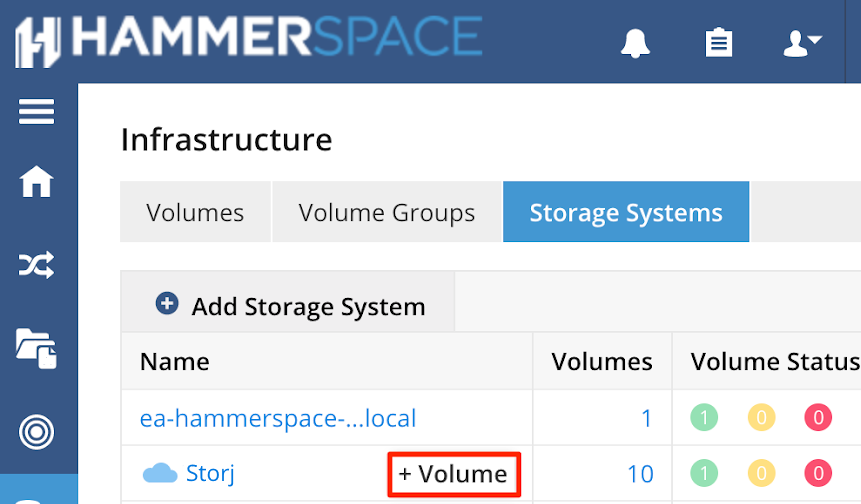
6. You will now see your Storj instance listed under Storage Systems.
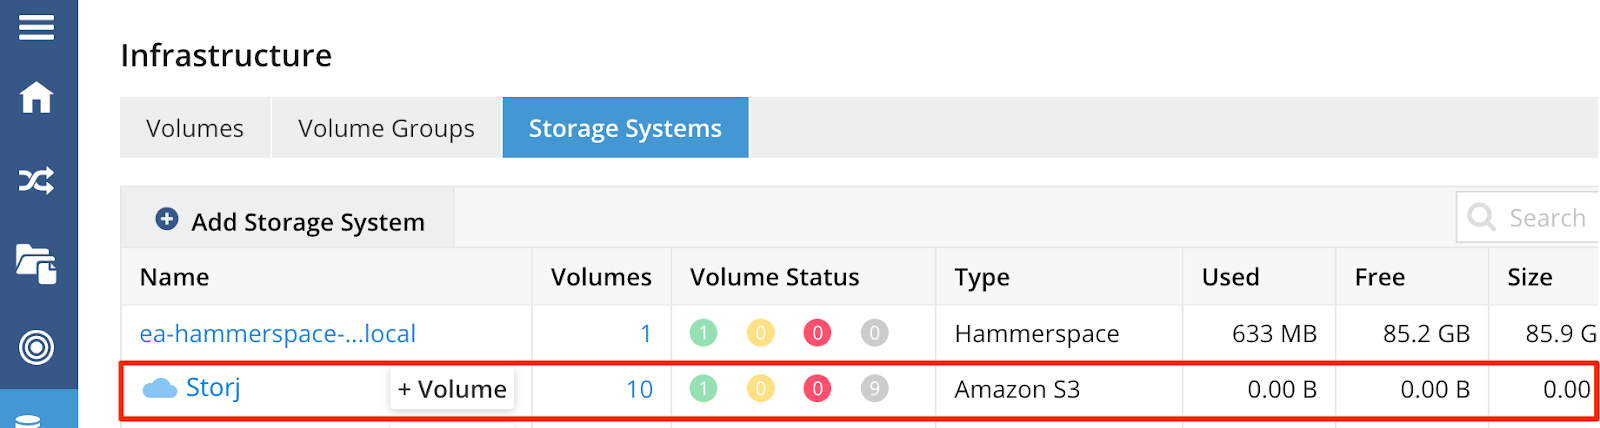
7. It is necessary to create a volume for the new Storj instance. This volume corresponds to the bucket you created earlier within Storj. Next to the Storj row in Storage Systems, select the + Volume button.
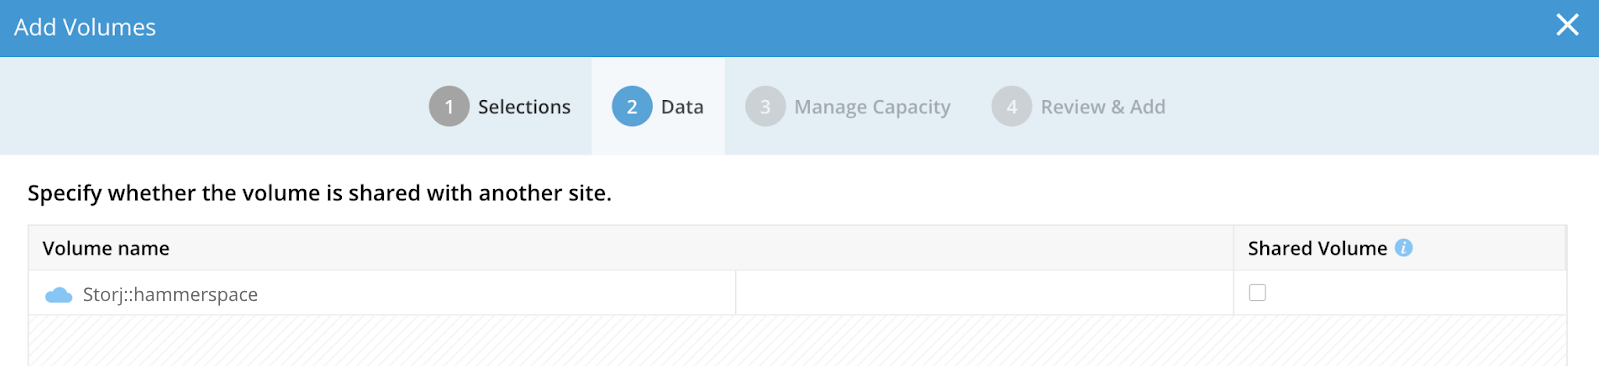
8. Choose the "hammerspace" bucket created earlier within Storj. Then select Next Step.
- If you want to share this bucket with another site, check the box under the Shared Volume column.
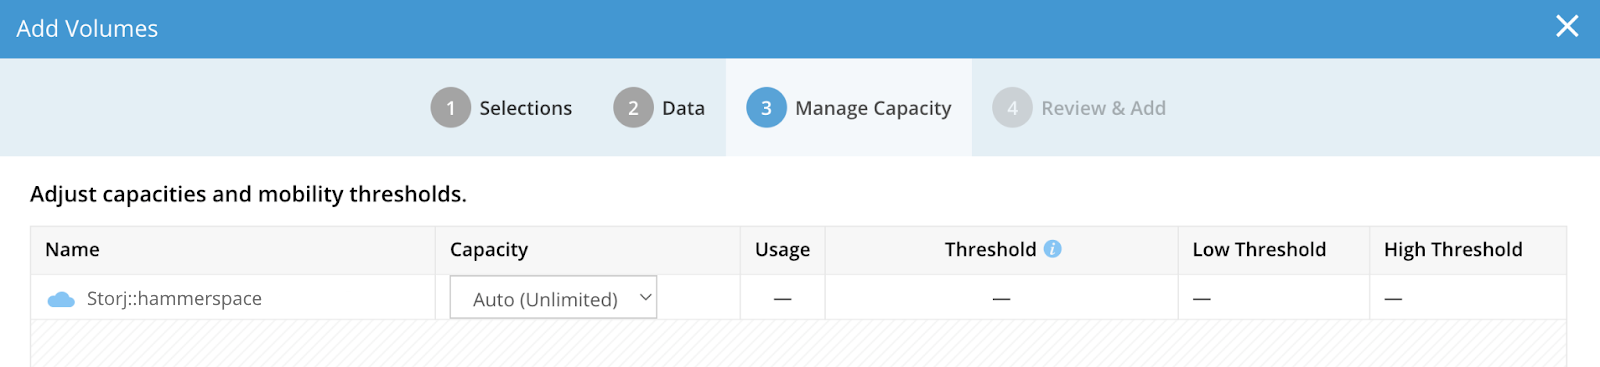
- If desired, set a limit on the bucket's capacity. The default is "Auto (Unlimited)".
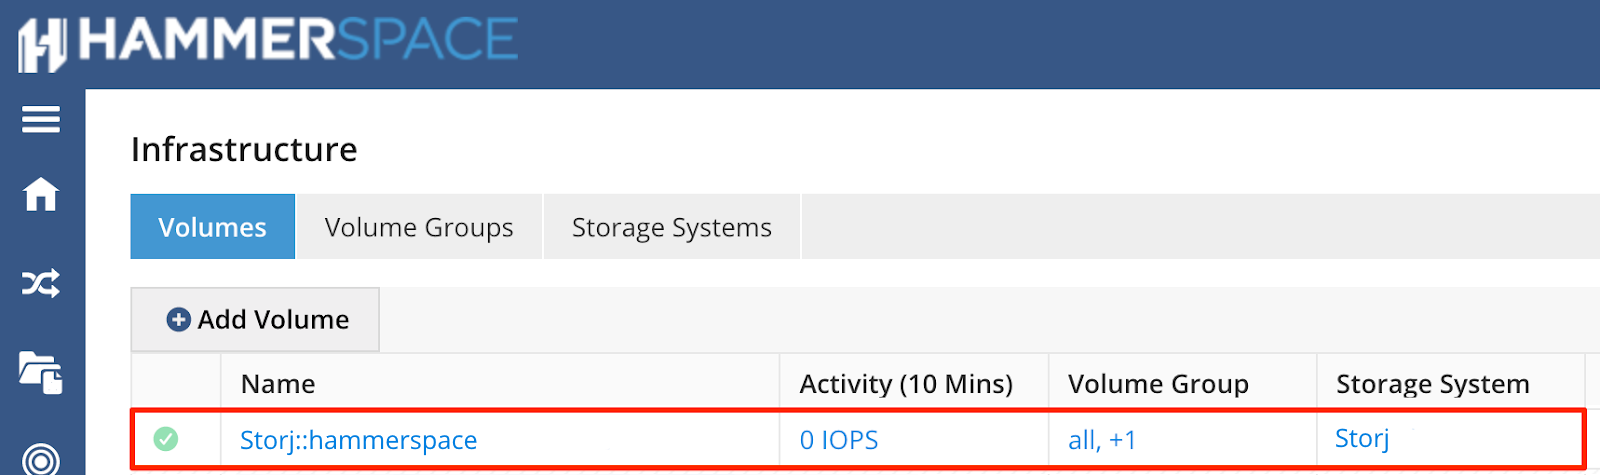
9. Review your bucket's information on the Review & Add page. Then select Add Volumes
10. The bucket will now appear under the Volumes tab in the Infrastructure section of your Hammerspace environment. This signifies that Storj has been successfully added to Hammerspace.
Note: for more information on accessing data in your Storj volume, refer to Hammerspace's documentation.