Chainstate Snapshots
Host snapshots at reduced cost when spinning up new node.
Create Storj account
After creating an account on Storj, you’ll need to setup the uplink cli.
Setup uplink CLI
The uplink cli is a tool similar to aws cli that allows creation of buckets and uploading/downloading snapshots directly from the 15,000+ storage nodes. We also have an aws s3 compatible api as an alternative.
Install uplink
Linux AMD64
For different uplink binaries see Download and Installation
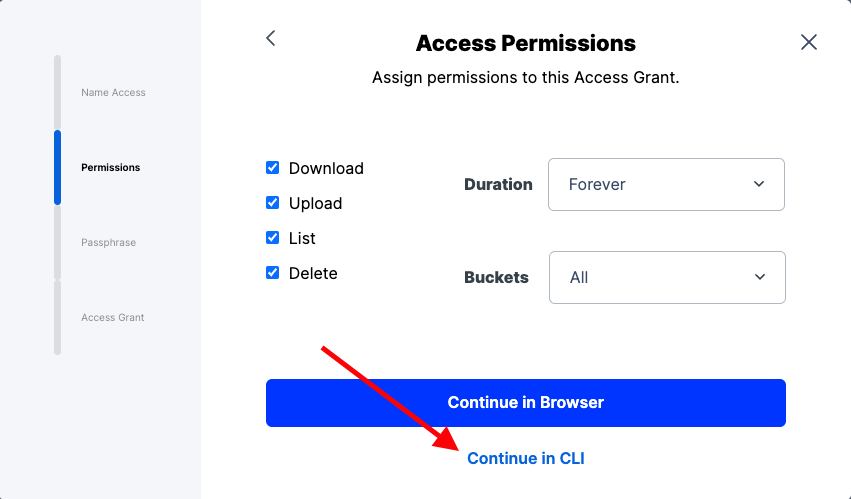
Create access grant and setup uplink

Click "Continue in CLI" after giving your access grant a name
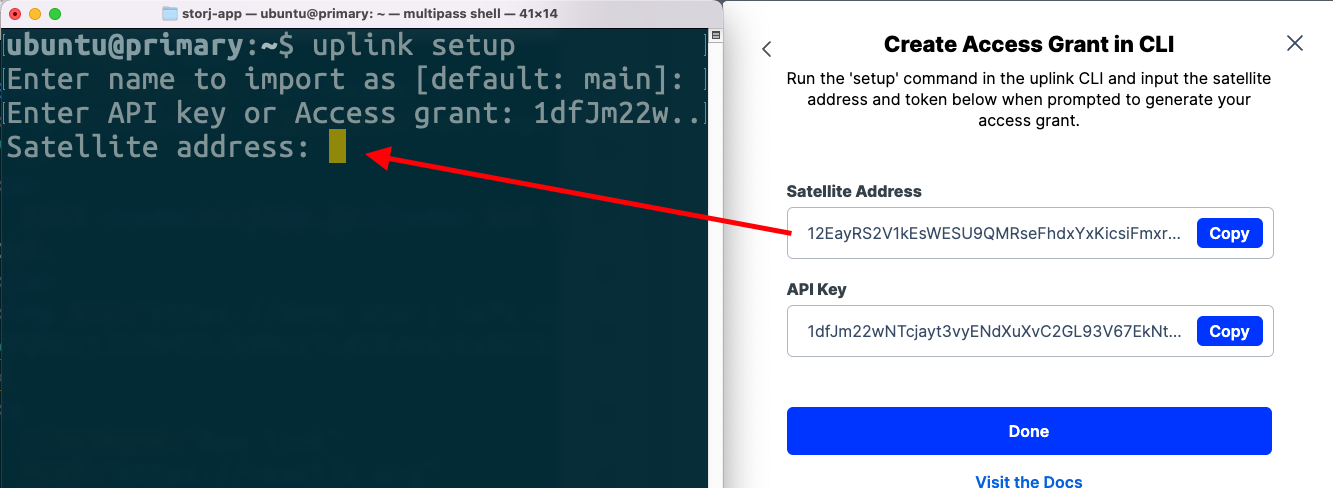
Keep the credential window open until you have completed the uplink setup command below
Run uplink setup to start the credentials prompt
Enter a name for the credential (default is "main")
Copy your "API Key" from the web console to the uplink cli "Enter API key or Access grant" prompt
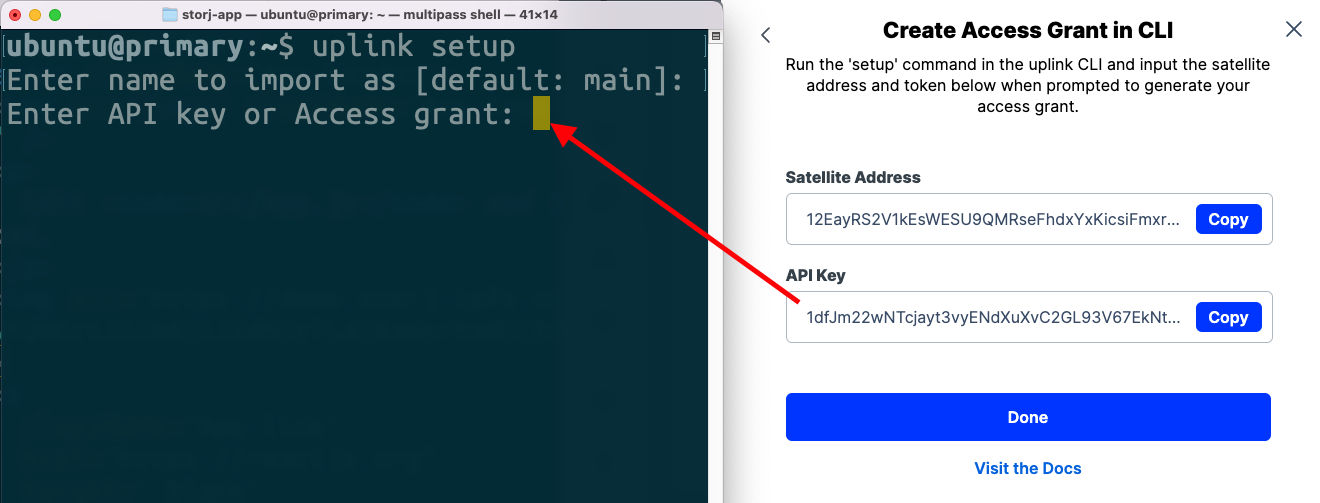
Copy your "Satellite Address" from the web console to the uplink cli "Satellite address" prompt
Enter a passphrase to complete the setup
Remember your Passphrase you will need it for future access of the data
Create bucket
Create a bucket called snapshots
Upload snapshots
Compress small files/directories to a single compressed file (e.g use tar).
Use uplink cp to upload your snapshot to Storj. Scale parallelism starting at 4 on powerful servers. Scale up by 2 until throughput no longer improves. You should have at least one cpu core for each parallelism. Parallelism 8 will require 8 cores or 16 threads.
Create download access grant
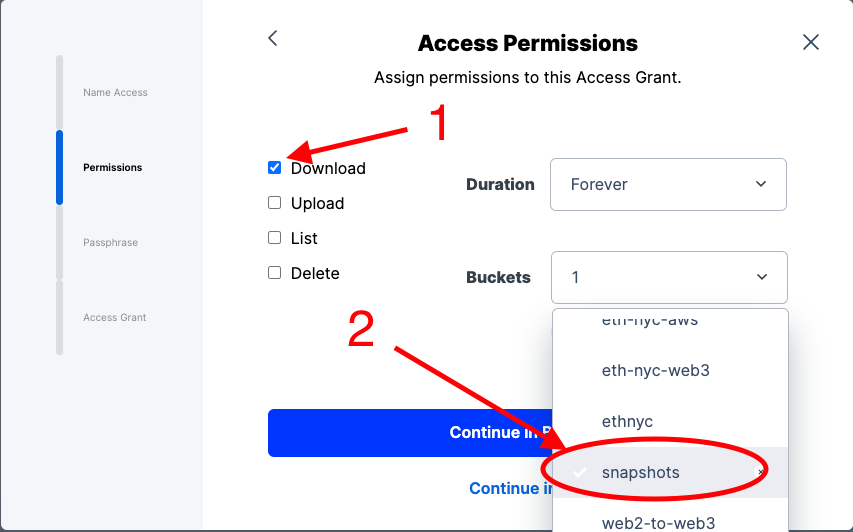
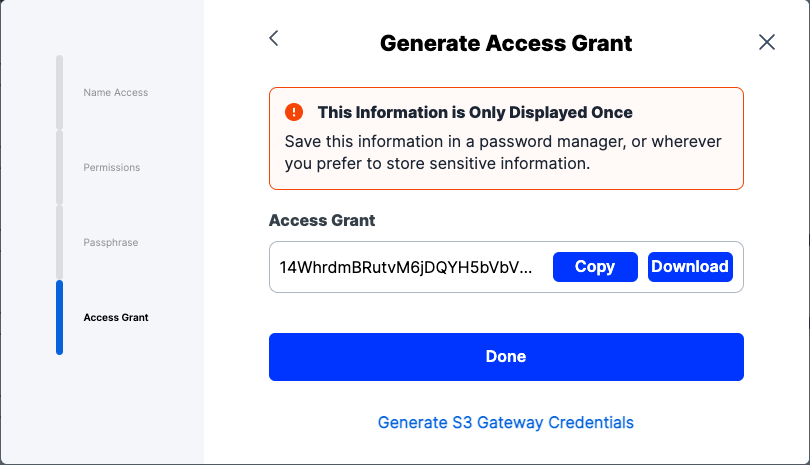
For node operators in your community, you'll need to generate another access grant with limited permissions.
Create another access grant with the following limitations
Check only 'Download' (leave others deselected)
Select
snapshotsas the bucket from the dropdown
Select "Continue in Browser"
Copy the access grant in file. You'll use it later in the template below.
When populating the template, only publish the access grant that is limited to downloads. Do not use the access grant that was used to upload snapshots.
Adapt the Download blockchain snapshots template, changing <your_access_grant> fields to the Download-only access grant. The commands from the template can be published to your communities.