Getting started
Storj is the leading provider of enterprise-grade, globally distributed cloud object storage.
It is a drop-in replacement for any S3-compatible object storage that is just as durable but with 99.95% availability and better global performance from a single upload.
Storj delivers default multi-region CDN-like performance with zero-trust security at a cost that’s 80% lower than AWS S3.
Before you begin
To get started, create an account with Storj. You’ll automatically be on Storj's free plan that gives you access to try our storage with your third-party tool or project.
Sign up
If you've never used Storj before, sign up for a new Storj account
Log in
If you already have a Storj account, log in to get started
Generate S3 compatible credentials
Storj has an Amazon S3 compatible API and you'll need generate S3 credentials to use it. S3 credentials consist of an access key, secret key, and endpoint.
Create S3 credentials in the Storj console:
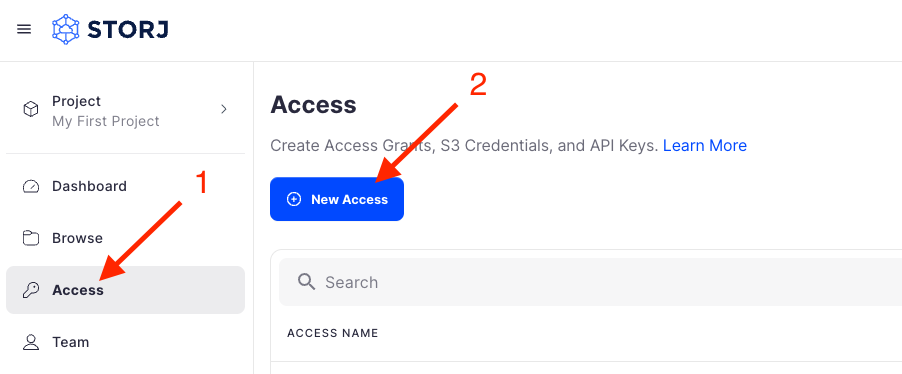
Navigate to Access on the left side menu.
Click Create S3 Credentials under the S3 Credentials block.
When the Create Access screen comes up, set specifications according to the following guidelines:
- Type: S3 Credentials
- Name: The name of the credentials (e.g. my-access)

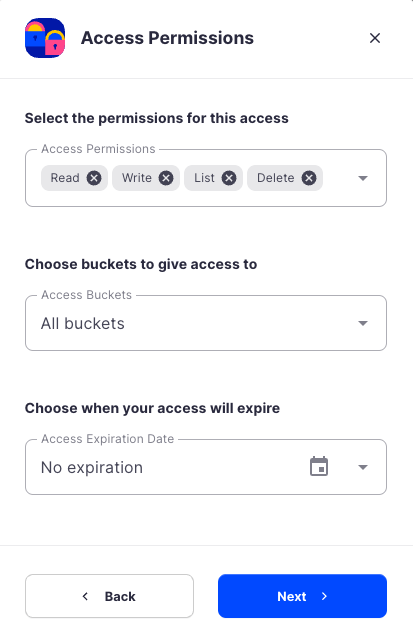
Click Continue to provide permissions
- Permissions: All
- Buckets: Feel free to specify the bucket you created above (e.g. my-bucket), or leave as “All”
- End date: provide an expiration date for these credentials (optional)
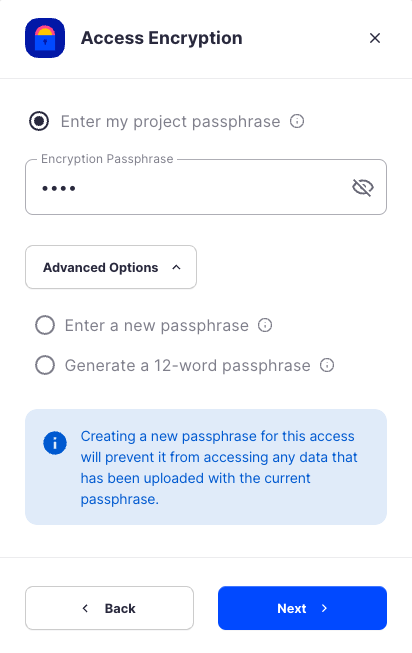
Click Continue to provide Access encryption Information
In order to see the data uploaded to your bucket in the Storj console, you must unlock the bucket with the same encryption passphrase as the credentials.
- Use the current passphrase: this is default option
- Advanced: you may provide a different encryption phrase either your own or generate a new one.
- Enter a new passphrase: use this option, if you would like to provide your own new encryption phrase
- Generate 12-word passphrase: use this option, if you would like to generate a new encryption phrase
Click Create Access to finish creation of your S3 credentials
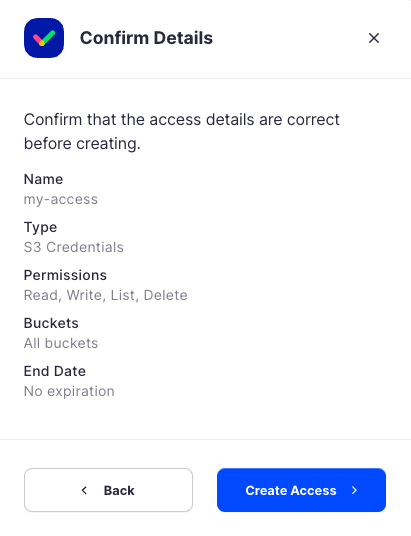
Click Confirm the Confirm details pop-up message
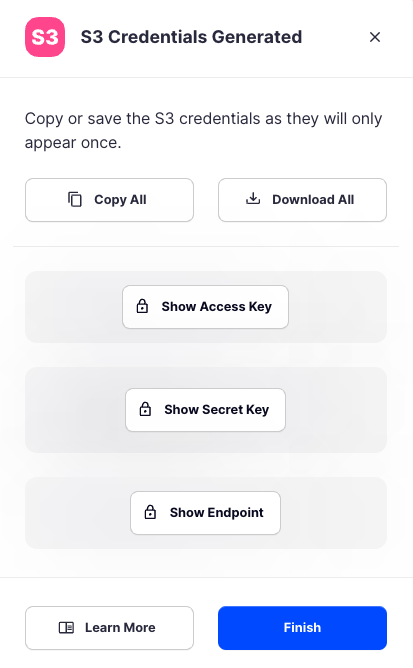
Your S3 credentials are created. Write them down and store them, or click the Download all button. You will need these credentials for the following steps.
Install command-line tools
Storj works with a variety command-line tools. Rclone is recommended for its compatibility with various cloud providers and ease of use.
However, some may already be familiar with AWS CLI which is also a suitable option.
Install rclone
Or use an alternative method
Configure rclone
Edit the rclone config file directly, you can find where it is stored by running the following:
In
rclone.conf, set theaccess_key_idandsecret_access_keywith the S3 compatible credentials created above.~/.config/rclone/rclone.conf
Create a bucket
Now that the command-line tool is configured, let's make a bucket to store our files.
List buckets
The bucket will show up in our bucket list (not to be mistaken with a life's to-do list)
Upload file
Next we'll upload a file. Here is an example image of a tree growing hard drives (while Storj doesn't grow hard drives on trees, it does emphasize sustainability). Right-click on it and save as storj-tree.png to your Downloads.

Copy the file to your bucket.
Using --disable-http2 with rclone for Storj is recommended for increased transfer speeds by avoiding HTTP/2 specific issues.
Download file
To retrieve the file, use the same command as upload but reverse the order of the arguments
Using --disable-http2 with rclone for Storj is recommended for increased transfer speeds by avoiding HTTP/2 specific issues.
List files
Let's see what files we have in the bucket.
Yep there's the Storj tree!
Delete file
Okay time to remove the file.
Delete buckets
Last but not least, we'll delete the bucket.
Delete a non-empty bucket
Next Steps
Congratulations on getting started with Storj!